


L200 Inverter
Inverter Mounting
and Installation
2–21
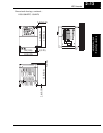
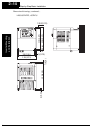
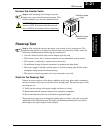
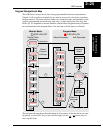
Uncover the Inverter Vents
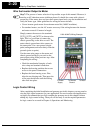
Step 8: After mounting and wiring the inverter,
remove any covers from the inverter housing. This
includes material over the side ventilation ports.
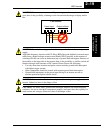
WARNING: Make sure the input power to the
inverter is OFF. If the drive has been powered,
leave it OFF for five minutes before continuing.
Powerup Test
Step 9: After wiring the inverter and motor, you’re ready to do a powerup test. The
procedure that follows is designed for the first-time use of the drive. Please verify the
following conditions before conducting the powerup test:
• You have followed all the steps in this chapter up to this step.
• The inverter is new, and is securely mounted to a non-flammable vertical surface
• The inverter is connected to a power source and motor.
• No additional wiring of inverter connectors or terminals has been done.
• The power supply is reliable, and the motor is a known working unit, and the motor
nameplate ratings match the inverter ratings.
• The motor is securely mounted, and is not connected to any load.
Goals for the Powerup Test
If there are any exceptions to the above conditions at this step, please take a moment to
take any measures necessary to reach this basic starting point. The specific goals of this
powerup test are:
1. Verify that the wiring to the power supply and motor is correct.
2. Demonstrate that the inverter and motor are generally compatible.
3. Get an introduction to the use of the built-in operator keypad.
The powerup test gives you an important starting point to ensure a safe and successful
application of the Hitachi inverter. We highly recommend performing this test before
proceeding to the other chapters in this manual.
8
Ventilation holes
(both sides)
Ventilation holes
(top)
9