


Transom Transducer Installation
(1197c SI Combo models only)
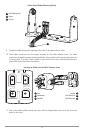
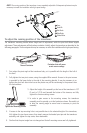
If you will be installing a transom mounted transducer, use the procedures in this section. There are two
pieces to the transducer mount assembly: the pivot, and the bracket. Your transducer comes with a two-
piece metal and plastic bracket assembly. There are several procedures you will have to perform in order
to install a transom-mounted transducer. They are:
• Determine transducer mounting location
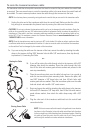
• Mount the bracket to the boat
• Attach the pivot to the transducer
• Mount the transducer pivot assembly to the bracket
• Adjust the running position of the transducer
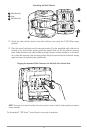
• Route the transducer cable
• Perform a final test of the transom transducer installation.
To determine transducer mounting location:
NOTE: If transom mounting is not possible because of a stepped hull or cavitation noise, trolling motor
installation may be an option. See Trolling Motor Transducer Installation for more information.
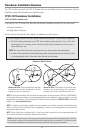
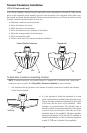
1. First, determine the best location on the transom to install the transducer. Consider the following
to find the best location:
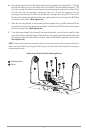
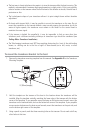
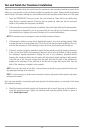
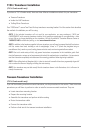
• It is very important to locate the transducer in an area
which is relatively free of turbulent water. As a boat moves
through the water, turbulence is generated by the weight
of the boat, and the thrust of the propeller(s) - either
clockwise or counter-clockwise. This turbulent water is
normally confined to areas immediately aft of ribs, strakes
or rows of rivets on the bottom of the boat, and in the
immed iate area of the propeller(s). Clockwise propellers
create more turbulence on the port side. On outboard or
inboard/outboard boats, it is best to locate the transducer
at least 15" (380 mm) to the side of the propeller(s).
Deadrise Angle
Areas of Possible Turbulence
Rivets Strakes
Transom Hull
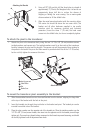
Stepped Hull
Step Rib
19