


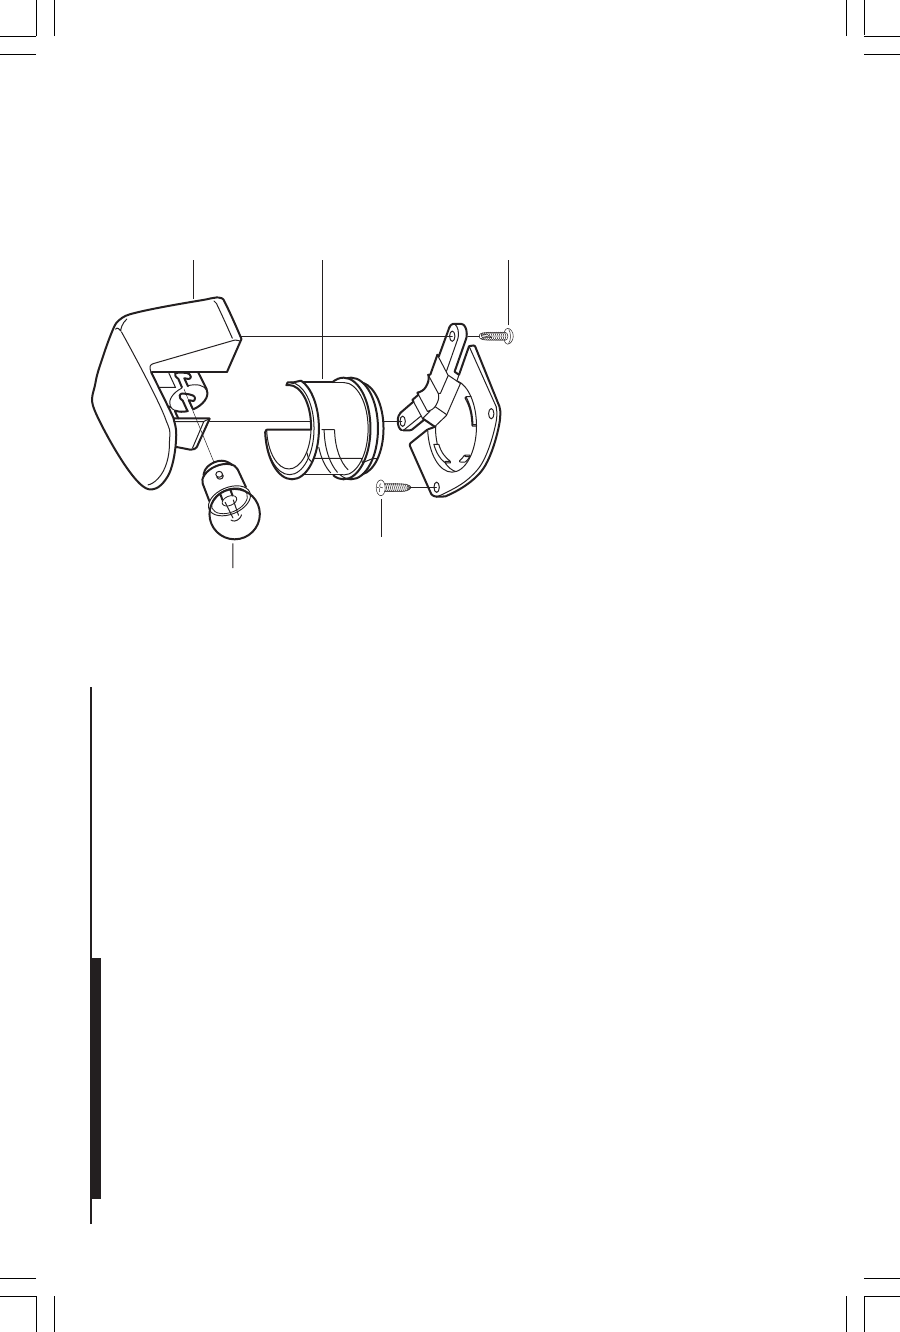
Figure 1
3.Attach power wires to suitable switch, 1-amp fuse, and
power source.
4.Apply marine sealant around base and wire hole. Use #8 screws
to fasten light to deck.
MAINTENANCE
Replace bulb with #90, 7.5 watt type (Attwood #9232):
1.Remove light from deck. Remove cover retension screws, base
and lens. Replace bulb. (See Figure 1.)
2.Reassemble and install light.
© 2003 Attwood Corporation
1016 N. Monroe Street, Lowell, MI 49331-0260 www.attwoodmarine.com
REQUIRED FOR INSTALLATION
• Drill with ¹⁄₈" (3mm) and ¹⁄₄" (6mm) dia. bits.
• Screwdriver and two #8 x ³⁄₄" (19mm) stainless screws.
• Suitable marine sealant.
• 2-conductor, 14-gauge wire for connection to switch and
power supply.
• Fuse holder with 1.0-amp (maximum) fuse.
• ON/OFF switch (Attwood Numbers: 7563, 7589).
LOCATION
1.Position light on horizontal (± 5°) deck surface at forward tip of
the bow on boat centerline.
2.Ensure that there are no front or side obstructions within arc of
visibility (112.5° each side).
MOUNTING INSTRUCTIONS
1.Align center of light with boat centerline. Use base to mark
mounting screw pilot holes. (See Figure 1.)
2.Drill two ¹⁄₈" (3mm) pilot holes. Beneath base, drill a ¹⁄₄" (6mm)
diameter hole for power wires.
Cover
•
•
Mounting
Screws
(Not Supplied)
Cover Retention
Screws
•
Lens
•
Bulb
•
3
®
Zamak 1-Mile Combination
Sidelight
6375D
Installation Instructions
Attwood marine hardware, navigational lighting, bilge pumps, and other
marine accessories are specified more than any other brand by America’s
best-known boat manufacturers as original equipment. Look to Attwood
for quality replacement parts and marine accessories.
SAVE THESE INSTRUCTIONS
Form Number 69305 Rev. B 03-10