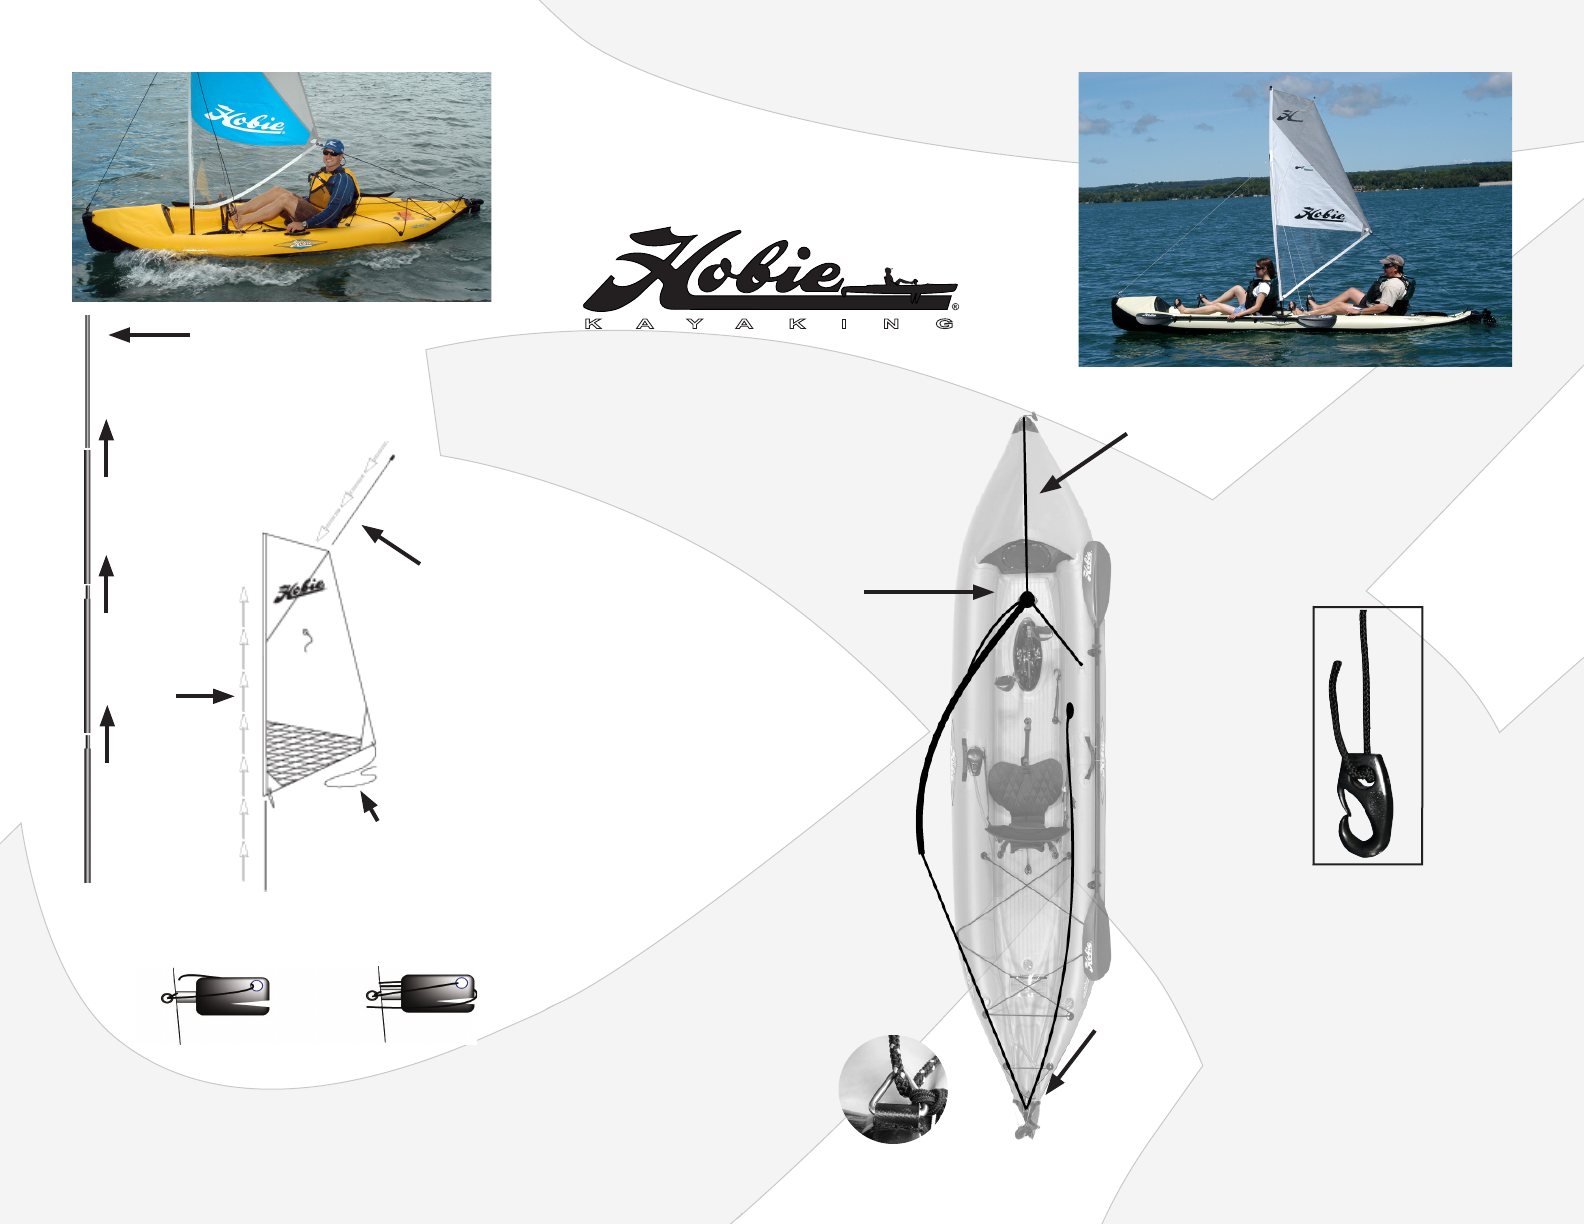
Step 1: Connect
mast sections
together. Thinner
diameter section
is mast top.
Step 3: Insert batten
into the narrow sleeve
at the top of the sail.
Mainsheet.
Step 2:
Slide the
mast into
the sail.
Step 4: Tie in the batten (Note: Be sure that when
tying, the batten is pushed snug into the sail.
Feed the line through
the hold in the batten cap.
Next, feed the line through
ring on the opposite side of
the sail and pull back snug
into the ‘v’jam.
Step 5: Insert mast
into base and attach
stretch cord to hook
at mast base.
TIP: Tie the end of the
mainsheet in a knot after
sliding it through the
ring at the seatback strap
connection point. This
helps keep the end of the
line from falling into
the water if you should
happen to lose your grip.
Step 7: Run the mainsheet from the sail,
through the rear pad-eye, and up through the
right clip on your seat. This conguration
allows you to steer with your left hand and
control the sail with your right.
Step 6: Attach sail stays to kayak and
adjust tension. Start with side shrouds by
attaching them to each side of the kayak
securing stay hooks to each stainless ring.
Tension stopper knots until mast is straight.
Finish by attaching the forstay to the bow
ring and adjust slack until mast and sail are
straight and snug.
K A Y A K I N G
Congratulations on purchasing the Hobie Sail Kit
for the Hobie inatable kayaks. Follow these simple
instructions and you’ll be out and sailing in minutes.


