


5
Nothing Comes Close to a Cobra
®
Installation
I
ntro Operation Customer
A
ssistance
W
arranty
N
otice
S
econdary Icons
C
aution Warning
Installation
C
ustomer
A
ssistance
Installation
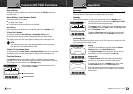
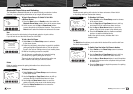
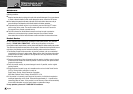
Connecting Power to the Bulkhead Connector Cord
Your Bluetooth handset is powered from your vessel’s 13.8 volt DC system
(12 volt nominal). A fused power connection lead is provided at the opposite
end from the bulkhead connector fitting.
1. Attach the black wire to a negative ground.
2. Attach the fused red power wire to the positive side of the vessel’s
12 volt DC power system.
Connecting (Optional) to a Stereo System AUX Input
Telephone conversations can be switched from the internal speaker in the
Bluetooth handset to the speakers that are part of the boat’s stereo system.
1. Connect the external stereo system to the handset connector cord
with a 3.5 mm male stereo jack. This cable is not supplied but can be
found at your local audio/visual store.
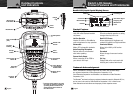
USB Connector
The USB connector shown next to the external stereo jack is used to
connect to a personal computer (PC) to reprogram or update the software
in the
Bluetooth handset. The latest software and update instructions can
be found at www.cobra.com.
Connecting to the Bulkhead Connector Cord
Red
Black
1 Ampere Fuse
3.5 mm
Female Jack
USB
Male Type “A”
4
4
English
Installation
Installation
•
Before using your Bluetooth handset, the bulkhead connector cord must be
installed on your vessel and connected to a 12 volt DC power source.
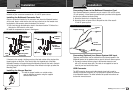
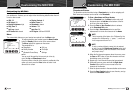
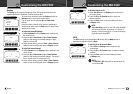
Installing the Bulkhead Connector Cord
Choose a convenient location for the connector near where the Bluetooth handset
will be used. Keep in mind that the nine foot long coiled cord on the handset must
be attached to the connector when the handset is to be used.
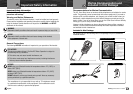
1. Drill a hole through the bulkhead or dash in the chosen location 7/8 inches for a
thick dash or 5/8 inches for a thin dash.
2. Install the components as shown in the diagram.
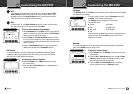
If the dash is thin enough, the flange can be at the back surface of the dash and the
threads project out the front. If the dash is thick, the threaded part of the Male
Bulkhead Connector will project through the Mounting Plate and the hole in the dash
will be big enough for the flange at the base of the threads to be right up behind the
Mounting Plate.
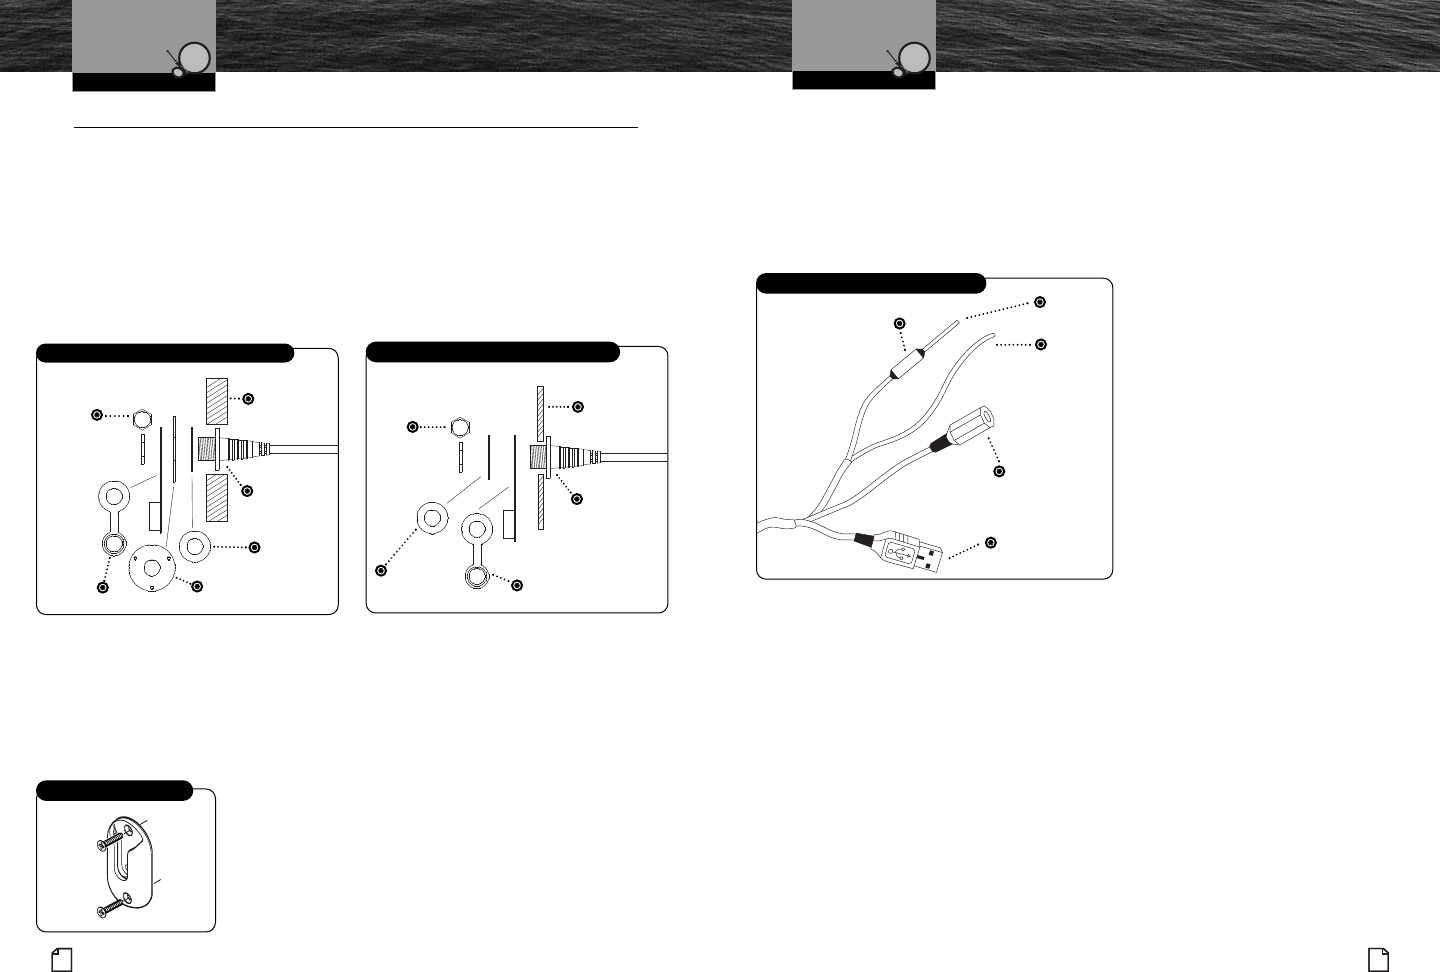
Installing the Hanger Bracket
1. Install the hanger bracket on a vertical surface
near the bulkhead connector using the supplied
stainless steel screws.
Installation
I
ntro Operation Customer
A
ssistance
W
arranty
N
otice
S
econdary Icons
C
aution Warning
Installation
C
ustomer
A
ssistance
Hanger Bracket
Installing Bulkhead Connector Cord in a Thick Dash
Bulkhead
or Dash
Male
Bulkhead
Connector
Gasket
Mounting Plate
and Screws
Nut
Dust
Cap
Installing Bulkhead Connector Cord in a Thin Dash
Bulkhead
or Dash
Male
Bulkhead
Connector
Gasket
Nut
Dust
Cap