MAN#650277
1968-77 Chevy Corvette
Dakota Digital Gauge Installation
This sheet covers the installation of the Dakota Digital gauge kit into the original clusters.
1. Remove the clusters from the vehicle. The procedure for the speedometer
and tachometer clusters are the same, but only one side is shown in the
photos.
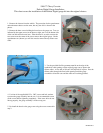
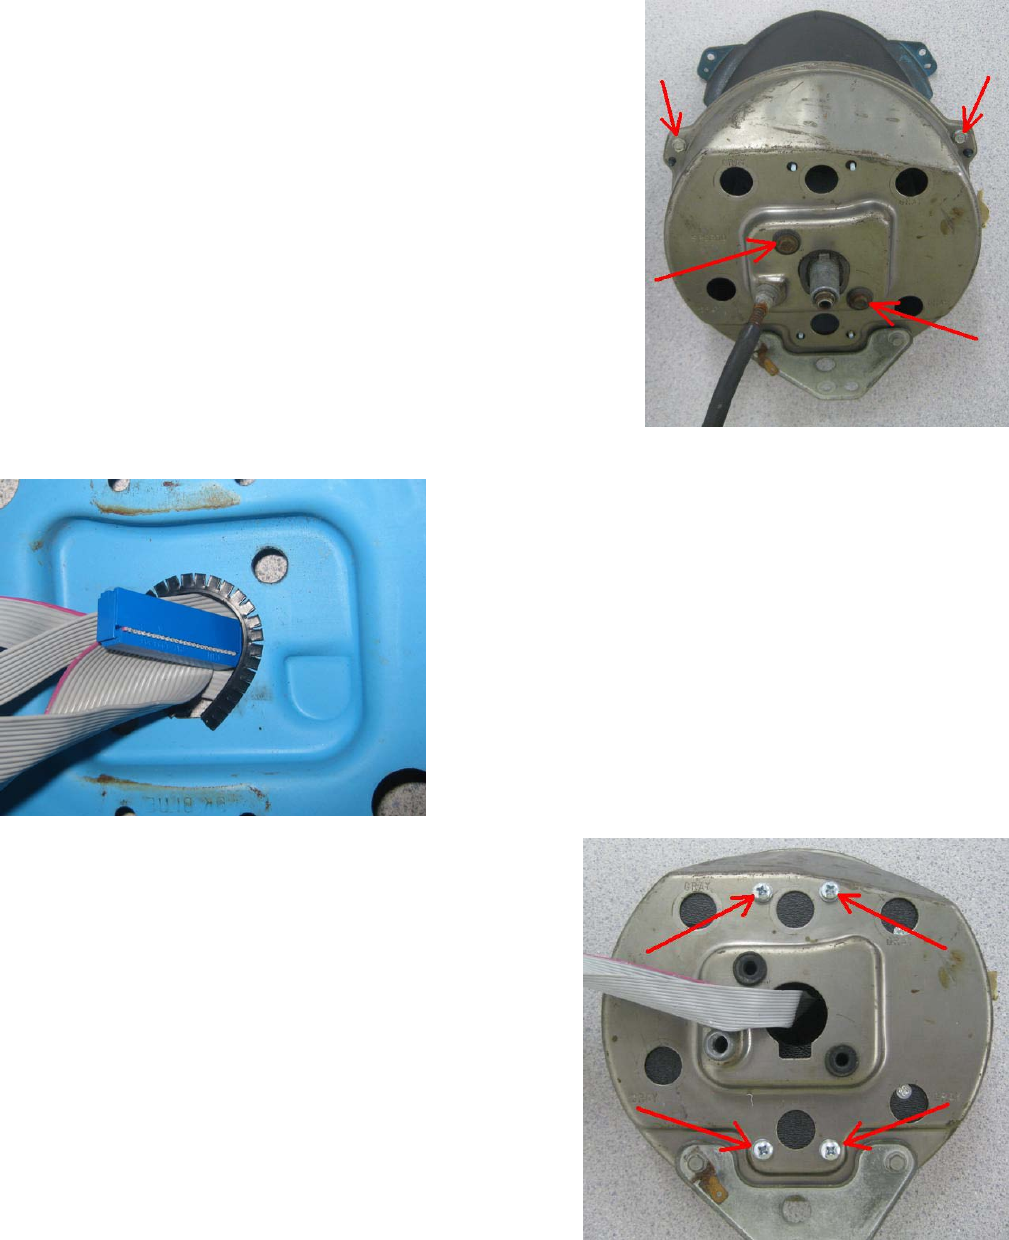
2. Remove the three screws holding the bezel on to the gauge can. Two are
indicated by the upper arrows in the photo at right; one is on the bottom side
of the can and cannot be seen here. After the bezel is set aside, remove the
two screws near the center of the can to remove the original gauge. On the
speedometer can (shown) you will also need to remove the trip meter reset
cable.
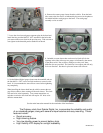
3. Use the provided flexible grommet material on the edge of the
mechanical cable openings on the original gauge cans to protect the
ribbon cables. A few dabs of silicone will help hold it in place. Pass the
ribbon cables through the lined cable openings until the gauge
assemblies sit into the cans and the cables are not being pinched.
4. Use four of the supplied #10-32 x .500” screws and lock washers
to secure the gauge assembly into the can. It is recommended to start
all the screws before tightening completely. If the screw holes do not
line up properly, the gauge assembly is in the wrong can.
5. Re-install the bezels to the gauge cans using the screws removed in
step 2.