


45
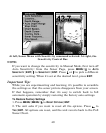
Basic Sonar Quick Reference
1. Mount the transducer and unit. Connect the unit to electric power
and the transducer.
2. Launch your boat.
3. To turn on the unit, press and release
PWR key.
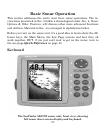
4. Head for your fishing grounds. Your unit automatically displays digi-
tal depth and surface water temperature in the corner of the screen.
The auto settings will track the bottom, displaying it in the lower por-
tion of the screen. The full sonar chart will scroll from right to left,
showing you what's under the boat as you cruise across the water.
5. As you're watching the sonar returns, you can change the display by:
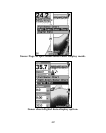
Zoom in to enlarge the chart for more detail: press
ZIN.
Zoom out to return to full chart mode: press
ZOUT.
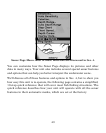
6. If necessary, adjust sensitivity to improve chart readability. Press
MENU|ENT and the Sensitivity Menu will appear on the left of your
screen. Use ↑ and ↓ to change the setting.
Boosting sensitivity will show more information on your screen, which
may cause clutter. Reducing sensitivity will filter out some information,
but could omit important images. We recommend adjusting sensitivity
until the background is lightly "peppered" — that is, scattered dots ap-
pear, but individual objects (like fish arches or bottom structure) can be
easily picked out of the background.
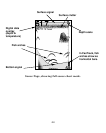
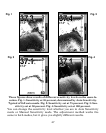
7. Watch the display for the appearance of fish arches. When you see
arches, you've found fish! Stop the boat and get your lure or bait into
the water at the depth indicated on the sonar chart.
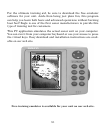
8. Gauge the fish depth by visually comparing the fish arches with the
depth scale on the right side of the screen, or get a more accurate
measure with the Depth Cursor. Press
MENU|↓ to DEPTH CURSOR|ENT.