


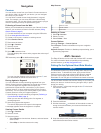

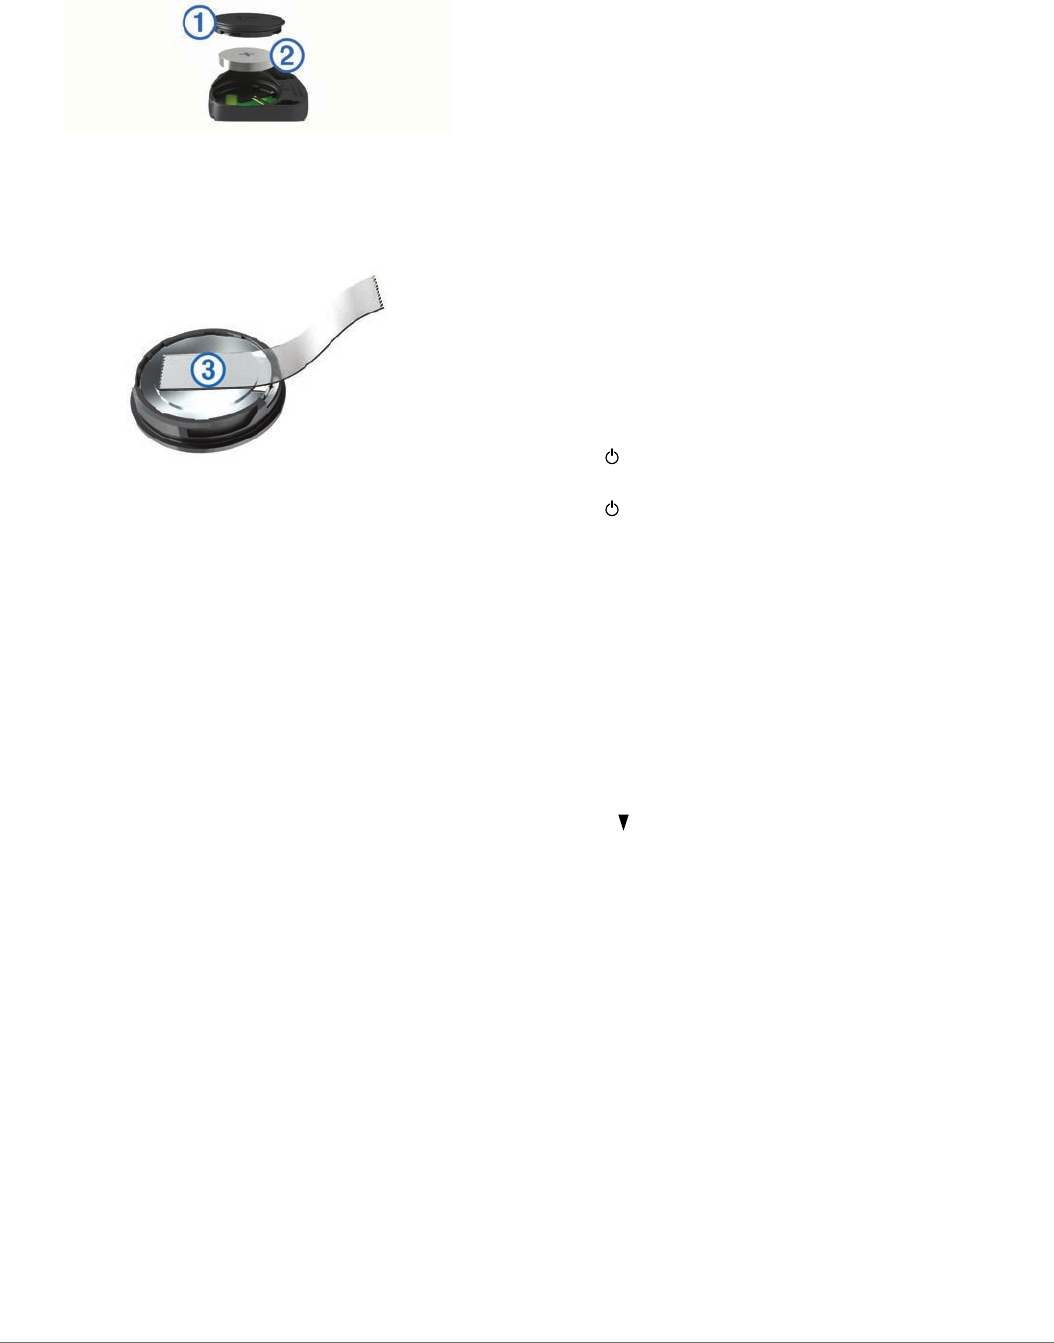
Replacing the Speed Sensor or Cadence Sensor
Battery
The LED flashes red to indicate a low battery level after two
revolutions.
1
Locate the circular battery cover
À
on the back of the sensor.
2
Twist the cover counter-clockwise until the marker points to
unlocked and the cover is loose enough to remove.
3
Remove the cover and the battery
Á
.
TIP: You can use a piece of tape
Â
or a magnet to remove
the battery from the cover.
4
Wait 30 seconds.
5
Insert the new battery into the cover, observing polarity.
NOTE:
Do not damage or lose the O-ring gasket.
6
Twist the cover clockwise until the marker points to locked.
NOTE: The LED flashes red and green for a few seconds
after battery replacement. When the LED flashes green and
then stops flashing, the device is active and ready to send
data.
Troubleshooting
Updating the Software
Before you can update your device software, you must have a
Garmin Connect account, and you must download the Garmin
Express
™
application.
1
Connect the device to your computer using the USB cable.
When new software is available, the Garmin Express
application sends it to your device.
2
Follow the on-screen instructions.
3
Do not disconnect your device from the computer while the
Garmin Express application downloads the software.
TIP:
If you are having trouble updating the software with the
Garmin Express application, you may need to upload your
activity history to the Garmin Connect application and delete
your activity history from the device. This should provide
sufficient memory space for the update.
Support and Updates
Garmin Express provides easy access to these services for
Garmin devices.
• Product registration
• Product manuals
• Software updates
• Data uploads to
Garmin Connect
Getting More Information
• Go to www.garmin.com/intosports.
• Go to www.garmin.com/learningcenter.
• Go to http://buy.garmin.com, or contact your Garmin dealer
for information about optional accessories and replacement
parts.
Maximizing Battery Life
• Turn off the
Bluetooth wireless feature on your
Edge 25
device (Turning Off
Bluetooth Technology, page
3)
.
• Turn off GLONASS (System Settings
, page
5).
Acquiring Satellite Signals
The device may need a clear view of the sky to acquire satellite
signals. The time and date are set automatically based on the
GPS position.
1
Go outdoors to an open area.
The front of the device should be oriented toward the sky.
2
Wait while the device locates satellites.
It may take 30–60 seconds to locate satellite signals.
Resetting the Device
If the device stops responding, you may need to reset it.
NOTE: Resetting the device may erase your data or settings.
1
Hold for 15 seconds.
The device turns off.
2
Hold for one second to turn on the device.
Replacement O-rings
Replacement bands (O-rings) are available for the standard
mount in two sizes:
• 1.3 × 1.5 × 0.9 in. AS568-125
• 1.7 × 1.9 × 0.9 in. AS568-131
NOTE: Use Ethylene Propylene Diene Monomer (EPDM)
replacement bands only. Go to http://buy.garmin.com, or contact
your
Garmin dealer.
Viewing Device Information
You can view the unit ID, software version, GPS version, and
software information.
Select
>
Settings > System > About
.
Appendix
Data fields
Some data fields require ANT+ accessories to display data
(
Edge
25 device only).
Avg. Speed: The average speed for the current activity.
BPM: Your heart rate in beats per minute (bpm). Your device
must be connected to a compatible heart rate monitor.
Cadence: Cycling. The number of revolutions of the crank arm.
Your device must be connected to a cadence accessory for
this data to appear.
Calories: The amount of total calories burned.
Distance: The distance traveled for the current track or activity.
HR Zone: The current range of your heart rate (1 to 5). The
default zones are based on your user profile and maximum
heart rate (220 minus your age).
Speed: The current rate of travel.
Time: The stopwatch time for the current activity.
Troubleshooting 7