


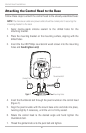
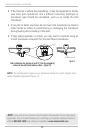

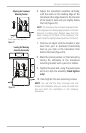

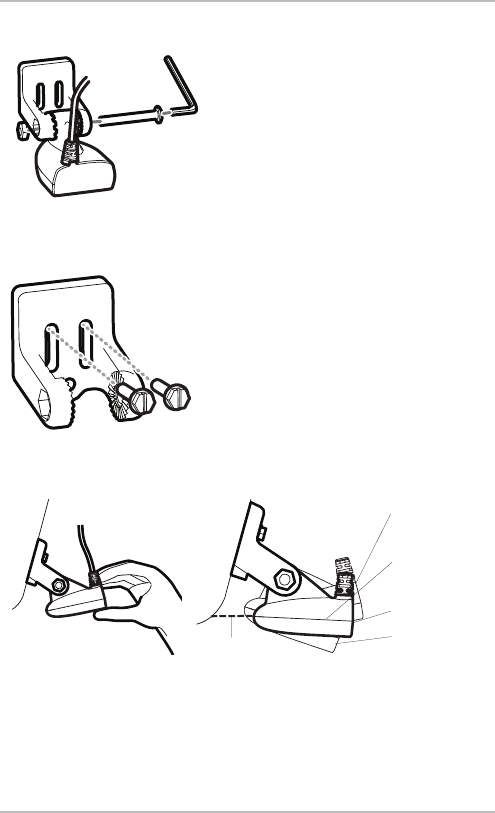
3. Put the pivot bolt through the assembly to
hold it in position and loosely install the nut,
but do NOT tighten the nut at this time
(Figure 19).
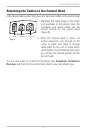
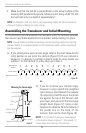
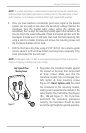
4. Align the mounting bracket transducer
assembly with the drilled holes in the
transom. With a 5/16" socket driver, mount
the assembly to the transom using the two
#10 - 1" long screws provided (Figure 20).
Hand tighten only!
NOTE: Make sure that the mounting screws are
snug,butdonotfullytightenthemountingscrewsat
thistimetoallowthetransducerassemblytoslidefor
adjustment purposes.
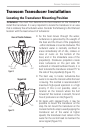
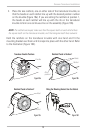
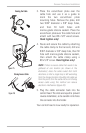
5. Adjusttheinitialangleofthetransducerfrom
back to front by rotating the transducer until
the side seam on the transducer is almost
parallelwiththebottomoftheboat,oneclick
atatimeineitherdirection(Figure21and22).
Adjusting theInitial Transducer Angle
Leading edge
One click too low
Trailingedge
Correctly aligned
(transducerside
seam aligned
with boat bottom)
One click too high
Figure21
Figure22
Inserting thePivot Bolt
Figure19
Mounting theAssembly
to theTransom
Figure20
14
Transom Transducer Installation