USING THE LCR400ID
OPERATING THE LCR400ID
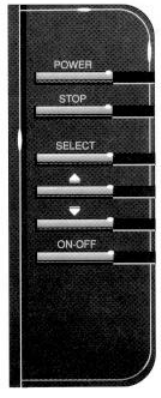
FRONT PANEL BUTTONS
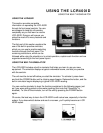
The LCR 400ID offers several functions that you can adjust with the
front panel buttons. (Note that to select something with a button, you
must press it fully so that you hear a “chirp” sound).
You can get acquainted with these features by actual operation, or
when using the simulator.
POWER: Press this once to turn the LCR 400ID on. Pressing it again
turns the LCR 400ID off. (Any adjustments you make with the other
front panel buttons are retained, as long as the 12-volt DC power
supply remains connected). When the unit is off, keeping POWER
pressed for about 2 seconds starts the built-in simulator.
STOP: Press this to “freeze” the display so you can study it. Press it
again to restart the display movement.
SELECT: This button is used to access the following functions for further adjustments:
• Sensitivity/Units
• Bottom Alarm
• Fish Alarm
• Zoom
• Bottom Lock
• Display Speed
• Depth Range
• Fish ID
To adjust any of these, press SELECT until the function you want appears. Each
function’s display tells you how to use the arrow buttons and ON/OFF for adjustment;
when first learning, you should also refer to the following instructions.
After you adjust any function, the display returns to its full-screen reading.
NOTE: The last function you select remains “active” – that is, you can adjust it
without having to press SELECT again. You can use this to simplify operations.
For example, if the bottom alarm is the last function used, you can readjust the alarm by
pressing one of the arrow buttons. Or, if you often use Zoom, you can select it once,
then switch it on and off by simply pressing ON-OFF.
The following sections describe each function, in order os appearance as you first press
SELECT.


