


Language (SetUp Menu: Int’l Only)
(Setting Saved in Memory)
Make sure that the SetUp menu is selected, then press the POWER-MENU key until LANGUAGE
appears (International Units Only). LANGUAGE selects the display language for menus. (Settings
vary, Default = English)
Scroll through all SetUp menu choices to exit the SetUp menu.
Units (SetUp Menu)
(Setting Saved in Memory)
Make sure that the SetUp menu is selected, then press the POWER-MENU key until UNITS
appears. UNITS selects the units of measure. (Feet/F, Meters/C, Fathoms/C, Default = Feet/F for
domestic units, and Meters/C for international units, where F stands for Fahrenheit and C stands
for Celsius)
Scroll through all SetUp menu choices to exit the SetUp menu.
Channel Select (SetUp Menu)
(Setting Saved in Memory)
Make sure that the SetUp menu is selected, then press the POWER-MENU key until CHANNEL
SELECT appears. CHANNEL SELECT selects the type of RSS you are using. (A, B, Default = A)
Scroll through all SetUp menu choices to exit the SetUp menu.
NOTE: The Channel Select setting must match the actual hardware configuration of your RSS in order for the
RSS to function. See Using the Advanced RSS for information about changing the channel of your Advanced
RSS manually using the wet switch on the Advanced RSS.
Channel A and B RSS Units
Your RF15 unit comes with an Advanced RSS. This Advanced RSS may be programmed to either
Channel A or Channel B. This A/B Channel option gives you the flexibility to switch to a different
channel if another angler is using a SmartCast™ unit within 150 feet of your RSS to reduce
possible interference. See
Changing the Channel on the Advanced RSS
for details on
selecting either Channel A or Channel B.
NOTE: RSS units, regardless of channel,may generate erratic depth readings as a result of sonar interference when used
in close proximity (closer than 40 feet) to each other or to other sonar devices.
Understanding the Advanced RSS
The Advanced RSS provides the following functionality:
• Water Surface Temperature • Blinking Light for nighttime use
• Grayscale Sonar Data • A/B Channel Select.
When you are using the RF15, grayscale sonar data and water temperature will be displayed
automatically on the screen.
You must manually program the Advanced RSS in order to turn the light on or off or to change the
RSS channel setting to A or B.
Default settings on new products are Light = OFF and Channel = A.
RSS Programming Mode
You may change the light setting or the channel type on the Advanced RSS using a programming
mode that is accessed by touching the wet switch contacts on the bottom of the RSS.
NOTE: Please read this and the next section BEFORE you try to program the Advanced RSS using the wet switch
contacts. Specific step-by-step procedures to turn on the light and to change the channel follow this section.You will find
it easier to perform these steps once you have grasped the way the programming mode works.
The programming mode allows you to:
• turn on the blinking light
• switch the Advanced RSS Channel from A to B.
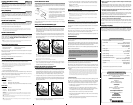
The RF15 Control Head temperature readout provides user feedback to help you make the correct
selections. The temperature readout will change on the Control Head to 40°F (4°C), 45°F (7°C),
50°F (9°C) or 55°F (12°C) to signify the following settings.
NOTE: If the temperature readout is set for degrees Celsius then the temperature readout will change on the Control
Head to 4,7,9 or 12 to signify the following settings.
Light setting
Temp changes to… Means that…
40°F (4°C) Blinking light is OFF (factory default)
45°F (7°C) Blinking light is ON (but only blinks when the Advanced RSS is in the water)
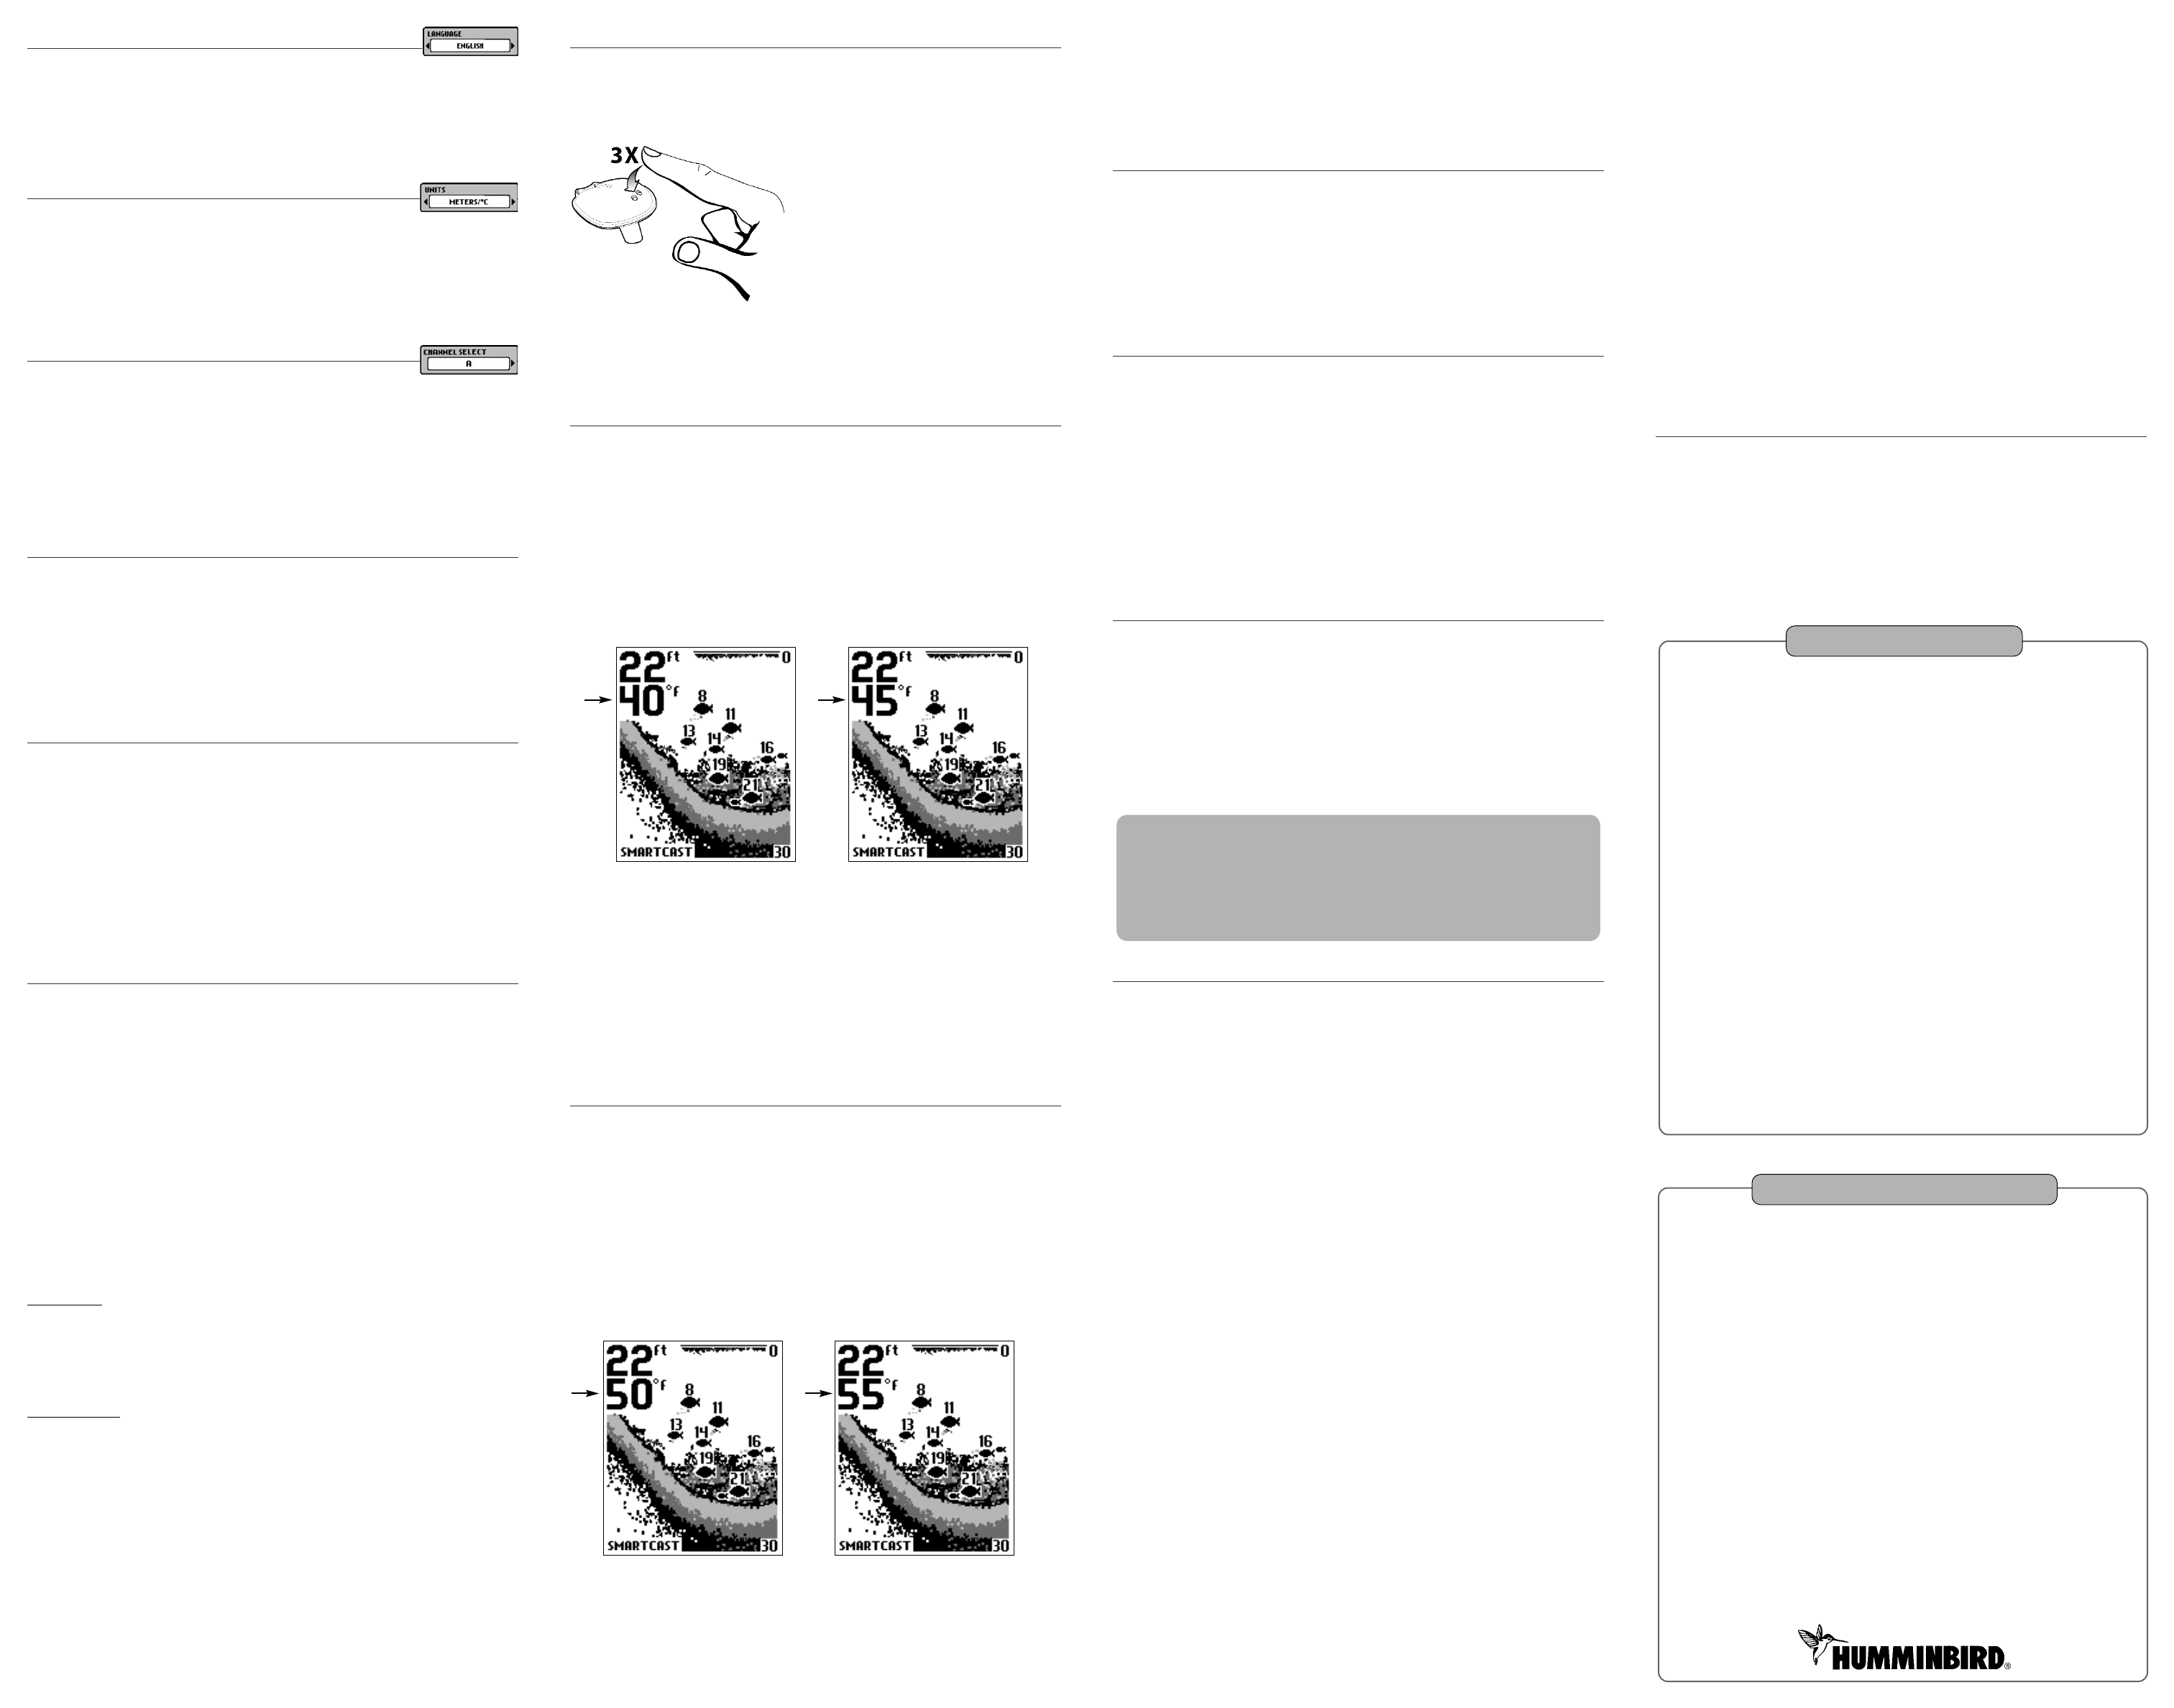
Channel setting
Temp changes to… Means that…
50°F (9°C) RSS is set to CHANNEL A (factory default)
55°F (12°C) RSS is set to CHANNEL B
IMPORTANT: The RF15 Control Head must be turned on and the CHANNEL SELECT SetUp menu on the Control
Head must be set to Channel A (even if the RSS is set to Channel B) before you can see the feedback on the Control
Head temperature readout.
NOTE: The Advanced RSS programming mode will time out after 20 seconds of no user activity, display the Start-
Up screen, and return the RSS to normal operation.
NOTE: If the temperature display returns to a normal reading, or the Start-Up screen appears on the display, you are
no longer in programming mode.
How the Wet Switch™ Works
In the following sections, you will use the wet switch contacts on the bottom of the Advanced RSS
to enter programming mode and to change the Light and Channel settings. Before you try these
procedures for the first time, please read through this section to familiarize yourself with the way
the Wet Switch™ works.
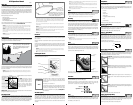
Your finger should be moist, but not dripping, before
you touch the Wet Switch™. You can achieve the
correct dampness by dipping your finger in water,
then dabbing your finger twice on a towel.
A “touch” means touching both wet switch contacts
at the same time with your moistened finger, using
medium pressure. The time between touches needs
to be one second or less.
NOTE: Your finger must make contact with both of the wet switch pins simultaneously in order to tap them successfully.
See the procedures that follow for specific instructions on turning the light on or off or changing
the channel from A to B.
Turning on the Advanced RSS Blinking Light
To turn on the blinking nighttime fishing light:
1. Wet your finger and tap the wet switch on the Advanced RSS three times (the time between
touches needs to be one second or less) to enter the Light programming mode. The RF15
temperature reading on the Control Head will change to show a temperature reading of 40°F
(4°C) (blinking light OFF).
2. To change the setting to 45°F (7°C) (blinking light ON) touch and release the wet switch
contacts once more. Wait two seconds and then confirm that the temperature reading on the
Control Head has changed to 45°F (7°C). Single touches will toggle the setting between
40°F (4°C) and 45°F (7°C).
NOTE: When the LED is set to ON it will flash every four seconds when the RSS is in operation (i.e. when the wet
switch is submerged). Even when the LED is set to ON, the LED will not flash unless the wet switch is activated. If you
want to test the RSS to make sure the LED is set to ON before using the RSS, wet your finger and hold it on the wet
switch; if the LED is set to ON, the LED will begin to flash.
NOTE: Repeat steps 1 and 2 to turn off the LED when finished with night fishing.
3. Once you have made your selection you can either wait 20 seconds for programming mode
to time out (the Start-Up screen will appear on the Control Head display), or continue
immediately to the next procedure to change the channel.
Changing the Channel on the Advanced RSS
To change the channel type on the Advanced RSS:
1. From the Light programming mode (see Turning on the Advanced RSS Blinking Light), touch
and release the wet switch contacts twice more with your moist finger to change from the Light
programming mode to the Channel programming mode. The temperature reading on the
Control Head will change to show a temperature reading of 50°F (9°C) (channel set to A).
2. To change the setting to 55°F (12°C) (channel set to B) touch and release the wet switch
contacts once more. Wait two seconds and then confirm that the temperature reading on the
Control Head has changed to 55°F (12°C). Single touches will toggle the setting between
50°F (9°C) and 55°F (12°C).
3. Once you have made your selection, wait 20 seconds for programming mode to time out
(the Start-Up screen will appear on the Control Head).
4. Use the SetUp Channel Select menu on the RF15 Control Head to switch the software to
match the new channel designation on the Advanced RSS. See Channel Select (SetUp
Menu) for more information.
CAUTION: Make sure that you change the Channel Selection on the Control Head to match the new Advanced RSS
Channel before using the Advanced RSS.
Using a First Generation RSS
First generation RSS units still sold with other SmartCast™ products come in two versions,
Channel A and Channel B (RF40A and RF40B), and are both compatible with the RF15.
NOTE: When using either an RF40A or RF40B RSS with the RF15, you will not get water temperature or grayscale
sonar information, and you will not be able to turn on the LED or change the channel on the RSS. You will still be able
to read digital depth and bottom contour information.
NOTE: When using an RF40A or RF40B RSS, make sure to select the matching channel from the CHANNEL
SELECT menu on the RF15 Control Head.
Maintenance
Your RF15 is designed to provide years of trouble-free operation with virtually no maintenance.
Follow these simple procedures to ensure your RF15 continues to deliver top performance.
If the unit comes into contact with salt spray, wipe the affected surfaces with a cloth dampened in
fresh water.
Do not use a chemical glass cleaner on the lens - this may cause cracking in the lens.
When cleaning the LCD protective lens, use a chamois and non-abrasive, mild cleaner. Do not
wipe while dirt or grease is on the lens. Be careful to avoid scratching the lens.
Never leave the unit in a closed car or trunk—the extremely high temperatures generated in hot
weather can damage the electronics.
RSS Maintenance
After using the RSS in salt water, wipe the affected surfaces with a cloth dampened with fresh
water. The RSS Wet Switch
TM
pins must be rinsed with fresh water after exposure to salt water
to prevent corrosion.
If your RSS remains out of the water for a long period of time, it may take some time to wet it
when returned to the water. Small air bubbles can cling to the surface of the RSS and interfere
with proper operation. Wipe the face of the RSS with a wet cloth to remove them.
Never leave the RSS in a closed car or trunk - the extremely high temperatures generated in hot
weather can damage the electronics.
Troubleshooting
Do not attempt to repair the RF15 yourself. There are no user-serviceable parts inside, and special
tools and techniques are required for assembly to ensure the waterproof integrity of the housing.
Repairs should be performed only by authorized Humminbird technicians.
Many requests for repair received by Humminbird involve units that do not actually need repair.
These units are returned “no problem found.” If you have a problem with your RF15, use the
following troubleshooting guide before calling the Customer Resource Center or sending your unit
in for repair.
NOTE: Retrieving the RSS too rapidly, or the repetitive rocking motion of rough water, can result in loss or distortion
of the bottom picture. This will cause intermittent screen display. For best bottom detail, perform a smooth and slow
reel-in with constant speed and the rod tip up (holding the rod tip low or using a heavy line may cause the RSS to
submerge and momentarily lose radio contact). The RSS has a maximum transmit range of 100 feet (30 meters). If
the unit is cast or drifts more than 100 feet away from the receiver, the signal may be inconsistent or lost. Raising the
RF15 control head slightly above ground level will also increase signal capture.
1. The RF15 loses signal.
If the RF15 is not able to get an RF signal from the RSS, the display will stop updating (the screen
will freeze) and the SmartCast™ screen will be displayed after several seconds. Whenever
reception is lost or the RSS emerges from the water for more than a few seconds, the SmartCast™
screen will be displayed until the RSS is placed back in the water and reception is regained.
• The RSS uses line-of-sight wireless technology. If objects are placed between the RSS and
the RF15, reception may be lost.
• The RSS depth range is 2 to 120 feet (0.6 to 35 meters). Erratic readings may occur in
water that is shallower than 2 feet. In addition, because of the nature of sonar, this product
is not intended for use in swimming pools or small enclosed bodies of water.
• Reeling the RSS too fast can cause loss of signal and the screen will freeze
• Check the buoyant balance between the RSS and your tackle; over 0.2 ounce will submerge
the RSS, causing signal loss.
• The RSS may not obtain its maximum RF distance of 100 feet unless the water is smooth.
Waves or chop may reduce the RF range significantly.
2. When in very shallow water, I get gaps in the bottom reading and inconsistent digital
depth indication.
The RSS will work reliably in water 2 feet (0.6 meters) or deeper. The depth is measured from the
RSS. A transmitter (RSS) to receiver (RF15) distance of greater than 100' may cause intermittent
screen display. Excessively rough water may cause the RSS to submerge, again losing contact.
3. The display shows fluctuating depth readings and excessive clutter, including vertical
bars that may be drawn on top of fish icons.
The RF15 system comes with the capability to receive separate signals from a Channel A RSS or
a Channel B RSS. Two A- or B-type RSS units used simultaneously, as well as one A- and one B-
type RSS unit used simultaneously, can cause RF interference between each other.
4. The screen jumps and the bottom has an abrupt change; sometimes a vertical line is
missing or a black line from top to bottom is displayed.
This screen image jump is due to an automatic change in depth. New returns graphed at a different
scale will not match up with the historic data already graphed at a higher or lower scale. Vertical
lines can also occur as the radio signal from the RSS is lost and then regained in rough water
conditions.
International Purchases
A separate warranty is provided by international distributors for units purchased outside the United
States. This warranty is included by your local distributor and this distributor maintains local
service for your unit. Warranties are only valid in the area of intended distribution. Units purchased
in the United States or Canada must be returned to our factory in the United States for service.
If sonar performance becomes weak (i.e., there are bottom gaps or "0" depth
readings) the bottom of the RSS needs to be cleaned with a drop or two of a 5 to
10 percent solution of liquid dishwashing detergent and water. Use approximately
one tablespoon detergent to 8 ounces of water to remove oils from the face of the
RSS, then wipe with a damp cloth.
Temperature of 50 Means Channel is Set to A
Temperature of 55 Means Channel is Set to B
Temperature of 40 Means LED is OFF
Temperature Setting of 45 Means LED is On
Your Humminbird accessory is designed for
trouble-free operation and is backed by a one year warranty. If you have any
questions, contact our
Humminbird Customer Resource Center
:
By Telephone
(Monday - Friday 8:00 a.m. to
4:30 p.m. Central Standard Time):
334-687-0503
By e-mail
(typically we respond to your e-mail within
three business days):
custserv@johnsonoutdoors.com
For direct shipping, our address is:
Humminbird
Service Department
678 Humminbird Lane
Eufaula, AL 36027 USA
CONTACT HUMMINBIRD
SPECIFICATIONS
Power Requirement:
Control Head: ............................................................ Eight AA 1.5 Volt
Alkaline batteries (not included)
RSS: .................................................................... One non-replaceable
Lithium RSS Battery
Display Type .................................................................................... STN
Depth Capability .................................................................. 2 - 120 feet
(0.6 - 35 meters)
Sonar Coverage .............................................................. 90° @-10 dB*
Sonar Operating Frequency........................................................125 kHz
Operational Wireless Frequency ..............................................916.5 mHz
(433.92 mHz for European models)
Operational Range ................................................ 100 feet (30 meters)
Approval ......................................................................European models
are CE-approved.
*Area of bottom coverage equals twice the current depth.