


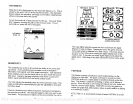
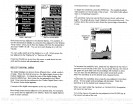
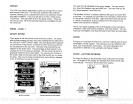

The
menu shown below
appears. Simply press
the
key adjacent
to
the
desired 5CC
level,
either
Off, Low, Medium,
or
High.
The X-6O
will clear the
display,
return to the
chart mode
using
the SOC level
you
entered.
Set
Noise
Re
jebt
ion
A
etSurfaoe
Clarity
.,Ihsplay
tone
Alarn Bar
4
MENU-4th PAGE
(AUTOMATIC
ON)
:
LoW
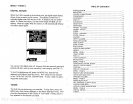
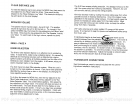
INTRODUCTION
The
X-60
represents
one of the best values in
sportfishing
sonar
today,
It
rivals other sonar units
costing
much more in features and
performance.
With.its
menus,
the X-6O offers
easy-to-use operation
at
the touch
of
a button. The wide screen shows the underwater
world
with
high
resolution and detail. With the
optional
combination
speed
and
temperature sensor,
the X-60 also
displays
boat
speed,
surface water
temperature,
and distance
travelled
(distance log).
Although
the X-60 has
many
features
and
functions,
the "soft
key"
menu
system
makes it
easy
to
use. Above
all,
don't be afraid to
try
different features and
functions on the unit. You can't hurt it
by
prssing
buttons!
9ead
this
manual and take it with
you
the first few
times
you
use
your
unit. It makes a
great
reference should
you
need it. The
more
you
know when
you
get
to the
water,
the
more
your
X-60 can do for
you!
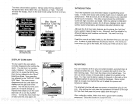
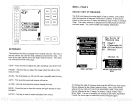
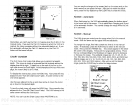
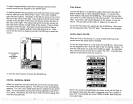
DISPLAY ZONE BAR
The
bar used in the zone alarm
normally disappeas
after
setting
the
alarm. You dan turn it on continu-
ously,
if desired. To turn the
zone
alarm bar
on,
press
the MENU
key,
then
the
key adjacent
to the "More"
tébet
three times. Now
press
the
key adjacent
to the "DISPLAY ZONE
BAR" label. The menu
screen
disappears
and
the.zone alarm bar
displays
on the
right
side of
the
screen.
This wilt also turn the zone
alarm on if it
wasn't
already
on.
Repeat
these
steps
to turn the zone
larm bar off or use the
ALARM
menus.
Turning
the Zone Alarm bar
off also turns
the zone alarm off.
28
ZONE ALARM
ON
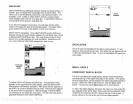
MQUNTING
Yqu
can install the X-6O
in
any
convenient
location,
provided
there is
clearance behind
the unit. Place it in
position
first and tilt it for the
best
viewing angle.
Then
mark the holes in the bracket base.
You
can use wood screws or
through-bolts
to attach the bracket
to the
boat. You
may
need to
place
a
piece
of
plywood
on the back of thin
fiberglass panels
to secure the
mounting
hardware. Make certain
thGre is
enough
room
behind the unit to attach the
power
and
trahducer cables.
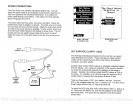
The
smallest hole that will
pass
one
power
or transducer
plug
is one
inch. After
drilling
the
hole,
pass
the transducer
connector
up through
the
hole
first,
then
pass
the
power
cable down
through
it.
After
routing
the
cables,
fill the hole with a
good
marine
sealing
compound.
Offset the bracket to cover
the hole.
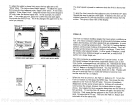
The
Chart
Surface
Clarity
Control Is
Low
Select
4
:inI
soc ADJUST
MENU
rIuTor -
0?
I
PDF compression, OCR, web-optimization with CVISION's PdfCompressor