


MT692C NOV. 02
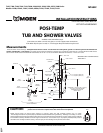
Trim
MAKE SURE ALL WATER SUPPLIES ARE OFF
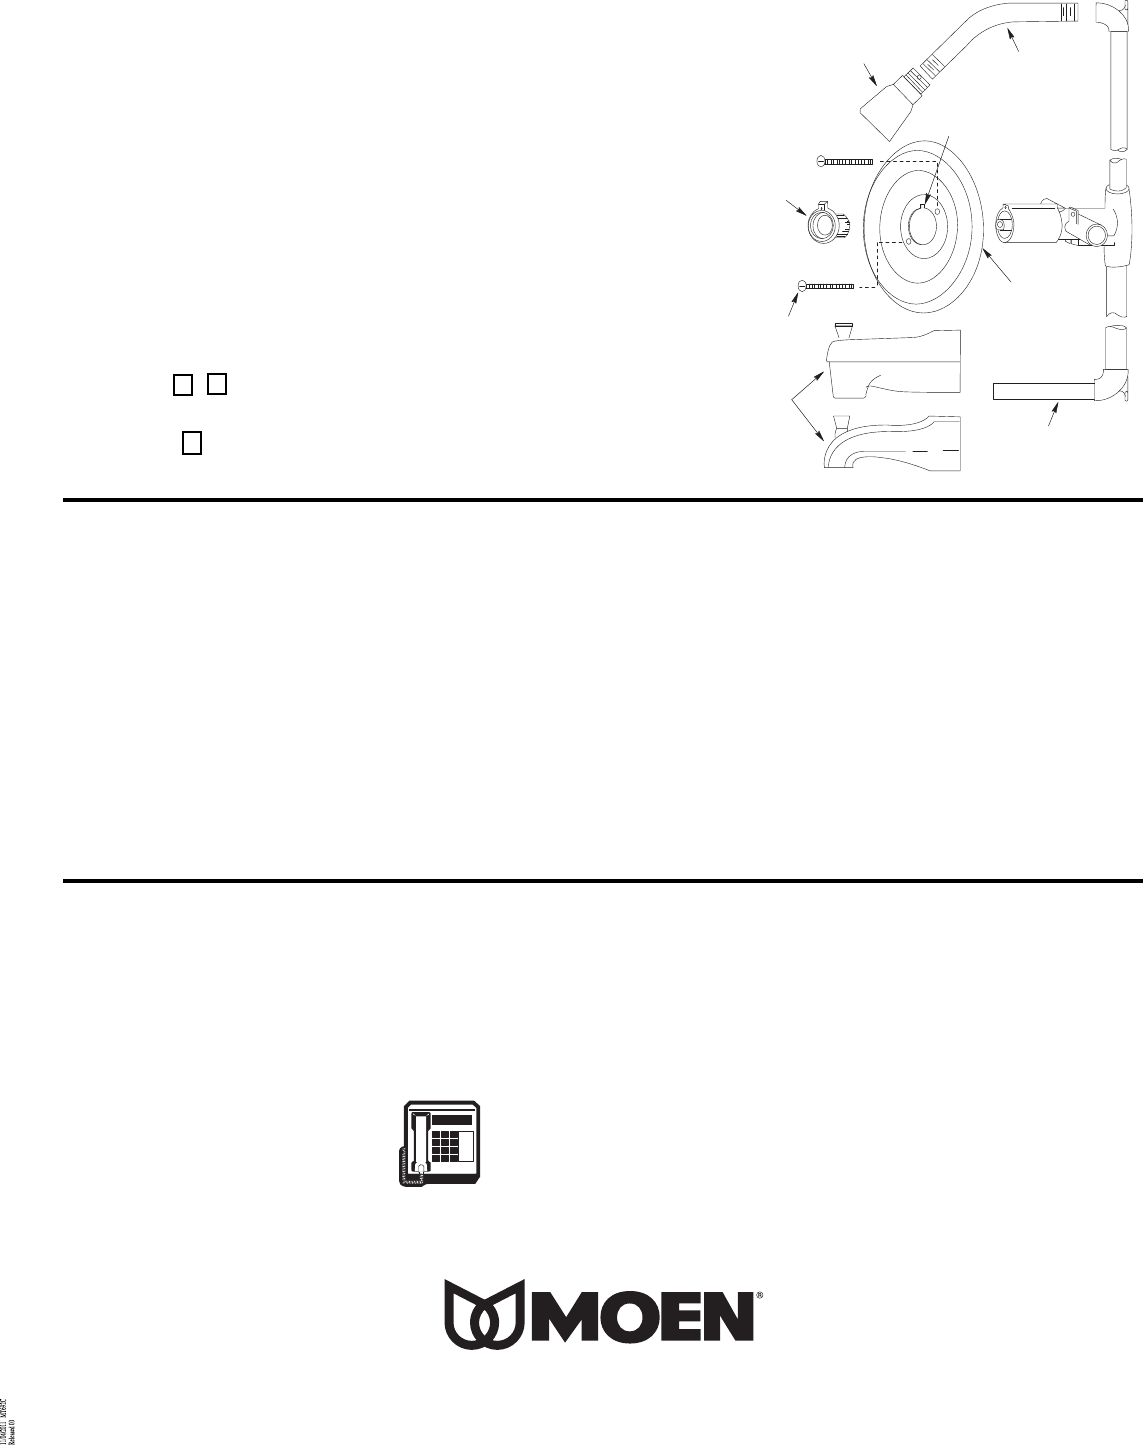
TO INSTALL TRIM AFTER ROUGH-IN
Slide the flange onto the long end of the shower arm. Wrap both ends of shower arm with
thread seal tape and screw long end of shower arm into pipe ell inside the wall. Do not install
the showerhead.
Install tub spout (see page 2).
Remove screw holding plaster ground and stop tube guard in place and discard. Temporarily
install handle. Turn on water, pull up on tub spout diverter knob and flush the shower riser for
15 seconds. Install showerhead and check system for leaks. If there are no leaks, turn OFF
water and remove handle and limit stop.
Install escutcheon plate with two screws provided. Mount with the escutcheon notch UP.
Install limit stop(see temperature limit stop section). The notched flat on the cartridge stem
must point DOWN when mounting handle.
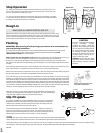
Handle Attachment :
For handle style A + B . Mount handle on the stem and replace handle screw tightly.
Snap handle insert or plug button in place on the handle.
For handle style C . Mount handle adapter on the stem and replace handle screw tightly.
Mount handle on handle adapter and replace set screw.
25300 Al Moen Dr., North Olmsted, OH 44070-8022 U.S.A.
© Moen Incorporated 2002
Printed in U.S.A
SHOWERHEAD
SHOWER ARM
NOTCH
CC
CONNECTIONS
ESCUTCHEON
TEMPERATURE
LIMIT STOP
ESCUTCHEON
SCREWS (2)
SPOUT
TUB LOOKOUT NIPPLE
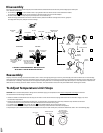
TO REMOVE STOP VALVE
Always turn water supply OFF before disassembly (see disassembly).
Removal of stop valve:
1. Remove handle parts (see disassembly) and escutcheon.
2. Using snap ring pliers, remove retaining ring from valve body.
3. Grip stop valve stem with pliers and rotate slightly to remove from valve body.
Re-Installation of new stop valve:
1. Check to be sure that stop valve stem is fully seated in plug.
2. Insert stop valve until fully seated beyond retaining ring groove in valve body.
3. Using snap ring pliers, place retaining ring in valve body, making sure that ring is fully seated.
4. Check orientation of stop valve for water flow. (Stop is in the off position when screwdriver slot is vertical).
5. Turn water supply on.
Not for use with Moentrol valves.
HELPLINE: Call our toll free Helpline number,
for answers to any product, installation, replacement
parts, or warranty questions.
(800) BUY-MOEN
(289-6636)
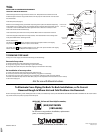
To Eliminate Cross-Piping On Back-To-Back Installations, or To Correct
Reversed Rough-In Where Hot and Cold Positions Are Reversed:
Remove cartridge assembly, rotate 180 degrees and re-install (see "Reassembly" above). CAUTION: MAKE SURE NOTCH ON STEM IS POINTING UP. Re-install retainer
clip, handle washer, stop tube, key stop and handle parts.