


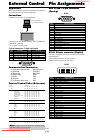
E-28
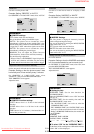
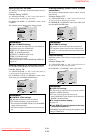
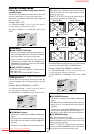
Setting the power on mode
This function sets the input mode at the time the power is
switched on.
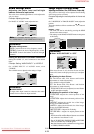
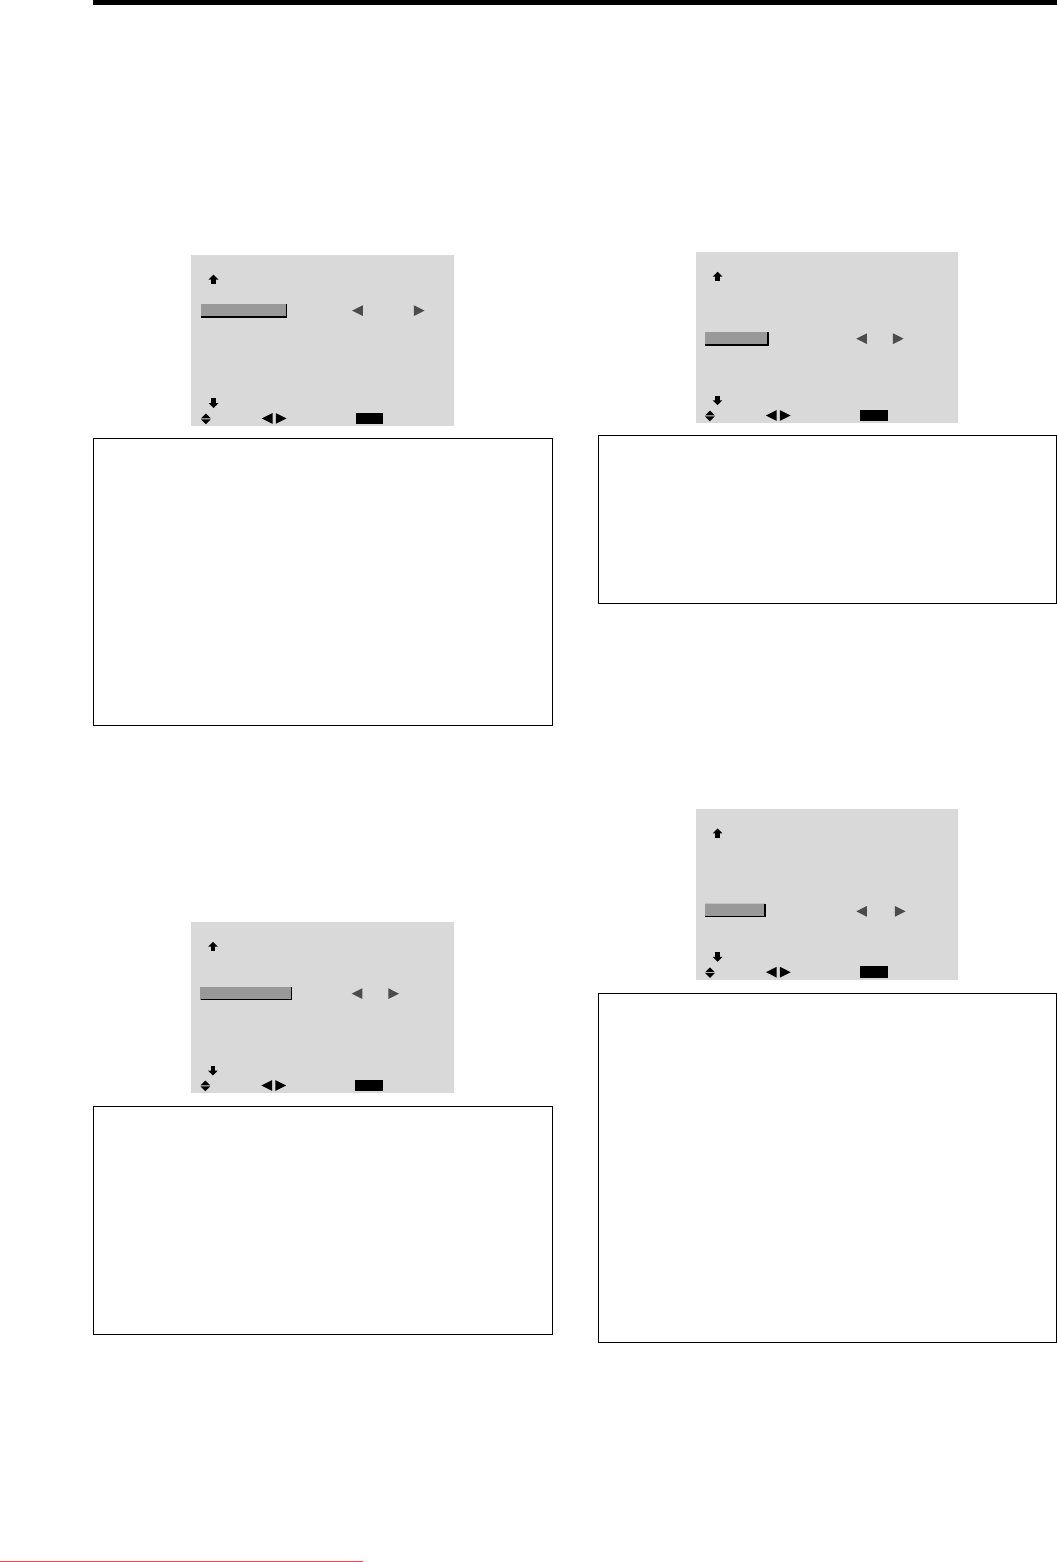
Example: Setting “VIDEO2”
Set “ADVANCED OSM” to “ON” in the main menu (1/
2), then perform the following operations.
On “PWR. ON MODE” of “OPTION3” menu, select
“VIDEO2”.
The available sources depend on the settings of input.
OPTION3
3 / 4
EXIT
PREVIOUS PAGE
TIMER
PWR. ON MODE
CONTROL LOCK
IR REMOTE
LOOP OUT
ID NUMBER
VIDEO WALL
NEXT PAGE
: VIDEO2
: OFF
: ON
: OFF
: ALL
SEL.
RETURN
ADJ.
Information
Ⅵ PWR. ON MODE settings
LAST: Last mode (the input that was last selected at
the time the power was switched off).
VIDEO1, 2, 3: VIDEO input mode.
RGB1, 2, 3: RGB input mode.
HD/DVD1, 2: HD/DVD input mode.
DVD2, 3: DVD input mode.
MULTI: Multi screen mode.
Follow the procedure used for PROGRAM TIMER. See
page E-27.
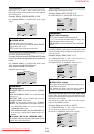
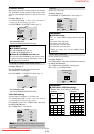
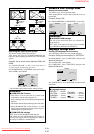
Enabling/disabling the front panel controls
This function enables/disables the front panel controls.
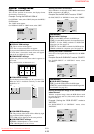
Example: Setting “ON”
Set “ADVANCED OSM” to “ON” in the main menu (1/
2), then perform the following operations.
On “CONTROL LOCK” of “OPTION3” menu, select
“ON”, then press the MENU/ENTER button.
OPTION3
3 / 4
EXIT
PREVIOUS PAGE
TIMER
PWR. ON MODE
CONTROL LOCK
IR REMOTE
LOOP OUT
ID NUMBER
VIDEO WALL
NEXT PAGE
: LAST
: ON
: ON
: OFF
: ALL
SEL.
RETURN
ADJ.
Information
Ⅵ CONTROL LOCK settings
ON: Disables the buttons on the front panel.
OFF: Enables the buttons on the front panel.
* Even when the CONTROL LOCK is set, the POWER
switch will not be locked.
* This becomes effective when the on-screen menu goes
out.
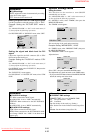
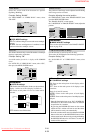
Enabling/disabling remote control wireless
transmission
This function enables/disables remote control wireless
transmission.
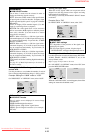
Example: Setting “OFF”
Set “ADVANCED OSM” to “ON” in the main menu (1/
2), then perform the following operations.
On “IR REMOTE” of “OPTION3” menu, select “OFF”, then
press the MENU/ENTER button.
OPTION3
3 / 4
EXIT
PREVIOUS PAGE
TIMER
PWR. ON MODE
CONTROL LOCK
IR REMOTE
LOOP OUT
ID NUMBER
VIDEO WALL
NEXT PAGE
: LAST
: OFF
: OFF
: OFF
: ALL
SEL.
RETURN
ADJ.
Information
Ⅵ IR REMOTE settings
ON: Enables remote control wireless transmission.
OFF: Disables remote control wireless transmission.
Set “OFF” to avoid unwanted control from other remote
controls.
Loop Out setting
When this feature is set to ON, the received signal will be
looped out.
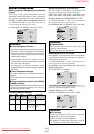
Example: Setting “ON”
Set “ADVANCED OSM” to “ON” in the main menu (1/
2), then perform the following operations.
On “LOOP OUT” of “OPTION3” menu, select “ON”.
OPTION3
3 / 4
EXIT
PREVIOUS PAGE
TIMER
PWR. ON MODE
CONTROL LOCK
IR REMOTE
LOOP OUT
ID NUMBER
VIDEO WALL
NEXT PAGE
: LAST
: OFF
: ON
: ON
: ALL
SEL.
RETURN
ADJ.
Information
Ⅵ LOOP OUT settings
ON: The received signal will be looped out via PC1
terminal or VIDEO1 terminal.
OFF: The received signal will not loop out.
* Even if LOOP OUT is ON, signals won’t be sent out if
POWER is being turned off.
Ⅵ To connect another display...
See page E-5.
Ⅵ If the RGB/PC1 signal is present at the time
the power switched on...
The RGB/PC1 input will be displayed regardless of the
setting of LOOP OUT.
Downloaded From TV-Manual.com Manuals
CONFIDENTIAL
4-32