


18
BUD OPERATING MANUAL
© 2002 Design, 2011 Doc. No. 12-5259-r01 (7/21/11)
CARE AND CLEANING
Protect your BUD from shock, excessive temperatures, exposure to chemicals, and tampering. Protect the lens against scratches
with a Instrument Lens Protector. Small scratches will naturally disappear underwater.
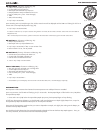
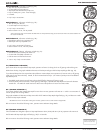
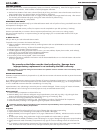
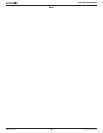
• Soak and rinse the BUD in fresh water at the end of each day of diving, and check to ensure that the areas around the Low
Pressure (Depth) Sensor (Fig. 45a) and button are free of debris or obstructions.
• To dissolve salt crystals, use lukewarm water or a slightly acidic bath (50% white vinegar/50% fresh water). After removal
from the bath, place the BUD under gently running fresh water and towel dry before storing.
• Transport your BUD cool, dry, and protected.
INSPECTIONS AND SERVICE
Your BUD should be inspected annually by an Authorized Oceanic Dealer who will perform a factory prescribed function check
and inspection for damage or wear.
To keep the 2 year limited warranty in effect, this inspection must be completed one year after purchase (+/- 30 days).
Oceanic recommends that you continue to have an inspection performed every year to ensure it is working properly.
The costs of annual inspections, or inspections relating to water tight integrity, are not covered under the terms of the 2 year
limited warranty.
To Obtain Service:
Take your BUD to your local Authorized Oceanic Dealer.
If required to return your BUD to the Oceanic USA factory:
• Obtain an RA (Return Authorization) number by contacting Oceanic USA at 510/562-0500 or send an e-mail to service@
oceanicusa.com.
• Record all dive data in the Log. All data will be erased during factory service.
• Package it using a protective cushioning material.
• Include a legible note stating the specific reason for return, your name, address, daytime phone number, serial number(s),
and a copy of your original sales receipt and Warranty Registration.
• Send freight prepaid and insured using a traceable method.
• Non-warranty service must be prepaid. COD is not accepted.
• Additional information is available on the Oceanic web site OceanicWorldwide.com or on the local Oceanic web site that
serves your global region.
The procedures that follow must be closely adhered to. Damage due to
improper battery replacement is not covered by the BUD's warranty.
When the battery is removed, settings and calculations for repetitive dives are retained in the unit's memory while a
new battery is installed.
BATTERY REPLACEMENT
The Battery Compartment should only be opened in a dry and clean environment with extreme care taken to prevent the entrance
of moisture or dust.
As an additional precautionary measure to prevent formation of moisture in the Battery Compartment, it is recommended that the
Battery be changed in an environment equivalent to the local outdoor temperature and humidity (e.g., do not change the Battery
in an air conditioned environment then take it outside during a hot sunny day).
Inspect the Buttons, Lens, and Housing to ensure they are not cracked or damaged. If there is any sign of moisture in the BUD,
DO NOT attempt to use it for diving until it receives proper service by an authorized Oceanic facility.
Battery Removal
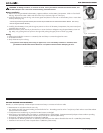
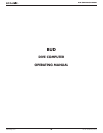
• Locate the Battery Compartment on the back of the unit.
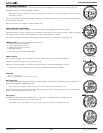
• Rotate the Battery Cover clockwise 10 degrees using the special Battery Cover Tool (Fig. 46A), or by pushing the lower
portion to the left while pushing the upper portion to the right using your thumbs (Fig. 46B).
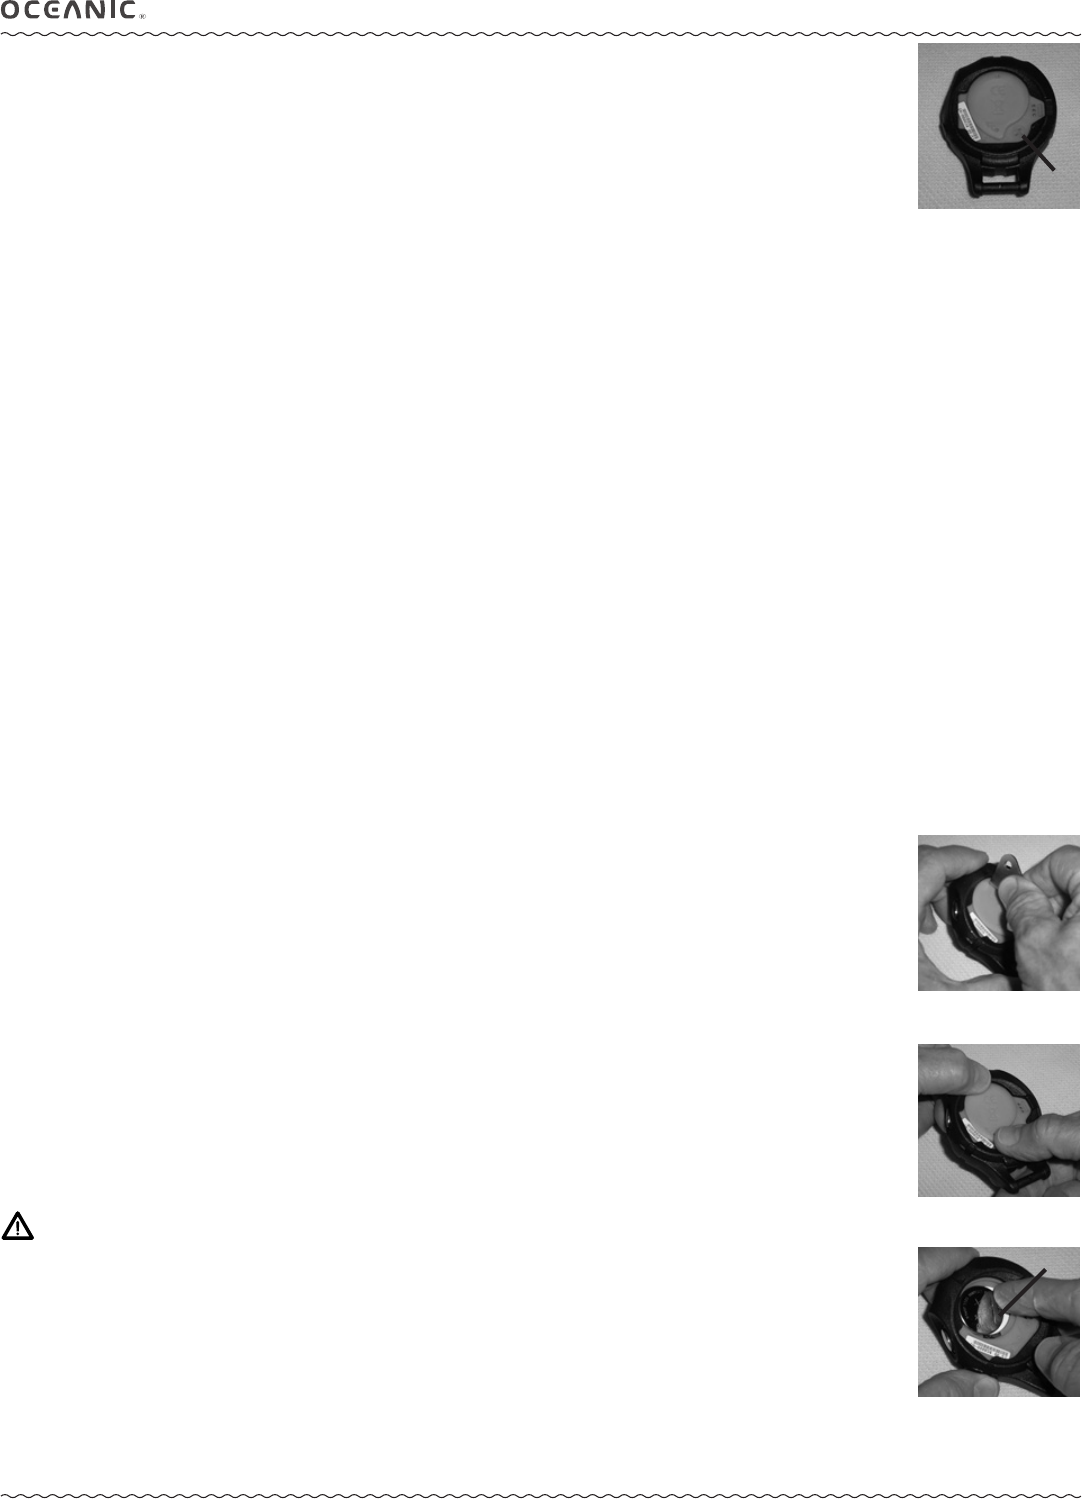
• Lift the Cover with O-ring up and away from the Housing.
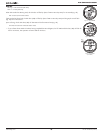
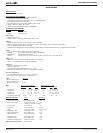
• Using care not to damage the Contact (Fig. 47a), slide the Battery up and out of the left side of the Compartment.
• Discard the Battery according to local regulations governing disposal of Lithium batteries.
CAUTION: DO NOT allow a metal object to short circuit the top of the Battery, which is positive (+), to the nega-
tive ( - ) contact of the Battery Compartment.
Inspection
• Closely check all of the sealing surfaces for any signs of damage that might impair proper sealing.
• Inspect the Buttons, Lens, and Housing to ensure they are not cracked or damaged.
• Remove the Battery Cover O-ring and inspect it for any signs of deterioration or deformity. DO NOT use tools to remove the
O-ring.
• To ensure proper sealing, O-ring replacement is highly recommended each time the Battery is replaced.
• Closely examine the threads of the Battery Cover and Housing for any signs of damage that might prevent proper threading.
• Closely examine the inside of the Battery Compartment for any signs of corrosion indicating entrance of moisture into the
unit.
• If it is necessary to clean the Battery Compartment, flush it thoroughly with a solution of 50% white vinegar and 50% fresh
water. Rinse with fresh water, and allow to dry overnight or blow dry with a hair dryer set at no heat.
Fig. 46A - COVER
REMOVAL (using tool)
Fig. 47 - BATTERY
REMOVAL
a
Fig. 46B - COVER
REMOVAL (using thumbs)
Fig. 45 - CASE BACK
a