


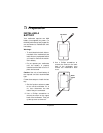


9
Preparation
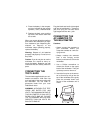
4. Place the battery in the compart-
ment as indicated by the polarity
symbols (+ and –) marked inside.
5. Replace the back cover and the
top cover, then secure them with
the screws.
When you cannot adjust the needle to
point to
0
on the scale when you mea-
sure resistance (see “Measuring Re-
sistance” on Page 16) or the
multimeter stops operating properly,
replace the battery.
Warning:
Dispose of old batteries
promptly and properly. Do not burn or
bury them.
Caution:
If you do not plan to use the
multimeter for a month or more, re-
move the battery. Batteries can leak
chemicals that can destroy electronic
parts.
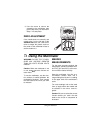
CONNECTING THE
TEST LEADS
The test leads supplied with your mul-
timeter are rated for 1000 volts. Use
only test leads of the same rating with
the multimeter. You can order re-
placement leads from your local
RadioShack store.
WARNING:
ALTHOUGH THE TEST
LEADS ARE RATED FOR 1000
VOLTS, THE MAXIMUM RATING OF
THIS MULTIMETER IS 500 VOLTS
DC/500 VOLTS RMS AC. DO NOT
TRY TO MEASURE ANY VOLTAGE
GREATER THAN 500 VOLTS DC/
500 VOLTS RMS AC.
Plug the black test lead’s right-angled
end into the multimeter’s
–
(common)
jack, then plug the red test lead’s
right-angled end into the + jack.
CONNECTING THE
AC AMMETER TO
THE MULTIMETER
Cautions:
• Always connect the ammeter to
your multimeter before you
clamp the ammeter to a wire car-
rying current.
• Always unclamp the ammeter
from a wire carrying current
before you disconnect it from the
multimeter.
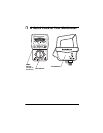
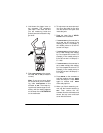
1. Use a Phillips screwdriver to
remove the screw on the upper
back of the multimeter. Then pull
up the top cover to remove it.
2. Insert the four pins on the amme-
ter as far as they will go into the
top of the multimeter, then gently
press the ammeter down onto
the top of the multimeter until it
clicks.
O
H
M
S