


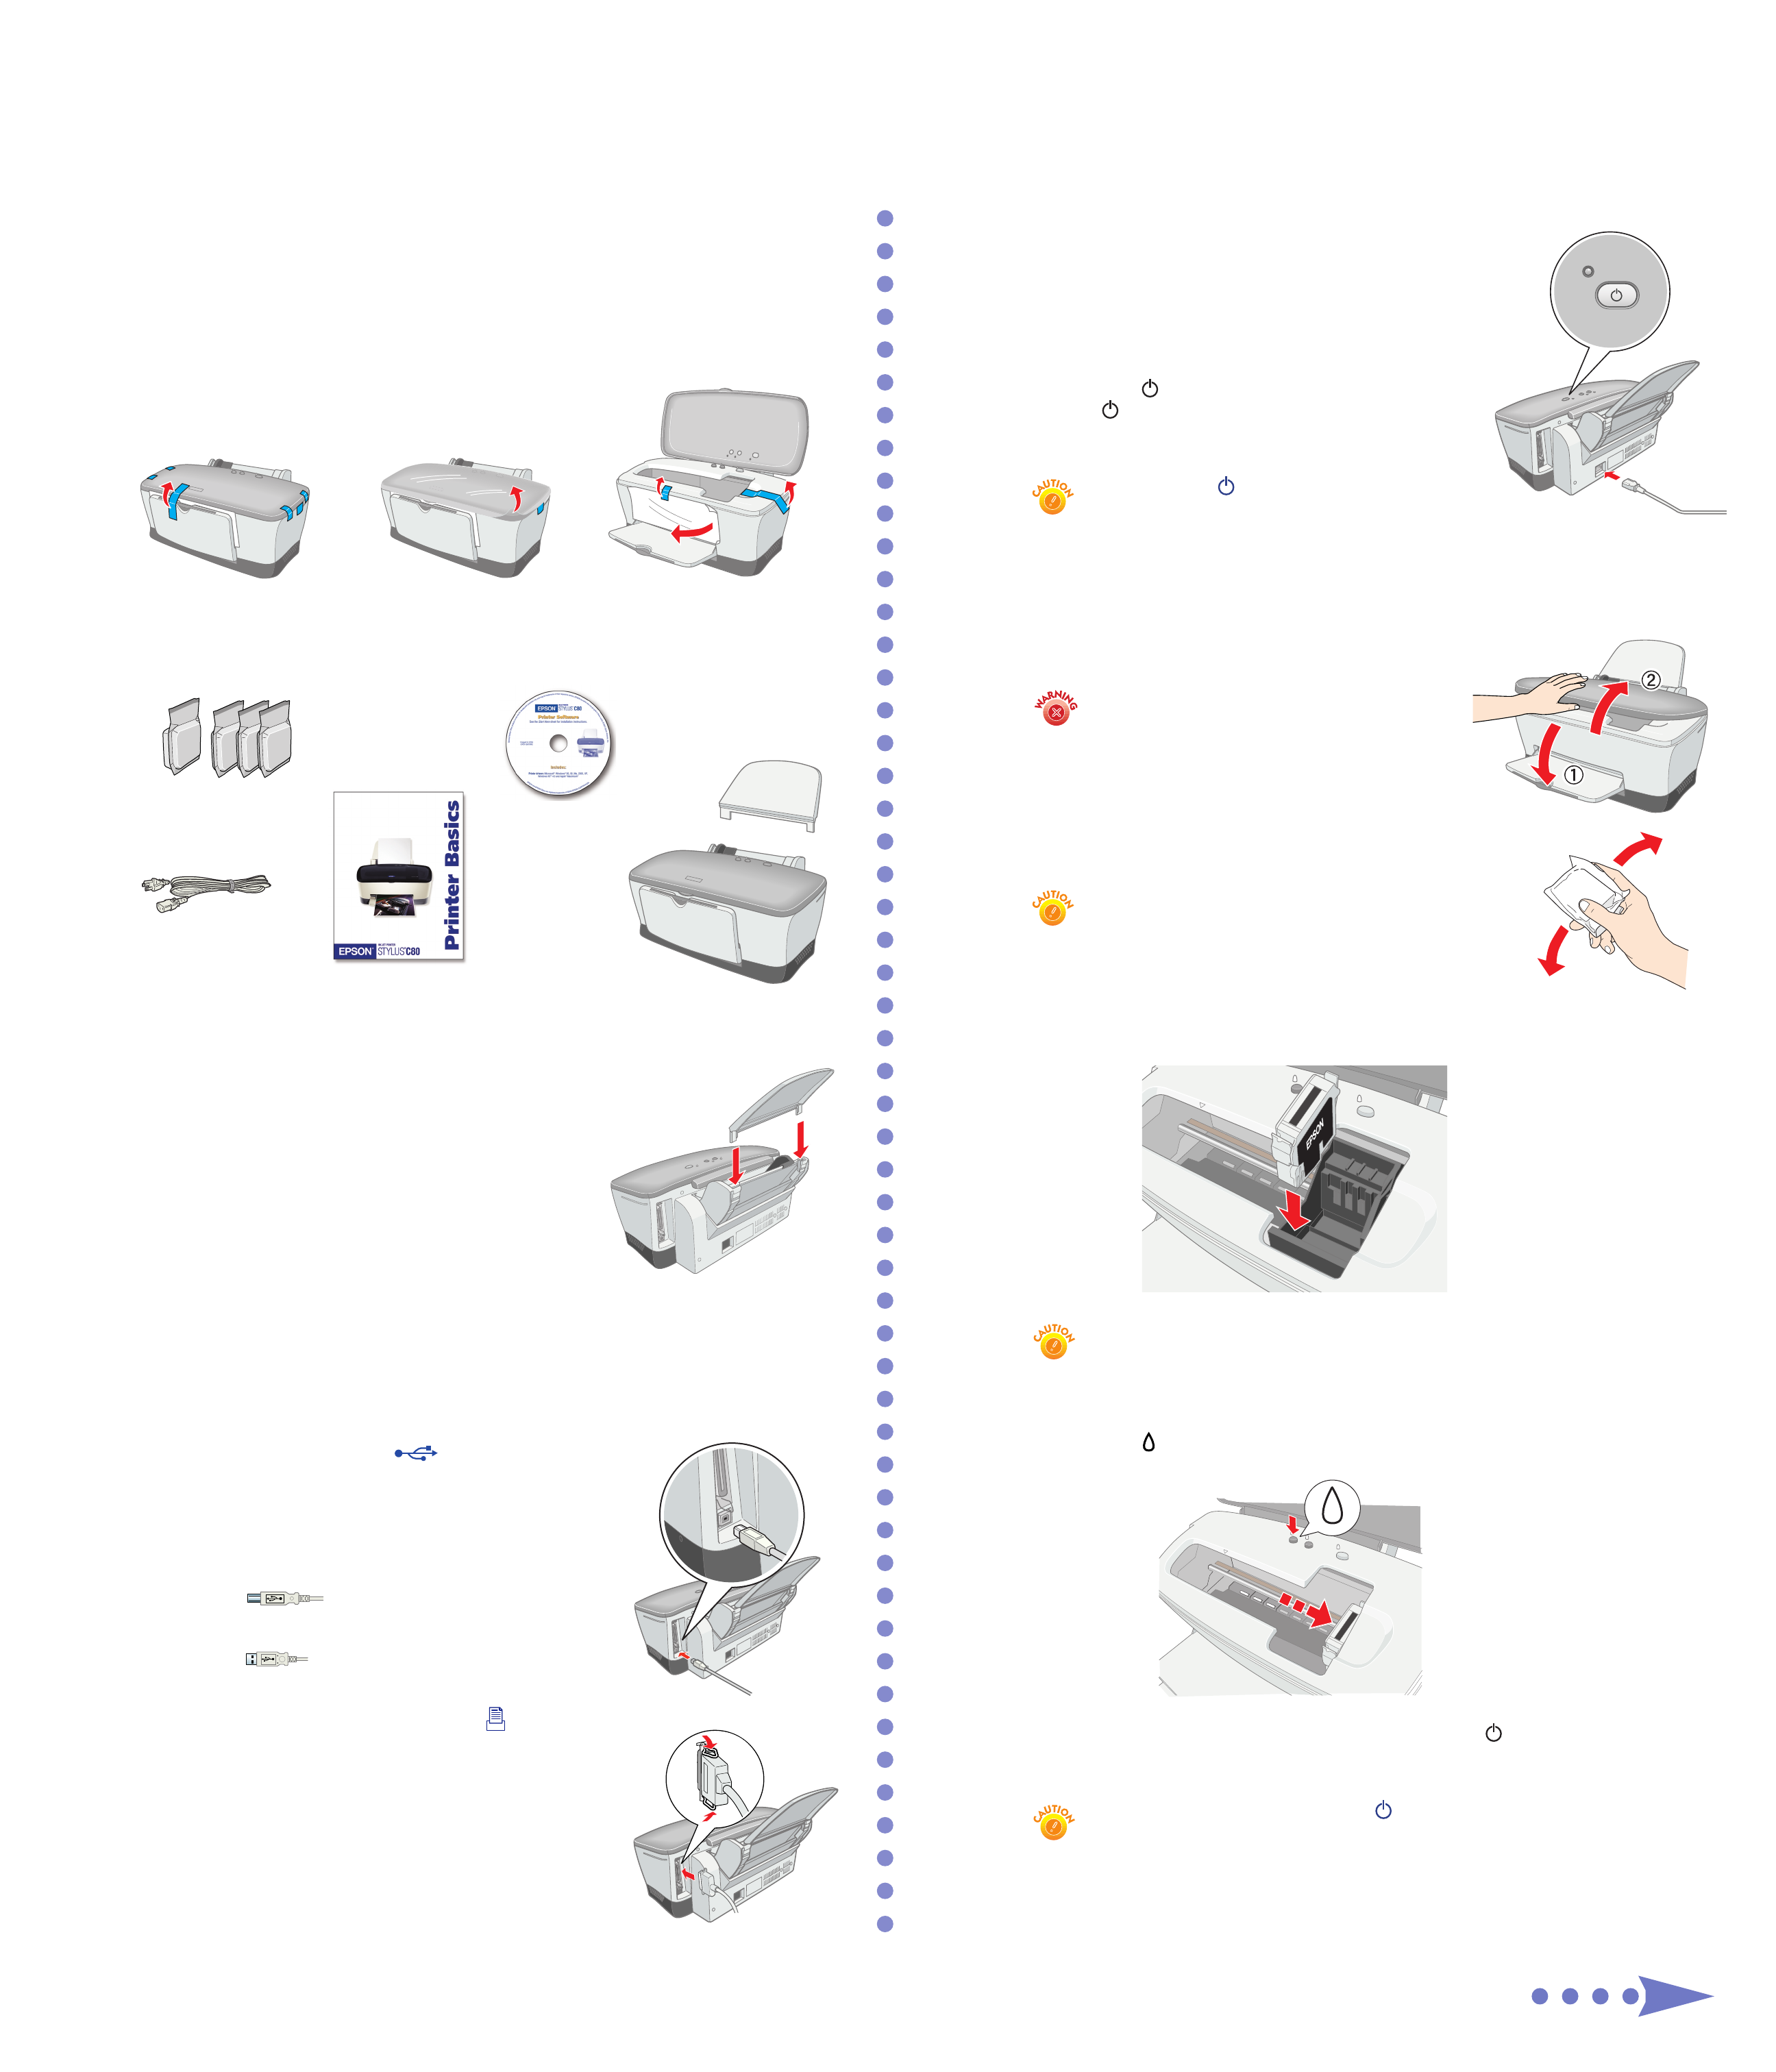
4 Turn On the Printer
1 With the printer and computer still turned off,
plug the printer’s power cord into the AC inlet on
the back of the printer. Then plug the power cord
into a grounded electrical outlet.
2 Press the power button to turn on the printer.
The power light flashes and the ink cartridge
holders begin to move. Don’t turn on your
computer yet.
Always use the power button to turn the
printer on or off. Never use an external switch,
such as a power strip switch or wall switch.
5 Install the Ink Cartridges
1 Lower the printer’s output tray and open
the cover.
Keep ink cartridges out of the reach of
children. If ink gets on your skin, wash the
area thoroughly with soap and water. If ink
gets in your eyes, flush them immediately
with water.
2 Shake each ink cartridge four or five times.
Then unwrap the cartridges.
Don’t remove the cartridge labels, or ink may leak.
3 Wait for the ink cartridge holders to move into loading
position. Then lower each ink cartridge into its holder.
The color of the cartridge label should match the sticker
on the holder.
Install all four ink cartridges, and leave them installed for all types of printing,
or the printer won‘t work.
4 Gently push each cartridge down until it clicks into place.
5 Press the ink button and close the printer cover.
Ink charging takes about 90 seconds. You will see the power light flash and
hear the printer charging your ink. Don’t turn off the printer during this process or
you’ll waste ink.
Never turn off the printer when the power light is flashing, unless the printer
hasn’t moved or made any noise for more than 5 minutes.
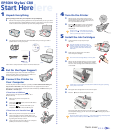
1 Unpack Everything
Before you begin, make sure your computer is set up completely.
1 Remove all the tape and packing material from the printer before you set up, as shown
here. The tape may be in slightly different locations on your printer, so be sure to check
inside and all around the printer for tape and other packing material.
2 Your printer comes with the items shown here. Make sure you’ve also got a USB or
parallel cable to connect your printer.
2 Put On the Paper Support
Locate the paper support slots on the back of the printer.
Position the paper support as shown here, then slide it into
the slots. (Don’t place it in the paper feeder.)
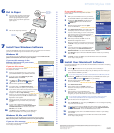
3 Connect the Printer to
Your Computer
Connect the printer to either a USB port or parallel port. Don’t connect both cables; you
only use one or the other. Follow the instructions in the appropriate section below.
Shut down your computer before connecting the cable. In Windows
®
, click Start and select your
Shut Down or Turn Off option.
If You Have a USB Port
(USB connection is not supported for Windows
®
95 or
Windows NT
®
4.0.)
1 Make sure the printer and computer are
turned off.
2 Connect the square end of the USB cable to
your printer’s USB port.
3 Connect the flat end of the cable to your
computer’s USB port or a first tier USB hub port.
If You Have a PC Parallel Port
1 Make sure the printer and computer are turned off.
2 Connect the larger end of the parallel cable to your
printer’s parallel port. Then secure it with the wire clips
by pushing them inwards, as shown.
3 Connect the other end of the cable to your computer’s
parallel port and secure it as necessary.
Turn over
ink cartridges
Printer Basics
paper support
CD-ROM
Start Here
EPSON Stylus
®
C80
Start Here
Follow all the “Safety Instructions” listed in the Printer Basics book.
power cord
printer