


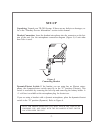


Push-to-Talk/Lock-to-Talk Switch:
For Model TR-200, this switch enables the talk function. Press the button
and hold down as long as required (Push-to-talk function), or if continuous
talk is required (lock-to-talk function), quickly press the button two times to
lock on. To release the talk function, press the button one time.
For Model TR-200P, this switch enables the transmit and audio function
and operates as described for TR-200.
Transmit LED Indicator: (Labeled “talk”) Will be illuminated whenever the
transmit function is enabled.
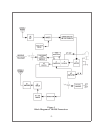
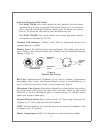
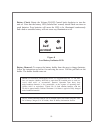
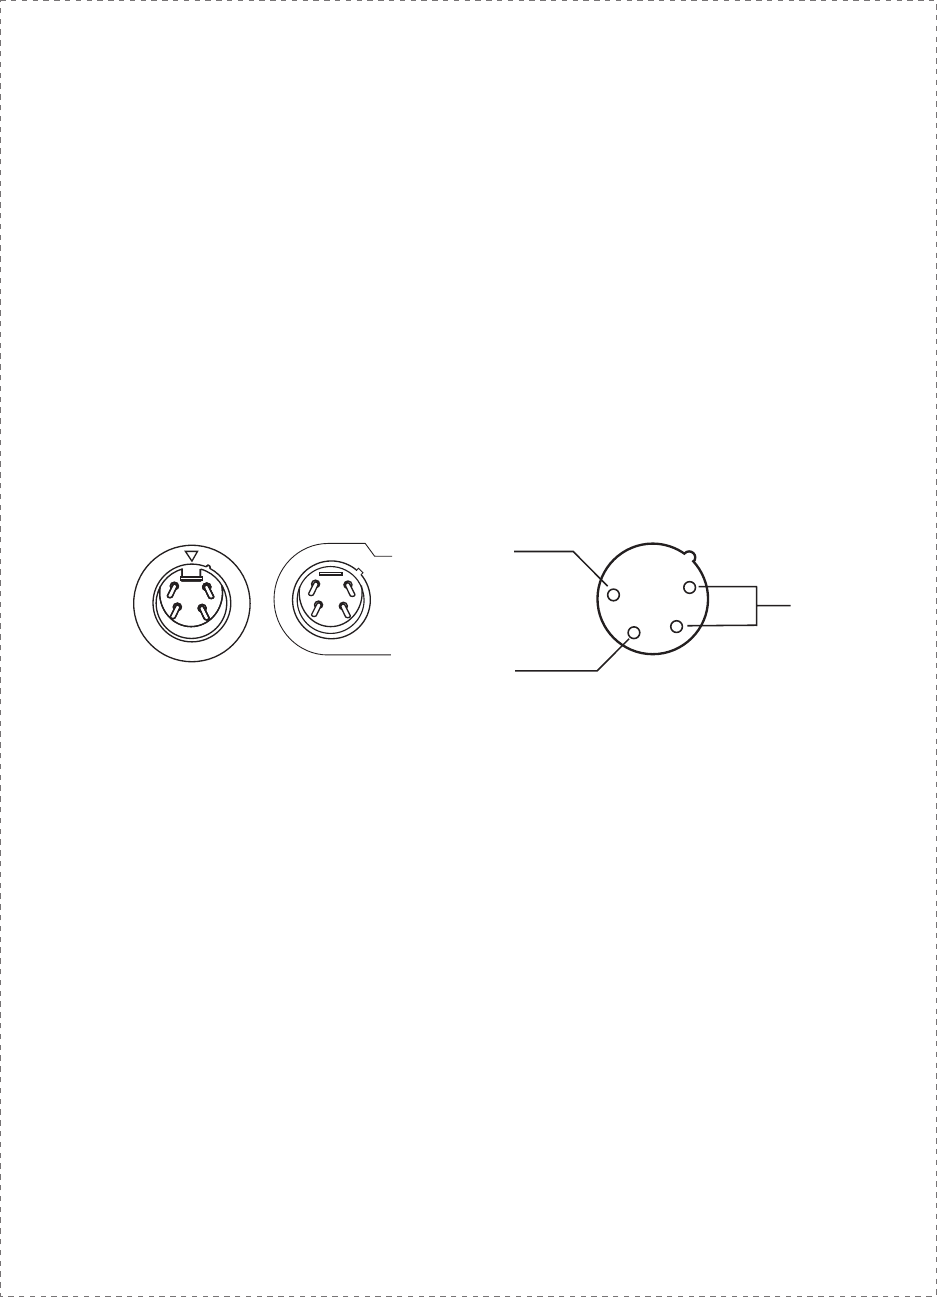
Headset Jack: 4 Pin XLR Connector for Input/Output. The headset jack will ac-
cept 5 different Telex Model headsets and 1 handset. See Recommended Headsets
starting on Page 14.
Figure 4
Headset Jack Wiring
Belt Clip: Combination Belt Clip/Battery Cover. Access to Battery Compartment,
Microphone Gain Control and Dynamic/Electret Switch is accomplished by re-
moval of belt clip via a quick release 1/4 turn fastener.(See Page 8)
Microphone Gain Control: Screwdriver adjustable by removing belt clip and pry-
ing out the small rubber plug to the right of the screw boss. Adjust the gain control
clockwise to increase microphone gain or counterclockwise to decrease micro-
phone gain. Replace rubber plug.
Dynamic/Electret Switch: Place switch towards “D” when using a Dynamic Mi-
crophone or “E” when using an Electret Microphone.
NOTE: All Telex headsets used with this intercom are dynamic microphones. Unit
is shipped in the “D” position.
Battery Compartment: Holds 6 AA batteries in a removable battery holder.
-5-
BTR-200/TR-200
MALE CONNECTORS
1
2
3
4
MICROPHONE
SHIELD (-)
MICROPHONE
AUDIO (+)
HEADPHONE
BALANCED
AUDIO
OUT