


I
I
n
n
s
s
t
t
a
a
l
l
l
l
a
a
t
t
i
i
o
o
n
n
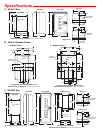
K-1900W-2 or K-1500P-W
(not included)
RJ-11 Wall Plate
(not included)
Adapter Panel #1
(included)
VE-9x12 Box
(included)
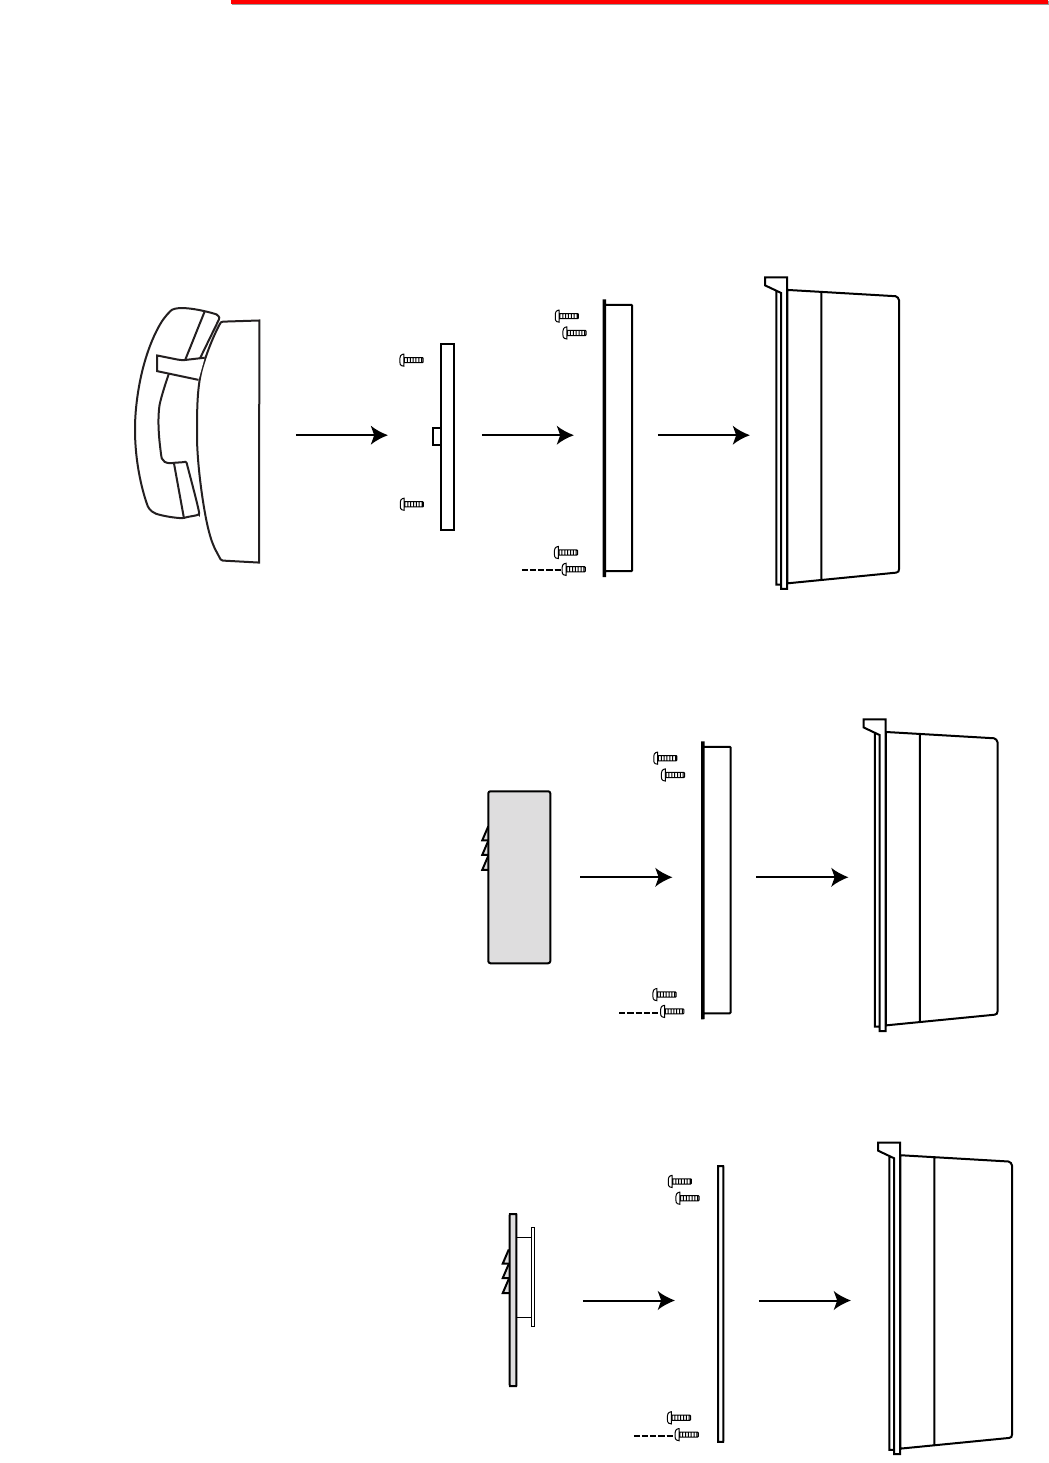
A. Using the VE-9x12 to mount the K-1900W-2 or K-1500P-W
1. Mount the VE-9x12 to the wall, or surface desired, using the (4) corner mounting holes.
2. Run the conduit and wiring as appropriate.
3. Attach adapter panel #1 using the (4) included 8-32 x 3/8 black cap screws.
4. Attach a standard RJ11 wall plate (Radio Shack part # 279-451 or equivalent).
5. Attach the K-1900W-2 or K-1500P-W to the RJ11 wall plate.
B. Using the VE-9x12 to mount the E-1600A, E-1600-03A, E-1600-45A, W-2000A or E-20A
1. Mount the VE-9x12 to the wall, or surface
desired, using the (4) corner mounting holes.
2. Run the conduit and wiring as appropriate.
3. Attach adapter panel #1 using the (4) includ-
ed 8-32 x 3/8 black cap screws.
4. Attach the Viking product directly to the
adapter using the installation instructions pro-
vided in the product’s Technical Practice.
E-1600A Shown
(not included)
Adapter Panel #1
(included)
VE-9x12 Box
(included)
C. Using the VE-9x12 to mount the E-10, E-15, E-1600-20A, E-30, W-1000 or W-3000
1. Mount the VE-9x12 to the wall, or surface
desired, using the (4) corner mounting holes.
2. Run the conduit and wiring as appropriate.
3. Attach adapter panel #2 using the (4) includ-
ed 8-32 x 3/8 black cap screws..
4. Attach the Viking product directly to the
adapter using the installation instructions
provided in the product’s Technical Practice.
W-3000 Shown
(not included)
Adapter Panel #2
(included)
VE-9x12 Box
(included)
(4) 8-32 x 3/8 black cap
screws (included)
(4) 8-32 x 3/8 black cap
screws (included)
(4) 8-32 x 3/8 black cap
screws (included)