724-746-5500 | blackbox.com
Page 22
724-746-5500 | blackbox.com
Chapter 6: VideoPlex4 Control Application
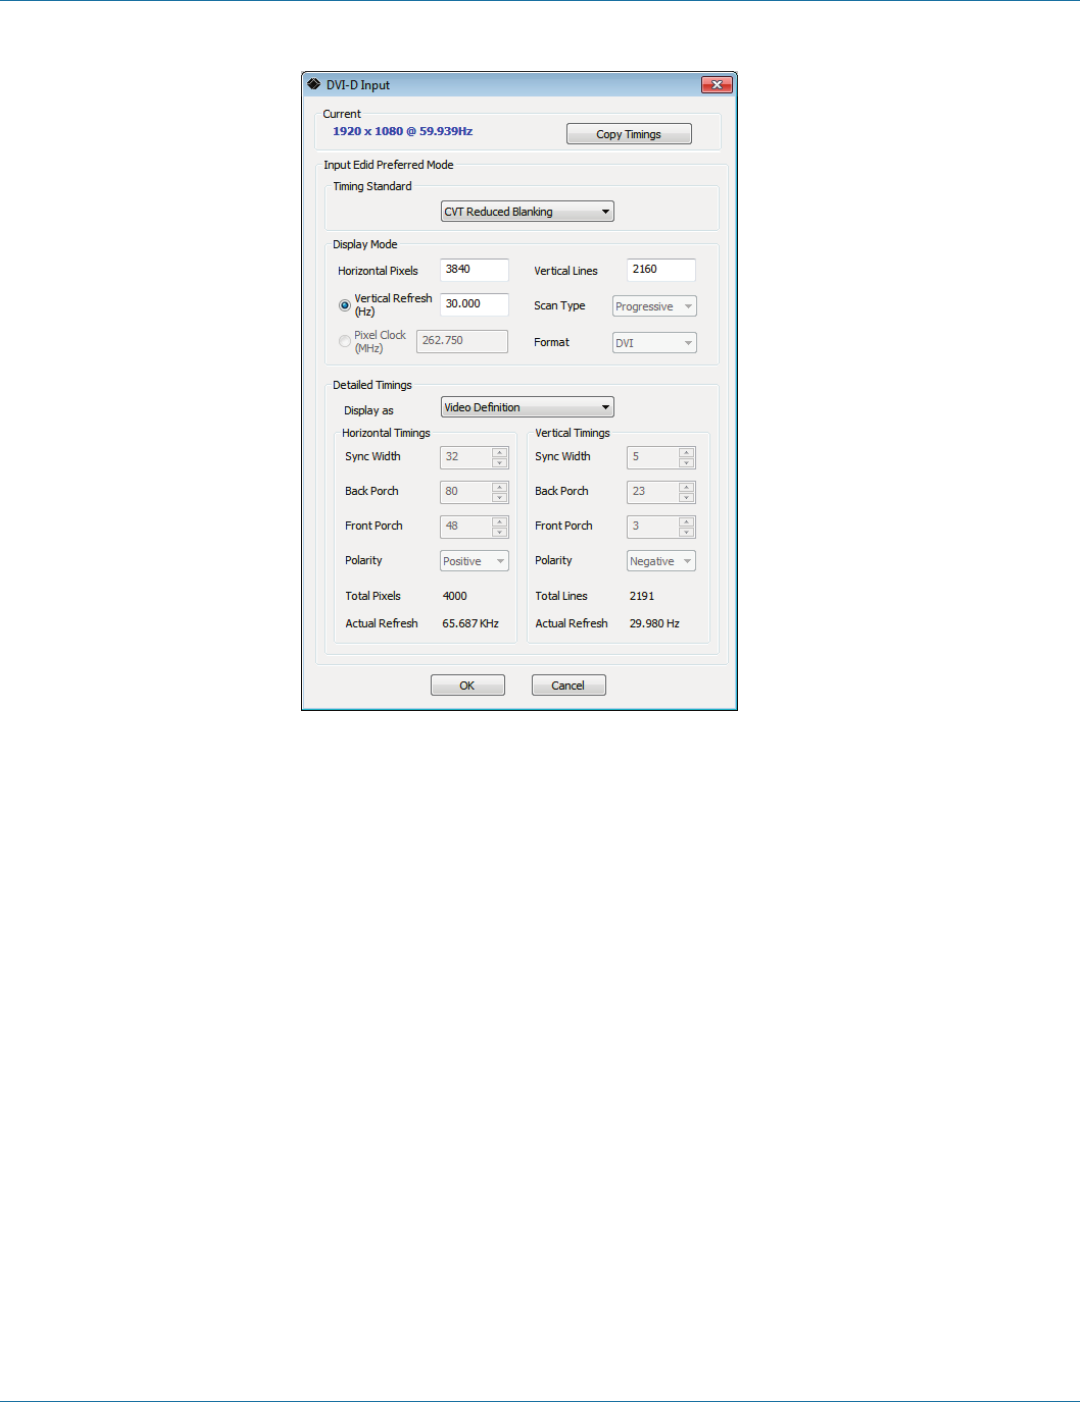
Figure 6-5. DVI-D input dialog box.
The DVI-D Input dialog displays the resolution of the current mode for reference and allows the timings of the EDID preferred
mode to be edited. To populate the EDID timings with the current timings, click on the Copy Timings button.
The dialog supports standard timing formulas such as:
• VESA CVT
• VESA CVT Reduced Blanking
• SMPTE (for HD modes)
• VESA GTF
• Custom
Selecting “Auto” from the drop-down list will typically default to the VESA CVT algorithm that best matches typical standard
VESA output modes. However, to minimize dot clocks and hence maximize DVI cable lengths, we recommend using the CVT
Reduced Blanking.
Selecting “Custom” allows the timing parameters to be edited.
NOTE: You will need to select between definition of Pixel Clock or Vertical Refresh, since these are mutually exclusive parameters.
Once edited, clicking “OK” writes the preferred mode into the EDID but may not normally affect the input mode that is being
captured. You might need to force the graphics device in the host machine to detect the new modes. Just select “Detect” on the
Screen Resolutions dialog box (Windows 7) or disconnect the source from the VideoPlex4 and reconnect.
All modifications to the Input settings can be saved as part of a .vqs file, removing the requirement to input the same settings
again. To save the settings, select the “Save” command in the File menu. To open a saved .vqs file, select the “Open” command.


