Before first use
Rating plate
• This is usually situated on the front frame
of the appliance and can be seen upon
opening either of the oven doors. Alterna-
tively the rating plate may also be found on
the back or top of some models (where
applicable).
• The appliance must be protected by a suit-
ably rated fuse or circuit breaker.
• The rating of the appliance is given on the
rating plate.
• Do not remove the rating plate from the
appliance as this may invalidate the guar-
antee.
Preparing to use your appliance
• Wipe over the base of the oven(s) with a
soft cloth using hot soapy water. Wash the
furniture before use.
• We suggest that you run the oven(s) and
grill for 10 – 15 minutes at maximum tem-
perature, to burn off any residue from their
surfaces.
Warning! Accessible parts may
become hotter than in normal use.
Children should be kept away.
• During this period an odour may be emit-
ted, it is therefore advisable to open a win-
dow for ventilation.
The cooling fan for the controls
• The cooling fan comes on immediately
when the grill/top oven is switched on and
after a short time when the main oven is in
use. It may run on after the controls are
switched off until the appliance has
cooled.
• During the initial period the cooling fan may
turn on and off, this is quite normal.
Warning! Always allow the cooling fan
to cool the appliance down before
switching off at the wall prior to carrying
out any cleaning or maintenance work.
Condensation and steam
• When food is heated it produces steam
similar to a boiling kettle. The vents allow
some of this steam to escape. However,
always stand back from the appliance
when opening the door(s) to allow any
build up of steam or heat to release.
• If the steam comes into contact with a cool
surface on the outside of the appliance,
e.g. a trim, it will condense and produce
water droplets. This is quite normal and is
not caused by a fault on the appliance.
• To prevent discolouration, regularly wipe
away condensation and foodstuff from
surfaces.
• For your safety wall coverings at the rear
of the appliance should be securely fixed
to the wall.
Cookware
• Do not use baking trays larger than 30cm
x 30cm (12" x 12") as they will restrict the
circulation of heat and may affect perform-
ance.
Operation
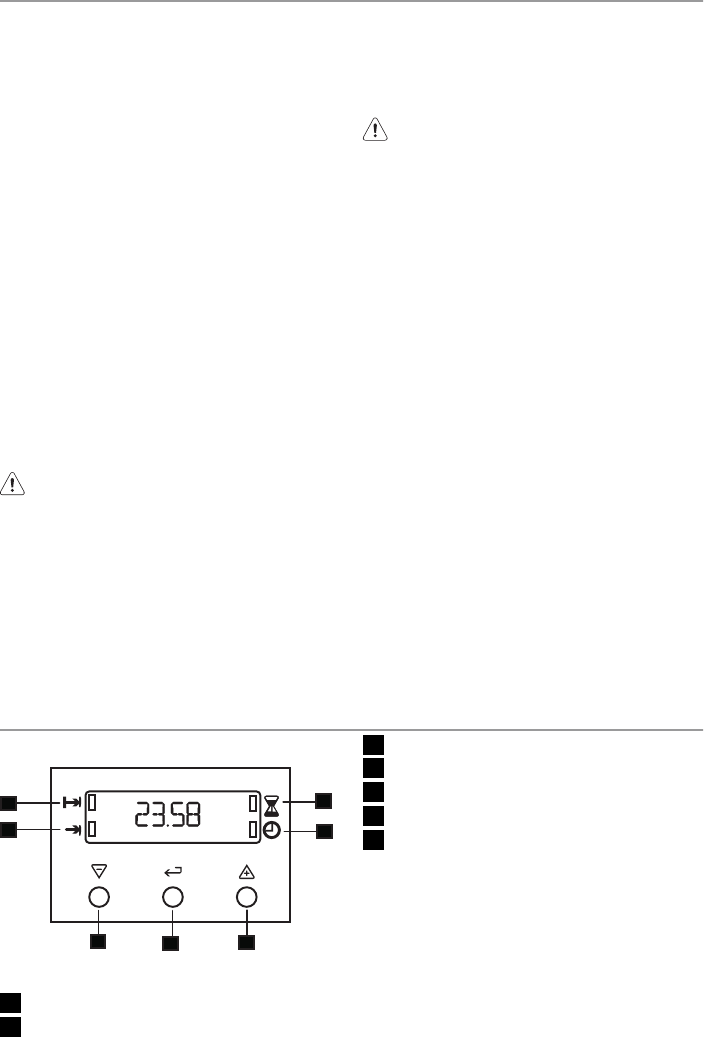
The timer
G
D
C
B
A
1
2
3
4
5
6
7
Key
1 Cook time
2 End time
3 Countdown
4 Time
5 Decrease control
6 Selector control
7 Increase control
How to set the time of day
The oven has a 24 hour clock. When the
electricity supply is first switched ON, the
display will show 12.00 and the 'Time' indi-
cator neon will flash.
To set the correct time press the increase
control button (+) and if necessary, the de-
crease control button (-) until the correct time
on the 24 hour clock is reached.
electrolux 5
