22
Installation of the Healthy Home System™ Control (HHSC)
Choose a Location
The HHSC controller can be installed anywhere in your
home. To simplify the installation, locate the HHSC control
near the HVAC system and/or the HRV/ERV, since the
HHSC does not require routine adjustment or occupant
interaction.
To provide the occupants with direct access to the functions
of the controls, install optional accessory controls
throughout the house.
How To Install the Controller
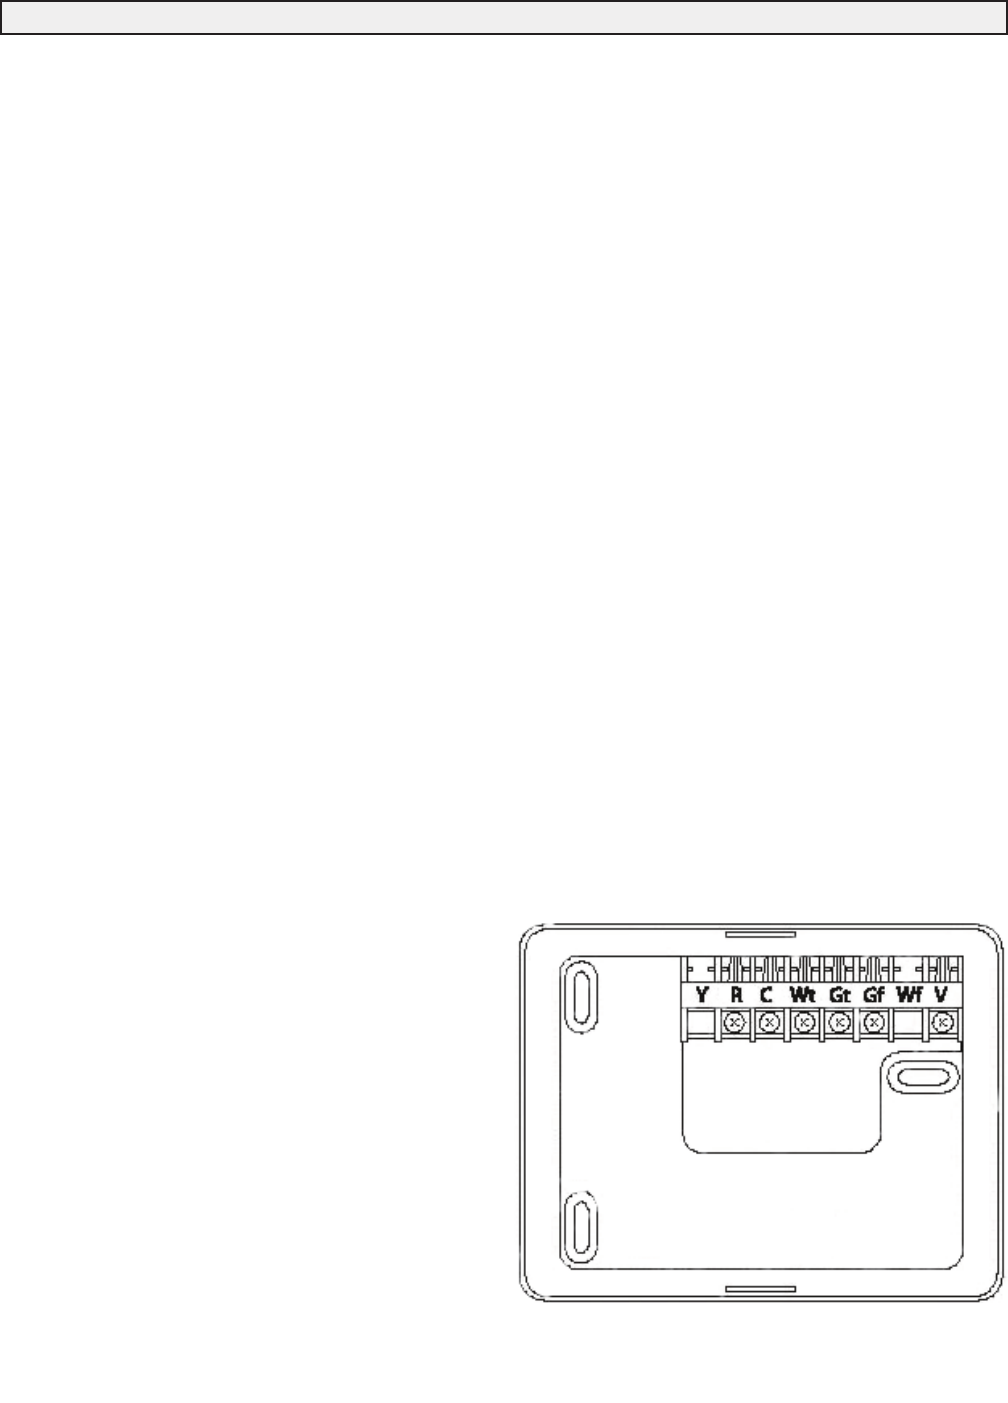
1. Separate the HHSC controller cover from the wall plate
(mounting base) to expose mounting holes
(see illustration).
2. Route wires through large hole in the mounting base.
Mount base against wall and mark wall through
3 mounting holes.
3. If mounting on a metal or wood surface, drill three 1/8-in.
pilot holes in wall where marked for the supplied
mounting screws. If mounting on drywall or other
surface, drill appropriate holes for wall anchors or other
means of attachment.
4. Secure mounting base to wall with either the 3 screws
provided or other fasteners, while ensuring that all wires
extend through the hole in mounting base.
5. Adjust length and routing of each wire to reach the
proper terminal and connector block on mounting base,
while leaving a 1/4 in. length of extra wire. Strip only
1/4 in. of insulation from each wire to prevent adjacent
wires from shorting together when connected.
6. Connect wires to their respective terminals on the
connector block. (Figure 1) Both (R) and (C) must be
connected for proper operation. Improper wiring or
installation may damage the controller. Ensure wiring is
correct before proceeding with installation or turning the
unit on.
7. Push any excess wire into wall and against mounting
base.
8. Snap cover onto base, while ensuring pins align with
sockets in connector.
9. Once powered the HHSC automatically enters into
operating mode.
Complete the Wiring Connections
1. Refer to subsequent wiring diagrams in this manual
that correspond to the desired control configuration.
NOTE: Disregard any wiring schematic(s) included with the
HHSC Control Installation Instructions that do not pertain to
HRV/ERV control. The HHSC is also typically used to
control an FAD fresh air damper.
2. Complete all wiring connections before restoring power
to the HVAC system and HRV/ERV.
Programming the HHSC Control
1. Balance the fresh and stale airflows as instructed in this
manual.
2. Determine the cfm flow rate as instructed in this manual.
3. To obtain the desired rate of fresh air exchange, refer to
the HHSC Control Installation Instructions to determine
the On/Off timer settings for the HHSC Control. Use the
cfm flow rate determined in step 2 as the computed or
measured fresh air flow rate (as calculated in the HHSC
instructions). To ensure adequate ventilation, ensure that
the “Fan On” time is equal to or greater than the “Vent
On” time, as programmed in the HHSC Control.
4. For continuous operation of the HRV/ERV, set
“Fan On” and “Vent On” to “Un” (unlimited), and “Fan
Off” and “Vent Off” to any setting except “Un”. This
setting also causes the HVAC fan to run continuously.
NOTE: The HHSC Control is factory programmed with the
default settings of the two On/Off timer values. No
configuration is required to use these factory default
settings.
Default settings:
FAN OFF 20 minutes
FAN ON 10 minutes
VENT ON 10 minutes
VENT OFF 20 minutes
Illustration of HHSC Control with cover off
