KK-C-VAK_INST_10-07
Always!
Read all instructions before installing any Havis-Shields Equipment Corp products.
Check for obstructions (Wire, brake lines, fuel tank, etc.) before drilling any holes!
Use hardware provided with install kit
For product support, visit the Install Instructions Section of our website at
http://havis.com/Installation/Installation.html, email technicalsupport@havis.com or call
1-800-524
Note: This procedure must be done PRIOR to the Kwik Kit installation and is
recommended to check the flow of Air through the hoses prior to installation of Kwik-
Kit unit.
SUBASSEMBLY:
1. Remove all necessary parts from shipping packages and verify parts.
2. Remove AC and Heat plastic vents from OEM - HVAC blower ducts.
3. If vehicle has full rear trim, you must remove trim panels around the OEM - HVAC unit
including ductwork / headliner. NOTE: The front portion of headliner can be cut off and reused
as front ceiling trim after complete kit is installed.
INSTALLATION:
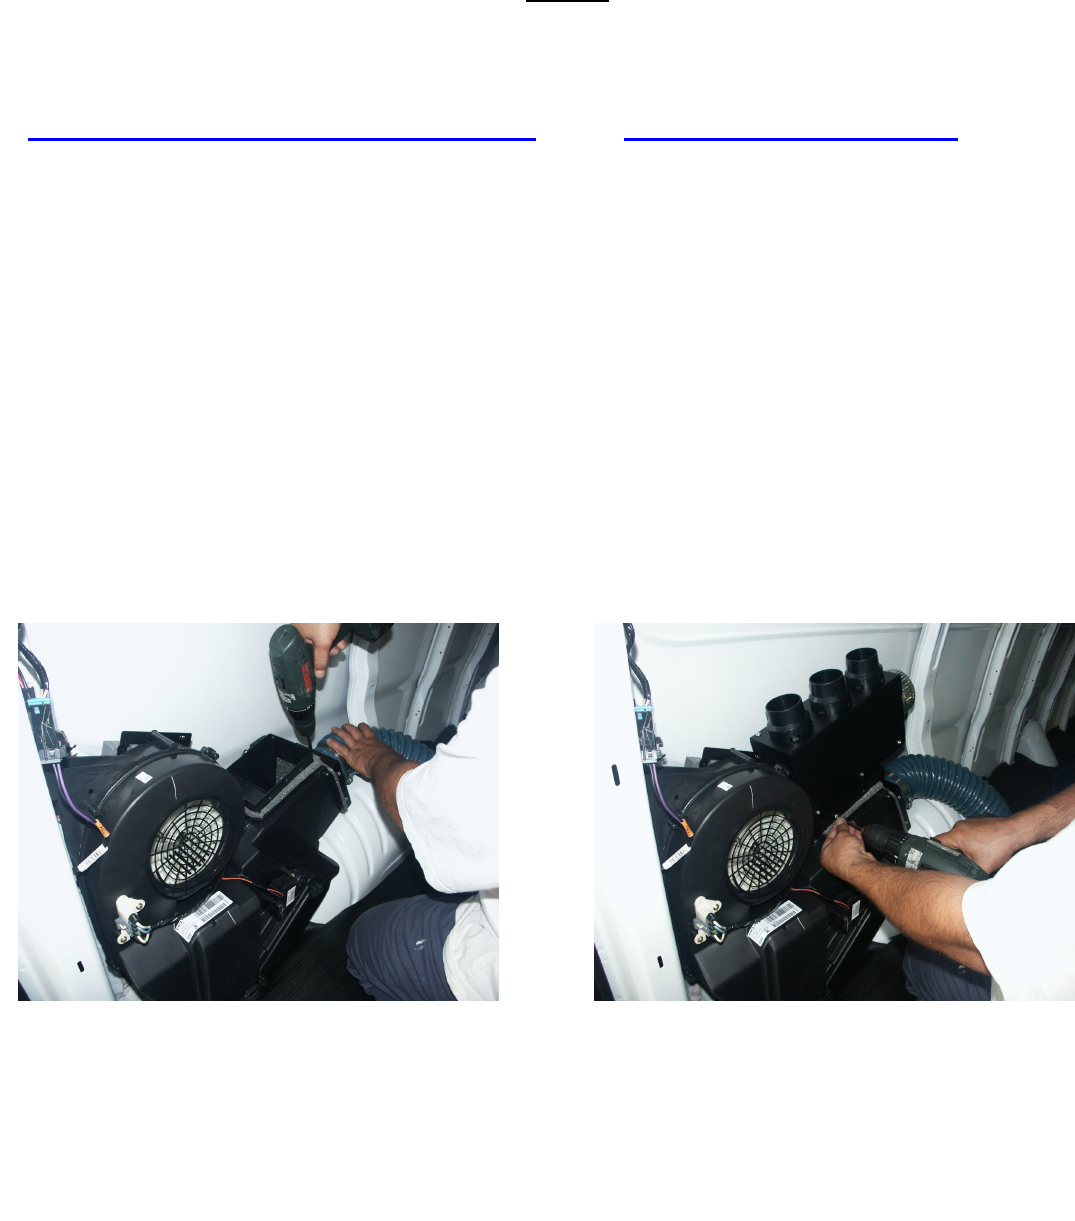
Connect Plenum (rectangle blower adaptor)
to the O.E.M
. blower ducts using #10 x ¾”
Sheet Metal Screws and #10 star washers
.
There are two (2) ducts on the factory HVAC
unit. One at rear is for air conditioning and
one forward is for heat. The 4” blue hose
connects heat into the new plenum.


