7
FUNCTIONAL
DESCRIPTION
CAUTION:
• Always be sure that the tool is switched off and
unplugged before adjusting or checking function on the
tool.
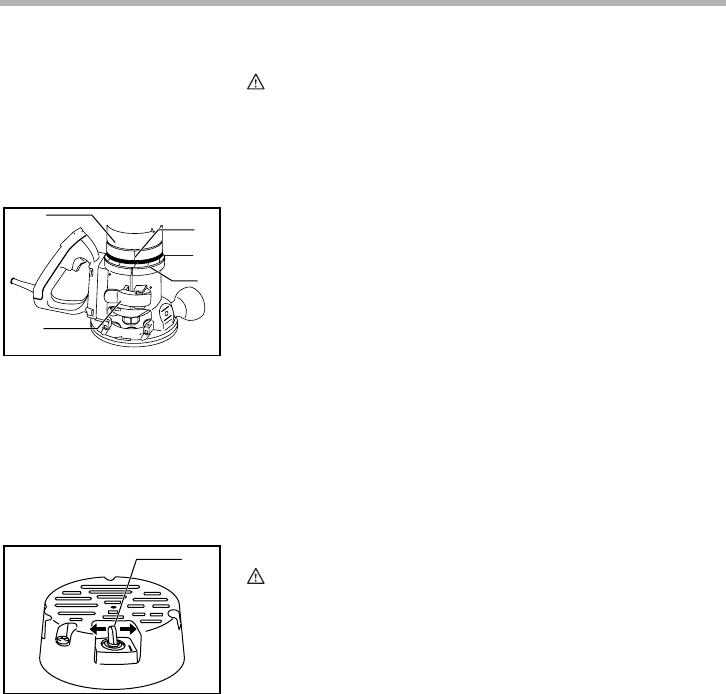
Adjusting the depth of cut
Place the tool on a flat wood surface. Open the lock lever.
Turn the motor unit until the bit just touches the flat surface.
Close the lock lever.
Rotate the scale ring until the zero-line is on the index line on
the motor unit. One graduation on the scale ring means the
cutting edge of the bit is exposed 1/64” below the base.
While holding up the base slightly, open the lock lever and
turn the motor unit clockwise until the index line on the motor
unit reaches the desired depth indicated on the scale ring.
Close the lock lever firmly.
Switch action
For RF1100 and RF1101
CAUTION:
• Before plugging in the tool, always check to see that the
tool is switched off.
• Switch can be locked in “ON” position for ease of
operator comfort during extended use. Apply caution
when locking tool in “ON” position and maintain firm
grasp on tool.
To start the tool, move the switch lever to the I (ON) position.
To stop the tool, move the switch lever to the O (OFF) posi-
tion.
1. Motor unit housing
2. Index line
3. Scale ring
4. Graduation
5. Lock lever
1
2
5
8
3
4
3
8
1
4
1
2
3
4
5
003653
1. Switch lever
0
1
OFF
ON
003661
