MODELS: WD-57733 / WD-65733 / WD-73733 / WD-57734 / WD-65734 / WD-73734 / WD-C657
WD-Y577 / WD-Y657 / WD-57833 / WD-65833 / WD-73833
Page 33
2. Manual Keystone Geometry Alignment (There are 2 modes of adjustment: FULL and TOUCH UP)
FULL ADJUSTMENT MODE: Part 1
(
Note: if data is out of range, you may need to do a reset before starting - press “1” then “INFO”)
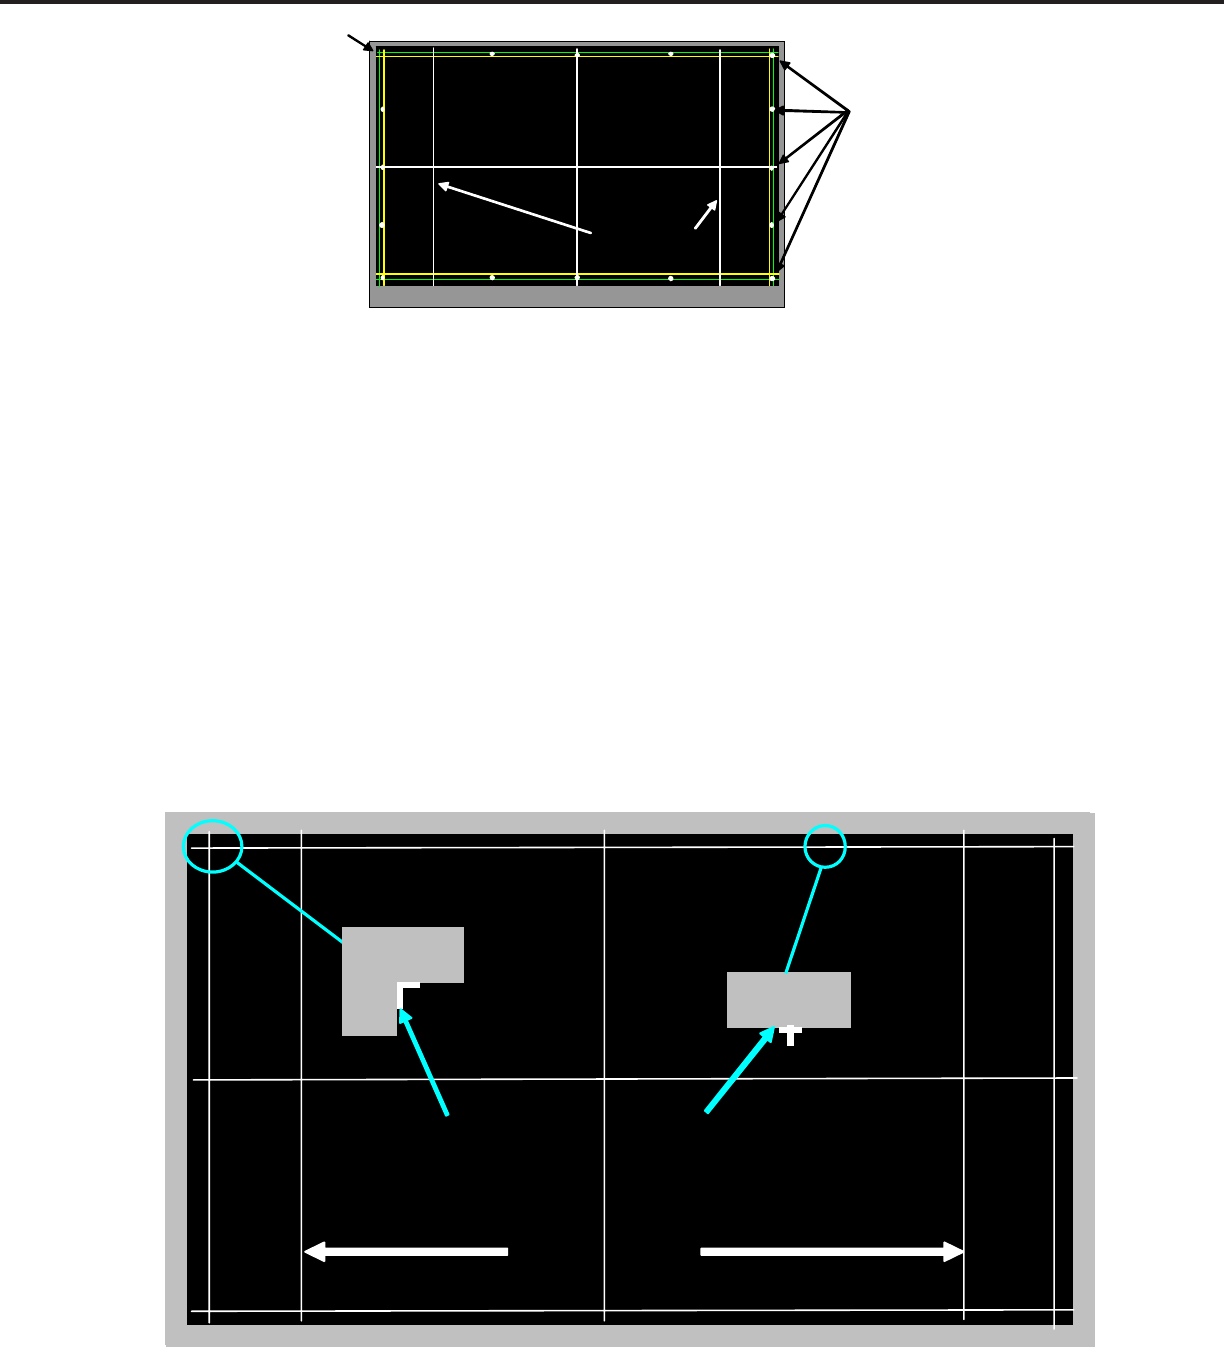
1. When entering the Keystone Adjustment mode you will see the test pattern as shown in the drawing above.
The point in the upper left corner will be a cross.
2. Starting from the 1st point (upper left corner) use the “UP/DOWN/LEFT/RIGHT” buttons to adjust the
selected point (selected point is the one that is a cross)
3. Align each point in a straight line, use the bezel as a reference. See example drawing below.
NOTE: Only the cross will move. The pattern will not change.
4. Use “FASTFORWARD” button to move between each point or “REWIND” to go back.
Part 2
5. After all 16 points are aligned properly, pressing the “FASTFORWARD” button again automatically activates
the 4:3 mode (there is no change in the display). There are 11 patterns, each with a small variation of
distortion in the 4:3 mode vertical lines. Continue pressing “FASTFORWARD” to cycle through the 11
patterns until you find the straightest 4:3 lines, then go to step 6.
6. Press the “ENTER” button to save the adjustment and “EXIT” to leave the Adjustment Mode..
Note: There will be no indication that the save was successful.
Pressing “FASTFORWARD” will cycle through 11 different geometry options. Select the
straightest option by pressing “ENTER”
Adjustment Points
(16 Total)
Cursor
+
4:3 Mode Lines
¦
¦¦¦
¦
¦¦
¦
¦
¦
¦
¦
¦
¦
¦
®
4:3 Mode Lines
Part 2
Match same pattern
Move cursor so the cross
