ENGLISH
– 63
Basic Operation
OFF:•
Geometry correction is not performed.
KEYSTONE:•
This adjusts projected images when they are
distorted to a trapezoid.
CURVED:•
This adjusts projected images when they are
distorted to a curved surface.
PC:•
This is for performing geometry correction from a PC.
Select “KEYSTONE” or 3.
“CURVED” in Step 2, and then
press ENTER.
The “GEOMETRY:KEYSTONE” or •
“GEOMETRY:CURVED” screen will be
displayed.
GEOMETRY:KEYSTONE
VERTICAL KEYSTONE
VERTICAL SUB KEYSTONE
0
0
GEOMETRY:CURVED
LENS THROW RATIO
VERTICAL KEYSTONE
0
0
Press ▲▼ to select the desired 4.
adjustment item, and press ◄►
to adjust the correction amount.
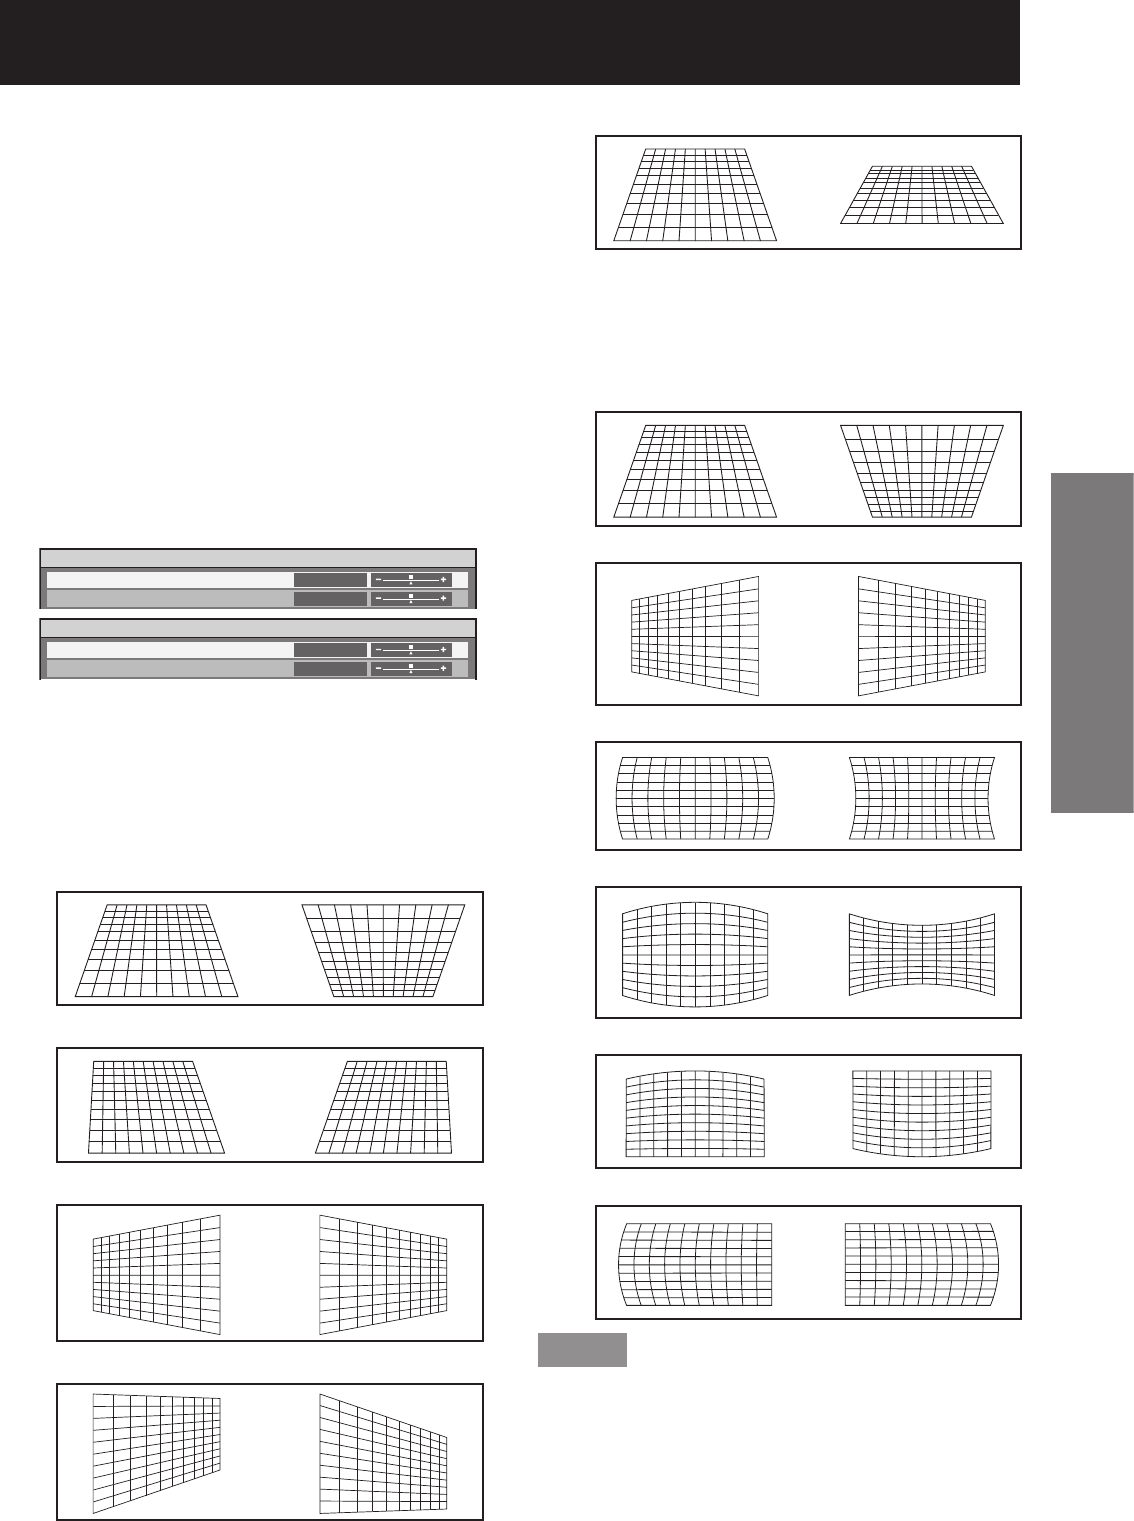
You can adjust the projection images as shown •
below.
KEYSTONE menu:
VERTICAL KEYSTONE•
VERTICAL SUB KEYSTONE•
HORIZONTAL KEYSTONE•
HORIZONTAL SUB KEYSTONE•
LINEARITY•
CURVED menu:
LENS THROW RATIO•
Set to the throw ratio being used (the
projection distance divided by the screen
width). (pp. 22-24)
VERTICAL KEYSTONE•
HORIZONTAL KEYSTONE•
VERTICAL ARC•
HORIZONTAL ARC•
VERTICAL BALANCE•
HORIZONTAL BALANCE•
Note
If vertical keystone correction is set, menus and logos •
may be projected outside of the actual image area.
If both edge blending adjustment and geometry •
correction are used, set the geometry correction
to curved-surface correction or PC. If geometry
correction is set to keystone-distortion correction,
edge blending adjustment cannot be made
correctly. (p. 66)


