Using an External Hard Disk
38
Preparations
To restore a card
Select “Execute” by turning the jog dial or
tilting the joystick then push the dial or
joystick.
The restore operation begins.
During restoration, the in-progress message and
status bar (%) are displayed, and the ACCESS
lamp is lit in red.
When restoration is completed, the completion
message is displayed for three seconds.
If restoration fails
•A write-protected SxS memory card or one on
which an error occurred cannot be restored. For
such a card, a warning message is displayed.
Release the write protection or replace the card,
as per the instructions in the message.
• An SxS memory card on which an error
occurred may become usable again through
repeated formatting.
• In some cases, only parts of clips cannot be
restored. Playback of the restored clips becomes
possible again.
• The following operation may restore an SxS
memory card for which the message “Could not
Restore Some Clips” is repeatedl
y displayed
each time you try the restoration process:
1 Copy necessary clips to another SxS memory
card, using the copy function (page 103) of
the camcorder or the XDCAM EX Clip
Browsing Software (page 137).
2 Format the problem SxS memory card, using
the format function of this camcorder.
3 Return the necessary clips to the SxS
memory card by copy operation.
Recording/playback during restoration
You can perform recording or playback using the
SxS memory card in the other card slot while
restoration is in progress.
You can use an optional PHU-60K, PHU-120K,
or PHU-120R Professional Hard Disk Unit with
this camcorder.
Notes
•High-speed playback (page 98) may not be
properly achieved with the PHU-60K/120K/
120R.
•Slow & Quick Motion recording (page 75)
cannot be made with the PHU-60K/120K/120R.
Recording/playback can be made using the PHU-
60K/120K/120R in the same manner as with SxS
memory cards if you connect the PHU connection
cable of the PHU-60K/120K/120R to an SxS
memory card slot of the camcorder.
Mounting the hard disk unit on the
camcorder
By using the cold shoe kit (an auxiliary shoe, four
screws, and a bottom plate) supplied with the
camcorder, you can mount the hard disk unit on
the rear accessory shoe of the camcorder.
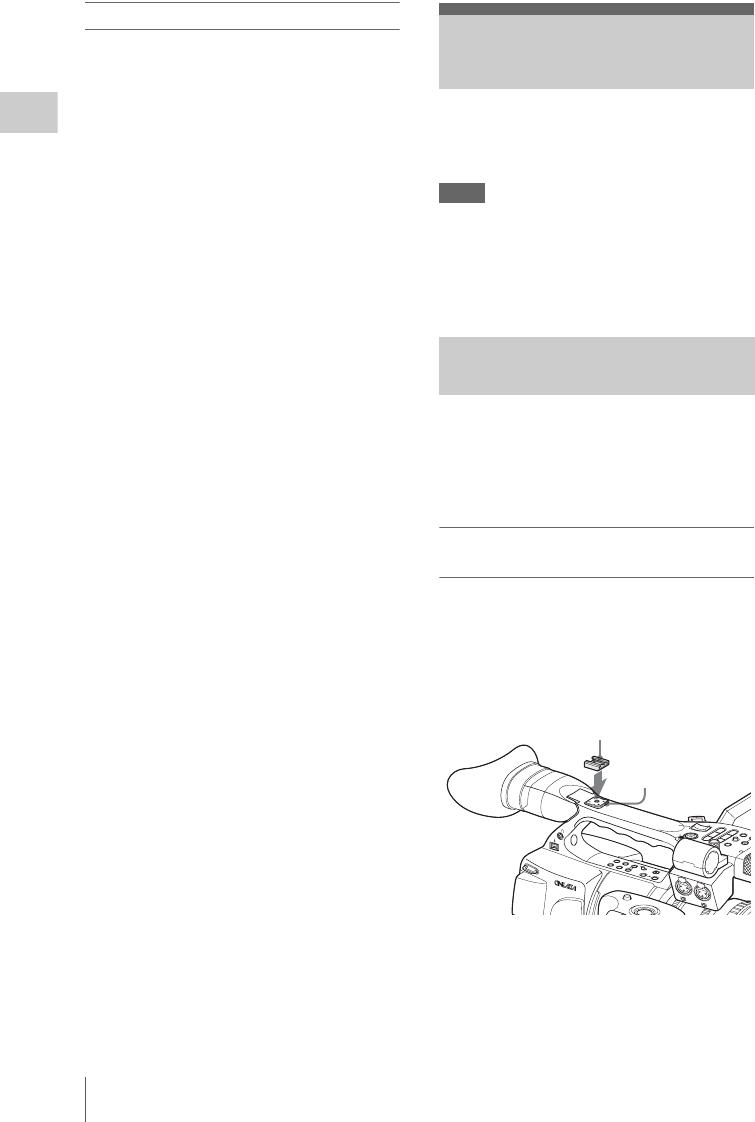
Mount the auxiliary shoe on the rear accessory
shoe.
1 Place the auxiliary shoe on the rear
accessory shoe and secure it with the
four screws.
Using an External Hard
Disk
Attaching/Removing the PHU-60K/
120K/120R
C
O
M
P
O
N
E
N
T
O
U
T
A
/V
O
U
T
H
D
M
I O
U
T
H
D
V
/
D
V
A
S
H
O
T
T
R
A
N
S
I
T
I
O
N
B
L
C
D
B
.
L
I
G
H
T
T
C
/
U
-
B
I
T
/
D
U
R
A
T
I
O
N
L
C
D
B
R
I
G
H
T
S
T
A
T
U
S
B
A
R
S
/
C
A
M
D
I
S
P
L
A
Y
B
A
T
T
I
N
F
O
O
N
H
U
M
N
A
I
L
F
R
E
V
P
R
E
V
S
E
L
/
S
E
T
P
L
A
Y
/
P
A
U
S
E
S
T
O
P
C
A
N
C
E
L
F
F
W
D
N
E
X
T
R
E
C
S
T
A
R
T
/
S
T
O
P
H
O
L
D
l
s
L
j
G
/
S
J
H
L
O
F
F
R
T
W
A
U
D
I
O
I
N
C
H
-1
M
IC
L
IN
E
M
IC
+
4
8
V
M
IC
L
IN
E
M
IC
+
4
8
V
C
H
-2
RELEAS
E
S
T
A
R
S
T
O
P
Rear accessory
shoe
Auxiliary shoe


