5.
4.
Perfectly Frank’s Snack Shack Use and Care Guide
8.
9.
10.
11.
12.
6.
1.
5.
3.
2.
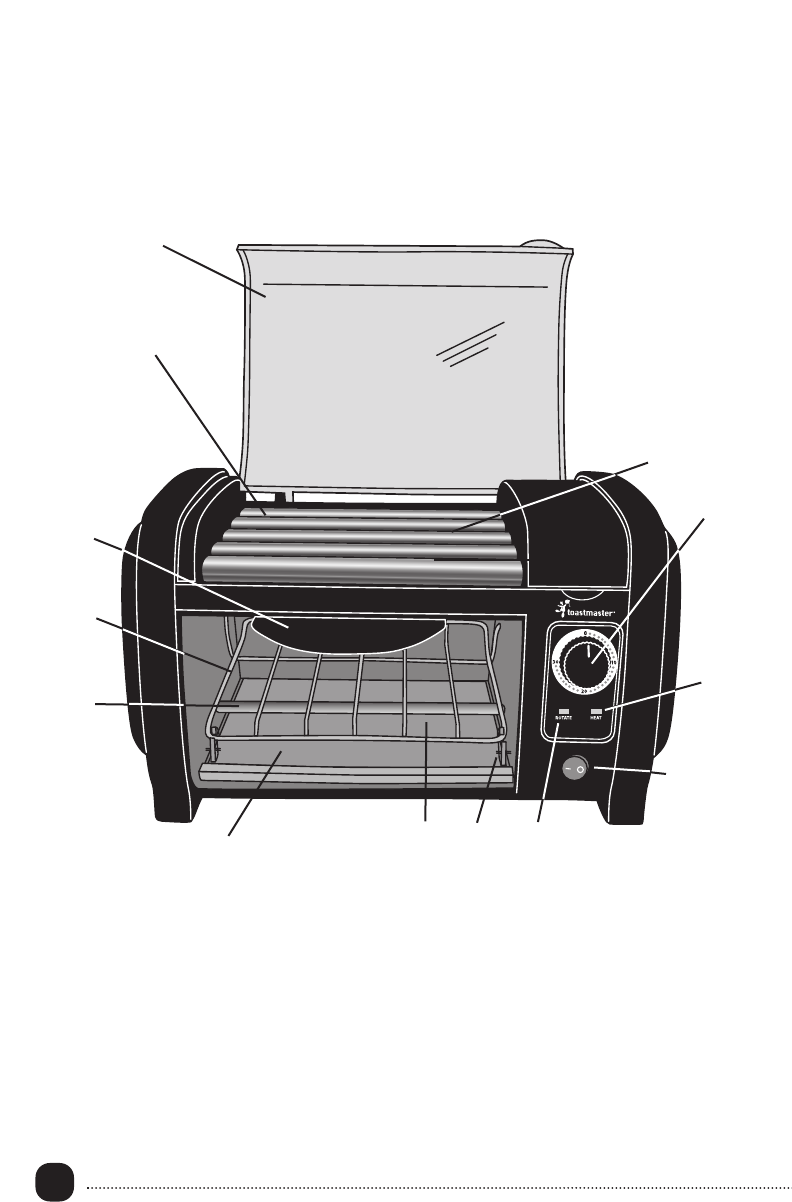
1. Lid with Handle
(P/N 22803)
2. Rollers
3. Door Handle
4. Wire Rack
5.
Lower Heating Element
6. Crumb Tray
(P/N 22805)
7. Door with Wire Rack Guides
8. Wire Rack Guide Hooks
9. ROTATE Light
10. Rotate Switch
11. HEAT Light
12.
T
imer Control Dial
13. Grill Cavity
Getting to Know Your Toastmaster
®
Perfectly Frank’s Snack Shack
Your product may vary slightly from illustration.
4.
OPERATING INSTRUCTIONS
Before the First Use
1. Carefully unpack your appliance and remove all packaging materials.
2. Place your appliance on a level surface such as a countertop or
tabletop. Be sure the sides, back, and top of the appliance are at
least 4 inches away from any walls, cabinets, or objects on the
counter or table.
3. Remove all stickers from the appliance except the rating label
located on the back.
4. Remove any dust that may have accumulated during packaging by
simply wiping the appliance exterior with a clean, damp cloth.
5. Do not use abrasive cleansers.
6. Do not immerse the appliance, cord or plug in water.
7. Wipe the Lid with a clean, damp cloth; or remove it by opening the
Lid to a 45° angle and pull the right side out and then the left side.
Wash in warm, soapy water, rinse and dry thoroughly. To replace
the Lid, insert the tab on the left side of the Lid into the hinge on
the back left side of the unit. Then slide in the tab on the right
side of the Lid into the hinge on the back right side of the unit.
8.
Wipe the Rollers with a clean damp cloth and dr
y thoroughly
.
NOTE: The
Rollers and the
Lower Heating
Element will
heat as long as
the Timer
Control Dial
is set to
desired time.
14. Drip Tray (P/N 22806)
15. Bake Pan (P/N 22807)
7.
13.
14.
13.
