


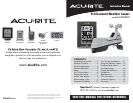
1716
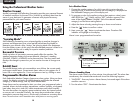
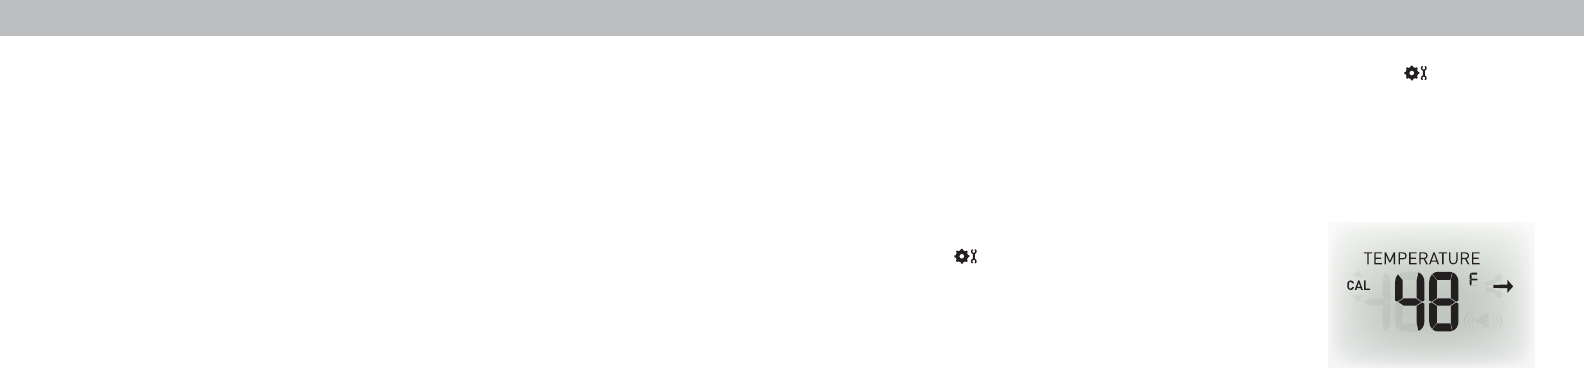
2. Press AND HOLD the up and down arrow buttons and the “ ” button all
at the same time for 15-20 seconds.
• The display unit beeps, and all display data is hidden except for the
value being calibrated.
• “CAL” (calibrate) and arrows appear next to the value being calibrated.
3. Press the up or down arrow buttons to calibrate the data value higher or
lower from the actual reading.
4. Press the “ ” button to confirm the calibration
adjustment. Note: The “CAL” icon remains
illuminated next to calibrated values.
Calibrate the Rain Gauge
The rain gauge on the 5-in-1 sensor can be calibrated to improve accuracy.
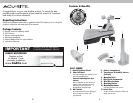
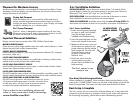
Items Needed: 5-in-1 sensor, display unit, plastic cup, pin, screw driver
1. First, ensure 5-in-1 sensor is perfectly level using built-in bubble level.
2. Place display unit close so you can monitor it during calibration.
3. Make a pin hole in the bottom of a plastic cup. Hold the cup over the rain
gauge and fill it with exactly 1 cup (8oz.) of water, allowing the water to
drip into the rain gauge. You should hear the internal buckets tip and see
water drain through the rain gauge.
4. A few seconds after each bucket tip, the display unit displays rainfall in
approximately 0.01" or more increments.
5. The cup of water should take more than 10 minutes to empty; a quicker
period will result in inaccurate calibration. Try to simulate a normal steady
rainfall. When cup is empty of water, display unit should register 1.06"
Tips
• There should be nearly an equal number of water drops (about 25 water
drops) between bucket tips. If not, adjust the calibration screws on the
bottom of the 5-in-1 sensor until an equal number of water drops are tipping
the buckets. Then, restart the calibration procedure.
• If you don't hear the buckets tipping and see water dripping alternately out
of each drain, there may be an issue with the rain gauge or it's adjustment.
See Troubleshooting on page 15.
Adjustment
If the rain gauge doesn't register close to 1.06", make an EQUAL adjustment to
the two calibration screws on the bottom of the 5-in-1 sensor. Turning screws
clockwise increases rainfall; counter clockwise decreases rainfall.
• To adjust the rainfall reading by 2% turn both screws 1/8 of a turn.
• To adjust the rainfall reading by 4% turn both screws 1/4 of a turn.
• To adjust the rainfall reading by 8% turn both screws 1/2 of a turn.
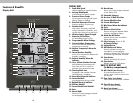
Care & Maintenance
Display Unit Care
Clean with a soft, damp cloth. Do not use caustic cleaners or abrasives. Keep
away from dust, dirt and moisture. Clean ventilation ports regularly with a
gentle puff of air.
5-in-1 Sensor Care
Clean The Sensor
Clean with a soft damp cloth. Do not use caustic cleaners or abrasives that will
mar the polished surfaces of the rain collection funnel or the solar cell.
Scratches will result in decreased performance and reliability.
Insect Prevention
Insects may cause obstructions and interrupt data by nesting in or on the 5-in-1
sensor. To limit this problem, spray sensor with a household insect repellent.
Consult the insect repellent instructions prior to use.
Snow & Freezing Weather
The 5-in-1 sensor will not be damaged by freezing conditions. NOTE: If the rain
collector cup fills with snow and then melts, it will register as rain on the
display unit.
Clean The Rain Collector Cup
Remove and empty rain collector debris filter. The debris filter is located in the
rain collector funnel. Remove from the top by gently squeezing and pulling out.
Clean the Wind Vane & Anemometer
Remove foreign matter from the outside of the sensor for free movement of the
wind vane and anemometer. If needed, use a small amount of spray lubricant,
clear silicone or graphite powder on the anemometer for improved movement.
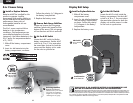
Calibration
Calibrate Temperature & Humidity
The indoor / outdoor temperature and humidity readings can be calibrated on
the display unit to improve accuracy. Calibration improves accuracy when
5-in-1 sensor placement or environmental factors impact your data accuracy.
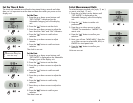
1. Choose the weather category you wish to calibrate by pressing the up or
down arrow buttons until the category is displayed on the Selectable
Category part of the display unit.