


901268-01D
7
7
For more information, visit www.desatech.com
For more information, visit www.desatech.com
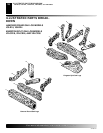
INSTALLATION
Hearth Pan Installation (Cont.)
INSTALLATION
Continued
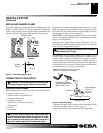
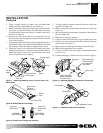
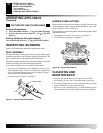
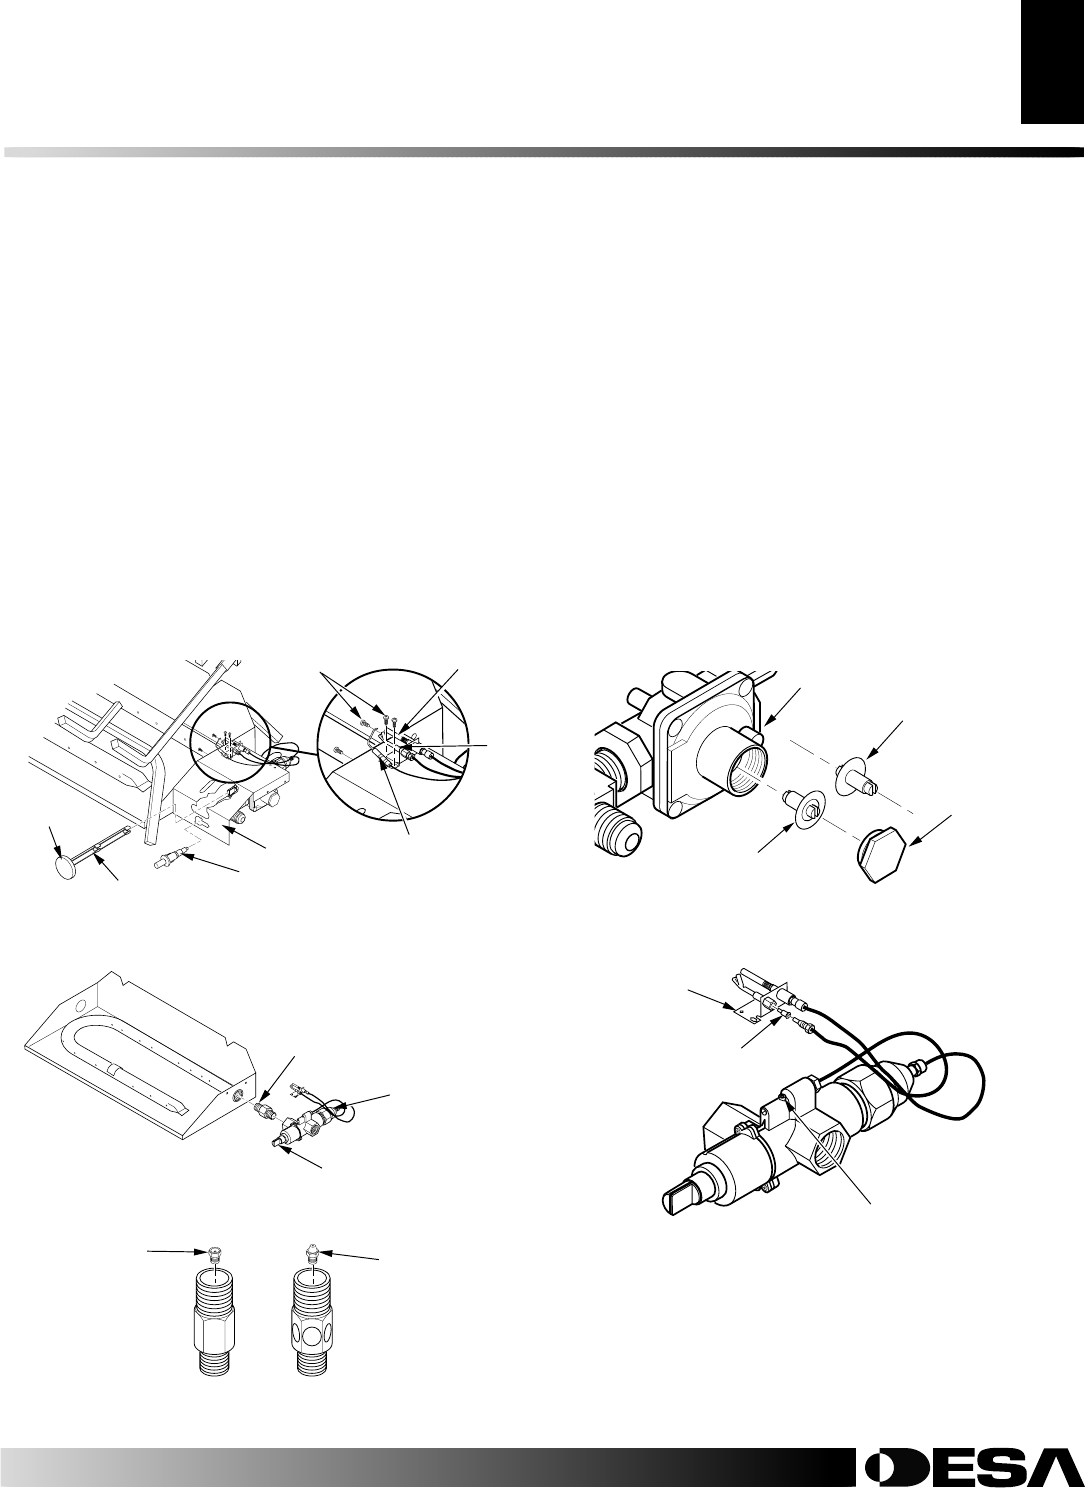
Piezo Ignitor
Control Rod
Extension
Screw
Valve Cover
Control
Knob
Figure 7 - Removing/Installing Cover, Control Knob, and
Piezo Ignitor
Thermocouple
Ignitor
Pilot
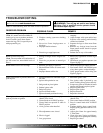
Figure 8- Remove Burner Inlet Fitting
Burner Inlet
Fitting for
Natural Gas
Figure 9 - Burner Inlet Fittings with Injectors
NATURAL
GAS FITTING
PROPANE/LP
GAS FITTING
Injector for
Natural Gas
Injector for
Propane/LP
Gas
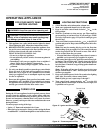
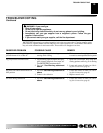
Figure 10 - Adjusting Regulator Pressure for Conversion
Reversed Plastic
Pressure Button
for Propane/LP
Conversion
Plastic Pressure
Button Positioned
for Natural Gas
Regulator
Brass Plug
4. Using a wrench, remove gas control valve and burner inlet
fitting by turning counterclockwise (see Figure 8).
5. Remove the burner inlet fitting from the gas control assembly
(see Figure 8). DO NOT remove the orifice from this fitting.
The propane/LP burner inlet fitting is included in the hard-
ware kit (see Figure 9).
6. Be sure to use the correct orifice for your appliance. The ori-
fice kit included with this appliance contains an orifice installed
in an air mixer fitting.
7. Using thread sealant (resistant to the action of propane/LP gas) on
smaller end of fitting, screw the burner inlet fitting into the outlet
side of the gas control (see Figure 8). Tighten using a wrench.
8. Thread gas control valve and burner inlet fitting into burner
manifold (see Figure 8). Use thread sealant on male threads of
burner inlet fitting. Secure with a wrench. Make sure control
rod is facing the front (see Figure 8).
Figure 11 - Installing Propane/LP Pilot Orifice
Pilot Injector
Pilot Adjustment Screw
Pilot Bracket
9. To adjust regulator pressure, remove the brass hex plug from
regulator (see Figure 10).
10. Remove the plastic pressure button from the brass plug (see
Figure 10).
11. Reverse the plastic pressure button and replace it into the brass
plug (see Figure 10).
12. Replace brass plug into regulator.
13. Using two screws removed in step 2, page 6, replace valve cover.
14. Gently loosen and remove the pilot line connection from the
pilot bracket (see Figure 11).
15. Replace injector with propane/LP injector with red stripe.
16. Replace and tighten pilot line to bracket.
17. Using screws removed in step 2, page 6, reattach pilot bracket
to valve cover.
18. Continue with step 1 under Hearth Pan Installation, page 6.
Control Rod
Control
Valve