8
SPARE PARTS
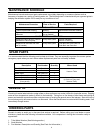
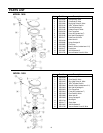
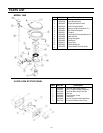
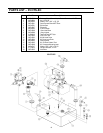
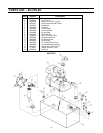
It is recommended that the following parts be kept at all times. They are especially important for vacuum system
emergency repair when you are in areas where replacement parts are not readily available.
MAINTENANCE SCHEDULE
Maintenance intervals and normal parts replacement vary widely depending on numerous factors such as
frequency of system use, quality of flushing water, etc. The following chart is intended strictly as a general guide in
keeping the sanitation system 100% ready for any conditions of use.
Description Part Number Quantity Where Used
Flush Ball Seal
Flush Ball
Water Valve
Vacuum Breaker Assembly
Vacuum Switch Kit
1.5-inch Duckbill Valve Kit
(2 ea. per kit)
see Parts List
see Parts List
see Parts List
see Parts List
see Parts List
310076
1
1
1
1
1
2
Vacuum Toilet
Vacuum Generator
(or Vacuum Pump and
Vacuum Tank)
Maintenance Procedure
Recommended
Date of Service
Parts Required
Toilet flush ball seal cleaning
Tighten toilet seat mounting
hardware
Monthly
Monthly
(or as needed)
SeaLand Bowl and Seal Cleaner
N/A
ROUTINE MAINTENANCE
Replace duckbill valves in vacuum
generator or vacuum pump
Replace flush ball seal and flush
ball (if needed)
Every three years
Every three years
Duckbill Valve Kit:
Item No. 310076 (2)
Flush Ball Seal: see Parts List
Flush Ball: see Parts List
MAJOR SYSTEM MAINTENANCE
ORDERING PARTS
Dometic is ready to assist you in the event that service is required. Before calling your local dealer or parts
distributor, please have the following information available. Your cooperation in having this information ready is
appreciated.
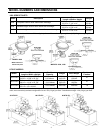
1. Toilet Model Number (See following section.)
2. Serial Number
3. Part Number, Description and Quantity (See Parts List information.)
SERVICE TIP
Checking for water leaks behind or under toilets or other appliances can make it difficult to locate the source. Dripping
water at room temperature makes it difficult to feel wetness. Taking four or five sheets of toilet tissue and wiping all
seams and waterline connections offers a simple means of locating the general area of the leakage. Start at the top of
the unit since gravity will cause a leak to run downward. When the tissue comes in contact with the leaking water, it will
immediately change texture.


