


2 GDL 30/30A Owner’s Manual
InstallIng and actIvatIng the gdl 30/30a
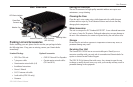
Step 1: Install the unit
Use the GDL 30/30A Installation Instructions to make the appropriate wiring
connections.
Step 2: Set up the XM account
Have your XM Weather ID ready (and XM Radio ID, if applicable). Contact
XM Satellite Radio by phone at 800-985-9200. After providing the required
information, the XM representative activates the account and sends out an
XM signal to activate the GDL 30/30A.
For answers to other XM questions, call the above number or visit
www.xmwxweather.com.
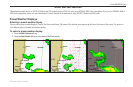
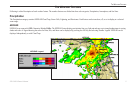
Step 3: Conrm all components of your service package
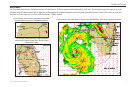
XM WX Weather: Ensure your chartplotter turned on so you receive the
XM signal. The XM signal is received when the components of the selected
service package appear in the Weather Products list. Do not turn off the
chartplotter until the name of the selected service package appears in the
Service Level eld (see page 23).
NOTE: on a 4000 or 5000 series chartplotter, your service package
appears on the system information screen (Congure > System > System
Information > Weather Subscription)
XM Radio: Highlight the Audio sub tab and verify that channels 7, 9, 47,
and 122 are being received (see page 22). This indicates that all channels
on XM’s basic radio service are being received. If within an hour the XM
WX Weather and/or the XM Radio service has not activated, call XM
customer care at 800-985-9200 to refresh the signal.
Step 4: Save the service package
After the service package name appears, turn off the entire marine network
using the chartplotter’s power key.
Step 5: Use your new XM services
When you turn on the GDL 30/30A after completing Step 4, you are ready
to view weather features on the chartplotter and customize the new radio
stations (GDL 30A only).
InstallIng and actIvatIng the gdl 30/30a