


Repair
3A1211M 9
Repair Air Valve
Replace Complete Air Valve
1. Stop the pump at the middle of its stroke. Follow
Pressure Relief Procedure, page 8.
2. Disconnect air lines.
3. See Remove the Shroud, page 8.
NOTE: You do not need to remove the bottom shroud to
replace or repair the air valve.
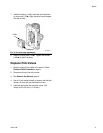
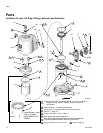
4. See Parts, page 14. Remove screws (18). Remove
the air valve (17) and gasket (16*◆).
5. To repair the air valve, go to Disassemble the Air
Valve, step 1. To install a replacement air valve,
continue with Step 6.
6. Lubricate and align the new air valve gasket (16*◆)
on the manifold.
7. Lubricate the air valve plate (105◆), then attach the
air valve (17). Torque screws to 95-105 in-lb
(11-12 N•m).
8. See Attach the Shroud, page 13.
Replace Seals or Rebuild Air Valve
NOTE:
• Air Valve Seal Kits are available. See page 18 to
order the correct kit for your pump. Parts are marked
with an †.
• Air Valve Repair Kits are available. See page 18 to
order the correct kit for your pump. Parts are marked
with an ◆.
• Air Valve End Cap Kits are available. See page 18 to
order the correct kit for your pump. Parts are marked
with an ✠.
Disassemble the Air Valve
1. Perform steps 1-4 under Replace Complete Air
Valve, page 9.
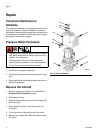
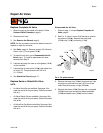
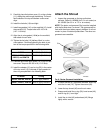
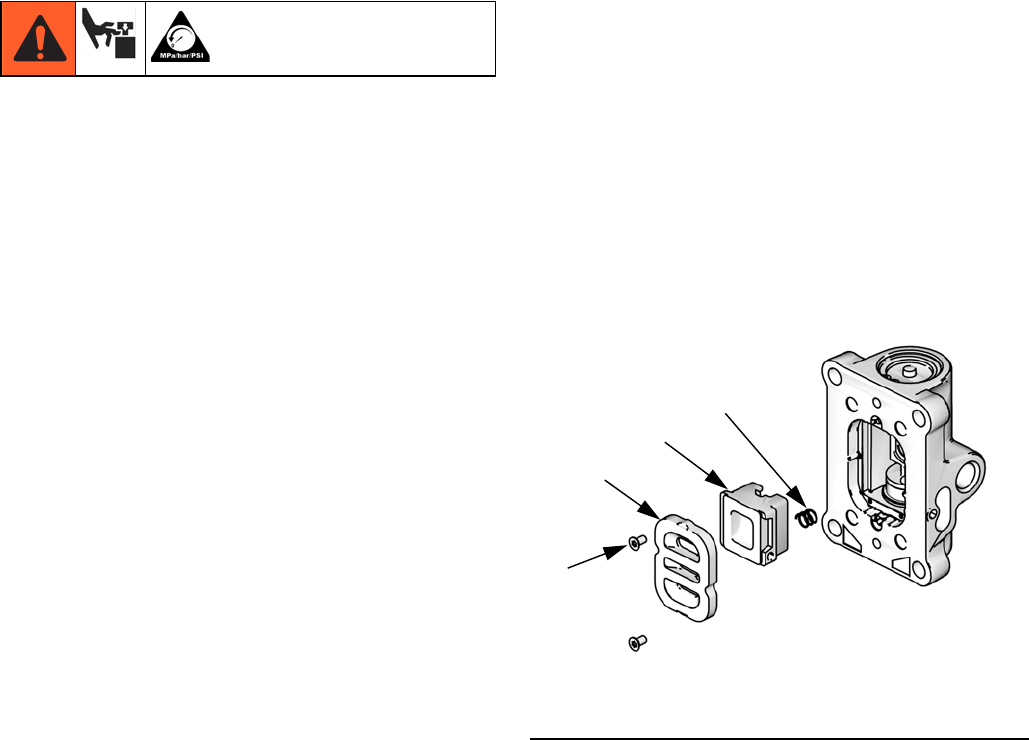
2. See FIG.3.Usea2mmor5/64hexkeytoremove
two screws (109†◆). Remove the valve plate
(105◆), cup (112◆), and spring (111◆).
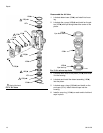
3. Remove the snap ring (110◆✠) from each end. Use
the piston to push the end caps (107✠) out of the
ends. Remove end cap o-rings (106†✠◆).
4. Remove the piston (102◆). Remove the u-cup seals
(108†◆) from each end and the detent assembly
(103◆) and detent cam (104◆) from the center.
FIG. 3. Air plate removal
109†◆
105◆
112◆
111◆
ti16499a