


Repair
16 312375J
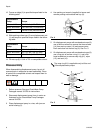
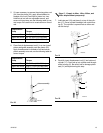
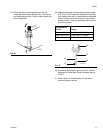
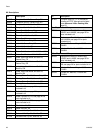
23. Partially thread wet cup (9) into cartridge (3) to hold
packings in place during installation. Install new car-
tridge o-ring (4) on cartridge (3). Apply thread lubri-
cant to cartridge (3) and carefully slide down over
displacement rod and into outlet housing (2). Torque
cartridge to the following torque. Be careful not to
damage throat packings on leading edge of rod.
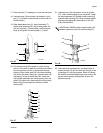
24. Use packing nut wrench (supplied) to tighten wet
cup (9) to specified torque; refer to the following
table.
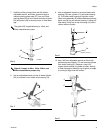
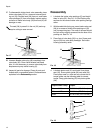
25. Lubricate the threads of the bleeder valve plug (40).
The plug has two sets of threads. Be sure to screw
the plug completely into the valve body (39). Torque
the plug to 9-11 ft-lbs (12-15 N•m).
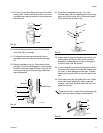
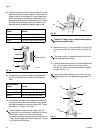
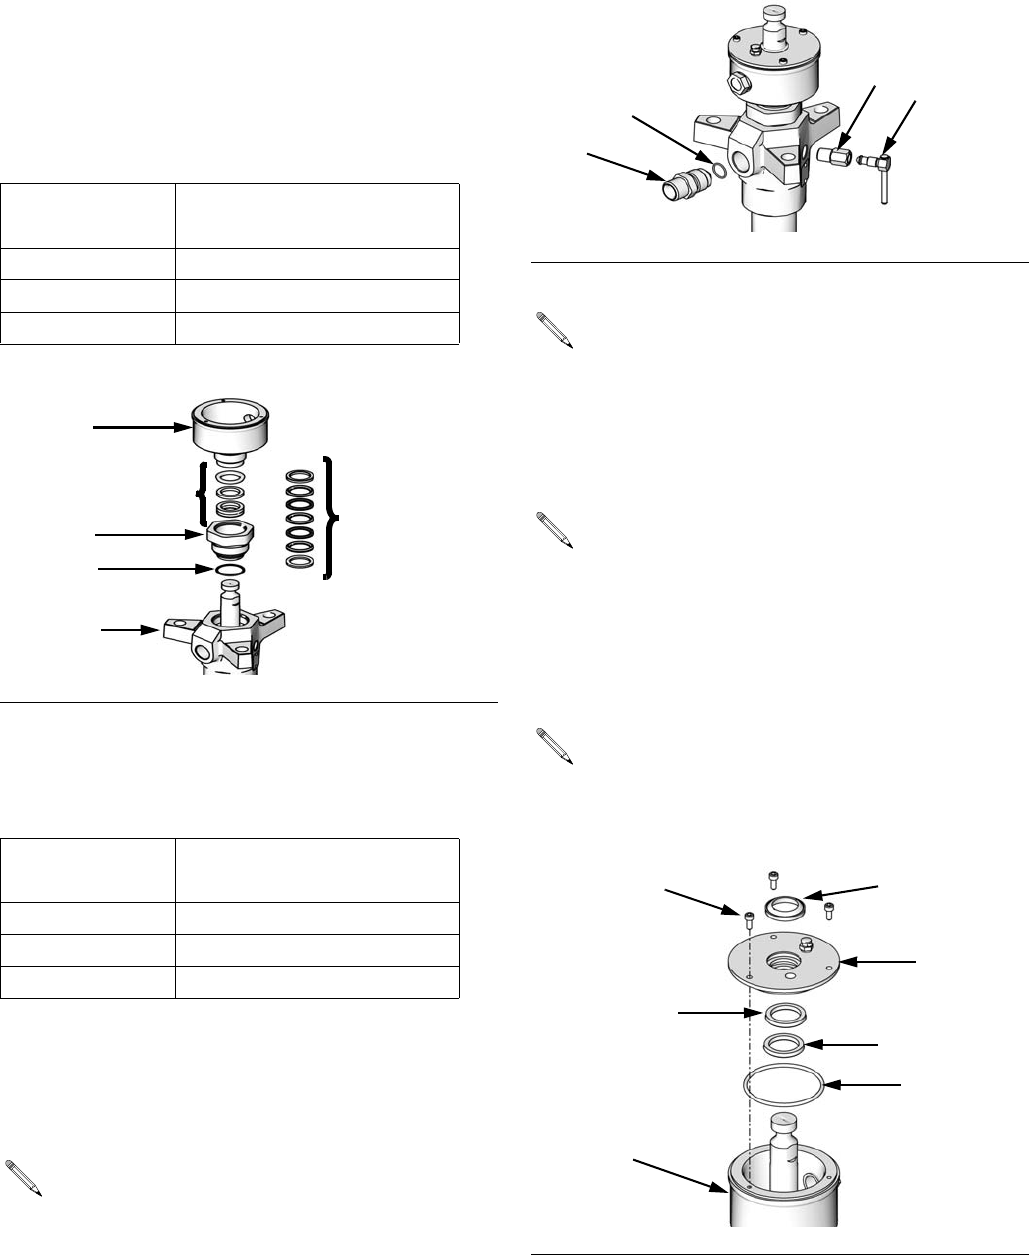
26. Install new o-ring (11), wet cup wiper (15), seal (16),
and snap ring (61) into wet cup cover (10). See F
IG.
31.
27. Carefully slide wet cup cover (10) over displacement
rod. Line up holes in cover and wet cup. Insert
screws (14). Use a hex head screwdriver to tighten
screws. See F
IG. 31.
Displacement
Pump Torque
60cc and 100cc 90-130 ft-lbs (122-176 N•m)
200cc and 250cc 130-190 ft-lbs (176-257 N•m)
500cc 150-261 ft-lbs (203-355 N•m)
F
IG. 29
Displacement
Pump Torque
60cc and 100cc 28-44 ft-lbs (38-59 N•m)
200cc and 250cc 95-115 ft-lbs (128-155 N•m)
500cc 95-115 ft-lbs (128-155 N•m)
Some models include an outlet nipple (43) and
o-ring (44). It is not ordinarily necessary to remove
these parts. However, if they were replaced
because of damage, lubricate o-ring and place it on
nipple. Screw nipple into outlet housing (2). Torque
to 44-62 ft-lbs (60-84 N•m).
ti10576a
4
3
2
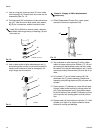
P
P
(Severe Duty)
(MaxLife)
9
FIG. 30
Steps 26-27 apply only to displacement pumps
with enclosed wet cups.
The snap ring (61) is applicable only to 60cc and
100cc displacement pumps.
Use caution when sliding wet cup cover (10) over
displacement rod (1) to avoid damaging seals (15,
16).
F
IG. 31
ti10585a
39
40
44
43
ti10561a
10
61
11
16
14
1, 9
15