


Hobie 18 and SX18 UPDATES
INSTALLING THE RUDDER ASSEMBLY
The rudders were updated after 1987. The newer
rudders use a black plastic cam to lock the rudder in the
down position. Locate the left and right rudder
assemblies. The left one has a red dot and the right one
a green dot. The tiller arms should have a slight bow
towards the centerline of the boat.
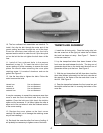
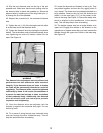
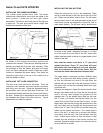
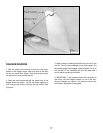
As shown in the original instructions, position the
rudders at the transom. There are two bushings and two
washers provided with the each new assembly. Slide
the bushings in from the bottom and place the longer
one in the lower casting hole. Install a cotter key in each
rudder pin. Assemble as shown below. Then insert the
remaining cotter keys in the top of the rudder pins to
hold the rudders in place.
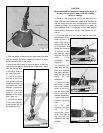
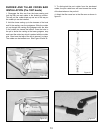
INSTALLING THE TILLER CONNECTOR
The tiller arms have swivels on the ends. Point the
connector rods upwards and slide the tiller connector
end fitting over the rods. Place the adjustable end of
the connector rod to the port (left) side of the boat. Pull
the small tabs forward and over the rod and lock them in
the slots. Rudder toe-in adjustments can be made with
the threaded end fitting on the tiller cross bar. Typical
adjustment has rudders in parallel.
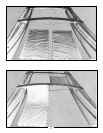
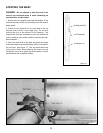
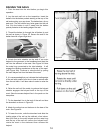
INSTALLING THE SAIL BATTENS
Unfold the sail and lay it out on the trampoline. There
will be a small bundle of thin lines tied to the top of the
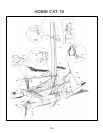
sail. These are the batten tension lines. Tie the batten
tension lines to one of the small grommets at the end of
each batten pocket as diagramed in figure 28 (one to
each batten pocket). Tie the lines using a bowline knot
as found in the "knots" diagramed on page 4. It is best
to tie the lines all to one side of the sail. Insert each
batten (shortest batten at the top to longest batten at the
bottom of the sail).
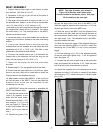
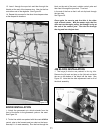
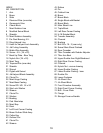
Note that the batten ends have a "V" jam cleat
molded into them. These "V" jam cleats will keep
the tension line from slipping in only one direction.
Note the hollowed-out side of the cleats. Pull the
line from the flush side toward the hollowed side.
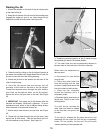
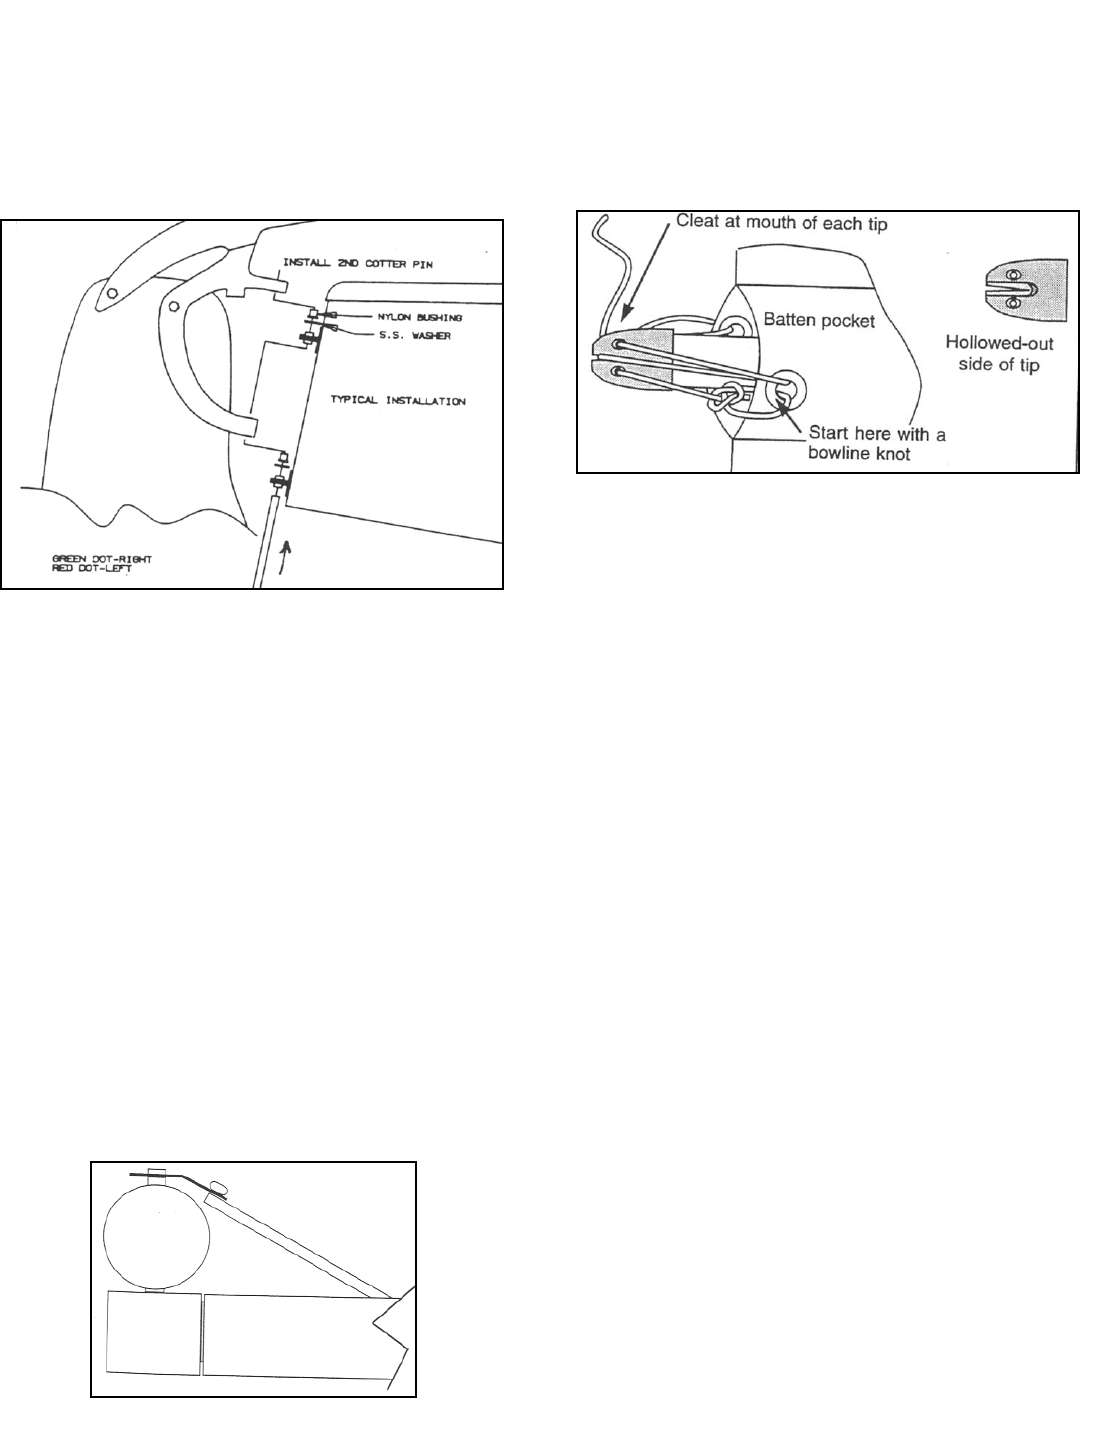
The upper batten is narrower and has a different cleat
shape. To be sure this cleat works correctly, position it
so that the hollowed out side of the cap faces the
bowline that you have tied to the sail grommet. Position
the larger caps so that the hollowed sides face away
from each knot.
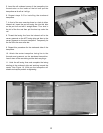
Following the diagram in figure 28, lace the tension lines
through each batten end cap. Pass the line through the
hole in the cap, then through the grommet on the
opposite side. For the smaller caps, pass the line over
the "V' cleat, pull tension forcing the batten into the
pocket, then pull the line into the cleat to hold it. For the
larger caps, pass the line through the second hole in the
cap, then pass the line through the first grommet and
back to the "V" cleat. Pull tension on the line forcing the
batten into the pocket and cleat it. Tie a small figure 8
knot in the end 1 of each line to prevent the battens
from falling from the sail if the line releases from the
cleat. Tension each batten so that the batten is well
seated and the wrinkles in the batten pockets are
removed. Excessive batten tension will cause the sail to
be more difficult to handle.
12
Figure 27
Figure 28
Figure 26