


5. Remove the steering handle by loosening setscrew from the steering crank. Connect the lines. With the
crank in your left hand, point the shaft up at 45 degrees with the dimple on the bottom of the shaft
6. Install the left-hand steering line loop on to the lower steering crank post and the right hand line loop on the
upper post. Insert the steering crankshaft, (using left hand) with plastic washer on the shaft, into the forward
of the two holes. Slide the handle onto the shaft (using right hand) with the setscrew facing down. Tighten
the setscrew into the shaft recess. You want the handle to be free to rotate.
Rudder Up/Down System Installation
7. Install the shortest line by inserting the looped end through the centerline hole. Install the down control line
(longest line) in the remaining hole. Press the Stainless steel collar in all the way.
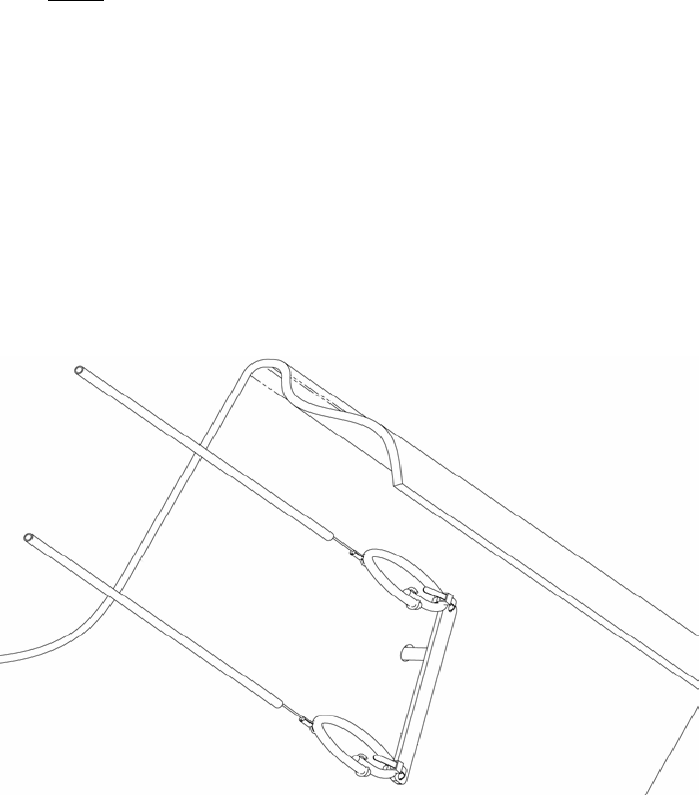
8. Note: In this step,
do not tighten the zip ties yet. Connect the lines. Be sure the lines are not tangled.
Connect the loop of the up line with a zip tie to the 3/16 shock cord loop and another zip tie connecting the
shock cord to the hole on the short arm on the control crank. You may find it is easier to connect these loops
by working just outside of the hatch opening. Connect the down line loop to the hole on the crank (longest
arm on the crank) with 3
rd
zip tie provided. See picture 1. Read the next note for early model types. Insert
the shaft, from the inside, through the rear most hole. Position the crank so that the recess in the shaft is
facing up. Slide the handle onto the shaft with the set screw facing up. This step is a bit tough, because; you
have to overcome the tension of the spring. You may want a second set of hands, one set holding the hull
while pushing the shaft through the hull and the other tightening the set screw into the shaft recess.
Notes
Some variations in production may have different cranks.
See Picture. The use of supplied linking loops (small plastic loops) may be necessary to join the parts
if crank has the riveted posts to loop the lines onto.
This crank doesn’t have rivets, use a zip ties to attach the bungee to the cranks and bungee to the up/down
control lines. If your up/down control crank does have rivets, use the small links and press the small loops
over the rivet heads. Then use the zip ties to attach the bungee to the links and bungee to the up/down control
lines.
Revised 2005 2 80018