


INSTALLATIONINSTALLATION
INSIDE THE HULL INSTALLATION
3. Power up the Control Head.
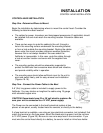
4. Run the boat at various speeds and water depths while observing the screen on the
Control Head. If the unit functions well at low speeds but begins to skip or miss the
bottom at higher speeds, the transducer needs to be moved. If depth performance is
required, test the fishfinder in water at the desired depth. Test different locations in
the hull until the optimum performance is achieved.
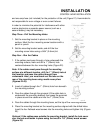
Step Three - Permanently Mount the Transducer
1. Once the mounting location is determined, mark the position of the transducer.
2. Remove the water from inside the hull and thoroughly dry the
mounting surface. If the surface is excessively rough, it may be
necessary to sand the area to provide a smooth mounting
surface.
Ensure the mounting area is clear and dry.
3. Mix an ample quantity of two-part slow-cure epoxy slowly and
thoroughly. Avoid trapping air bubbles.
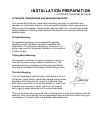
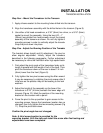
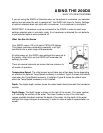
4. Coat the face of the transducer and the inside of the hull (Figure
16).
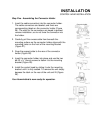
5. Press the transducer into place with a slight twisting motion to
purge any trapped air from underneath, keeping the pointed end
of the transducer body pointed forward (Figure 17).
Note: Proper operation requires the pointed end of the
transducer body to face towards the bow.
6. Weight the transducer so it does not move while the epoxy is curing.
When the epoxy cures, no water is necessary inside the hull. Neither water, spilled
gasoline, or oil will affect the performance of the transducer.