


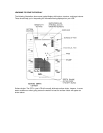
It plugs into the outlet on the back of the unit marked “Power”. The transducer connector is
identified with the letter T and plugs into the outlet on the back of the unit marked “Transducer”.
Note: An adapter (AD-4) is available to allow use of an old waterproof (BNC) transducer with the
LCR, but be sure that the transducer is a 16degree. A 32-degree transducer cannot be used.
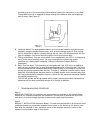
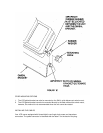
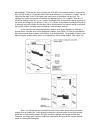
A 11/8” hole must be drilled to pull through the transducer connector. After drilling the hole, pull
the transducer connector up through the hole. If you are installing two units, both transducer
connectors can be pulled through this 1 1/8” inch hole. Next, push the power cable wires down
through the hole. A hole cover has been provided which will dress and hold the wires. Install the
hole cover after determining the necessary wire length from the hole.
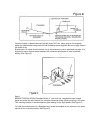
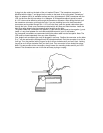
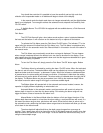
The power cable has a red lead to the positive (+) post and the black lead to the negative (-) post.
Install a 1 amp fuse between the red cable and positive post of your 12-volt battery.
If a fuse panel is available, we recommend wiring the power cable into the fuse panel. Note: The
LCR must be fused separately from any other accessory.
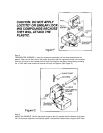
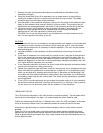
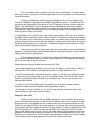
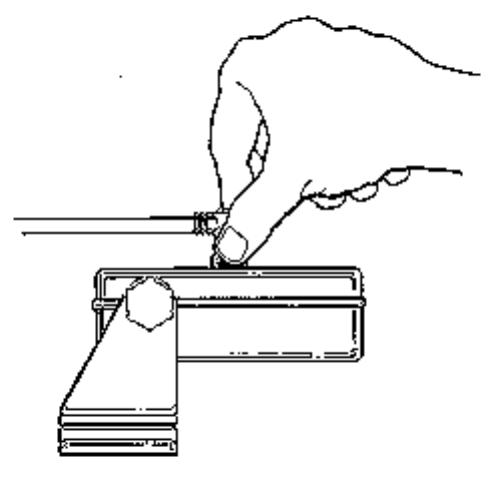
Your Angle-Lock connectors can only be plugged in one way. Position the connector so the letter
P or T can be read and the 90 degree bend is pointed downward. Push the connector in as far as
it will go. Turn the positive locking ring as far as it will go clockwise until you feel it lock. Locking
ring as far as it will go clockwise until you feel it lock. Your connector is now locked into place.
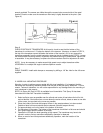
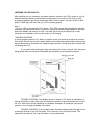
Note: For easy access to the connectors, simply loosen the mounting knobs and tilt your LCR
forward. The connectors are now in full view and easy to plug or unplug.