45
© Copyright 1970-2008 Kirby Morgan Dive Systems, Inc. All rights reserved. Document #080626002
Kirby Morgan 77
sembly out away from the base of the helmet. Slightly
loosen the screws until the neck pad can slide back
and forth. Be sure each of the head cushion snaps
are attached to their corresponding fitting inside the
helmet.
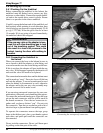
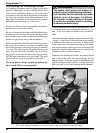
Pick up the helmet and pull the nose block device
knob out fully. Position the helmet on your head so
the oral nasal is in the proper position on your face,
covering your nose and mouth. Turn the sealed pull
pins to the locking position with the ridge on the pins
engaging the notch in the sleeve and the pins fully
retracted.
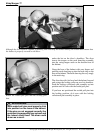
Tilt your head forward so the locking collar/neck pad
assembly may be swung forward and locked up into
its closed position. The sealed pull pins must snap
into place on the locking collar.
Lift your head back up and slide the neck pad forward
until it is snug but comfortable. Mark the position of
the neck pad on the locking collar using an indelible
marker. Pull the sealed pull pins out to their unlocked
position and let the locking collar open.
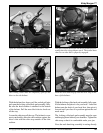
Remove the helmet. Position the neck pad plate on the
locking collar at the marked position and tighten the
screws on each side. After the adjustment screws are
tightened, don the helmet again, tilt your head forward
and lock the locking collar/neck pad assembly. Move
your head in various positions to make sure the pad
is adjusted for comfort.
The helmet is now adjusted for your head. It should
need no further adjustment unless another diver uses
the helmet.
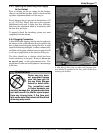
3.5 Pre Dress-In Procedure
Before dressing in for a dive, inspection of the helmet
systems must be made to be sure it is in proper work-
ing order. This must be done well in advance of the
dive so any problems can be fixed without delaying
the dive. The following steps are part of the recom-
mended daily maintenance.
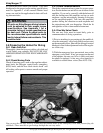
3.5.1 Pre-Dive Visual Inspection
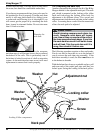
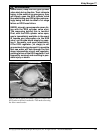
Visually inspect the exterior and interior of the hel-
met.
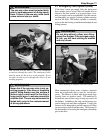
1) Inspect the regulator cover for any damage. The
purge button must work.
2) The neck dam must not be torn or punctured, and
properly trimmed to fit.
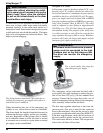
3) Inspect the O-ring on the neck dam ring assem-
bly. The O-ring must be in place, undamaged, and
lubricated.
4) Inspect the bent tube that supplies breathing gas
to the regulator. There must be no dents or kinks in
the assembly.
5) Inspect the face port. It must be in good condi-
tion.
6) Be sure the communications wires are hooked up
and tested.
7) Inspect the oral/nasal mask. Make sure it is on
the regulator mount nut properly and the valve is
installed properly.
8) Inspect the sealed pull pin on each side of the hel-
met. They must engage and disengage properly.
9) Make sure the head cushion and chin cushion are
properly fastened inside the helmet. The chin strap
should be open as wide as possible.
WARNING
There must be no holes in the neck dam.
If there are any holes in the neck dam the
helmet could leak or flood. In addition,
the demand regulator will not operate
properly. Drowning could result.
The O-ring on the neck dam ring assem-
bly on the Kirby Morgan helmet must be
in place and in good condition. It must
be properly lubricated for smooth opera-
tion. Without a proper functioning O-ring
the helmet will leak and possibly flood.
Drowning could result.
WARNING


