


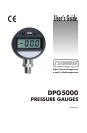


• Instructions
NOTE: All units are factory calibrated prior to shipment.
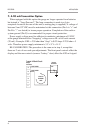
1. Zero Trimming
NOTE: Some units are equipped with zero “knob”.
If it becomes necessary to re-adjust the “Zero” on the display, this can be
accomplished by turning the trimpot marked “Z” just to the left of the On/Off
push button. On the DPG5000 there is either a zero adjustment knob or a black
nylon cover screw. If the gauge has a cover screw, it is necessary to remove the
cover screw to access the zero adjustment pot. An ideal zero is indicated by a
reading of 000 with an intermittently flashing “-” sign.
NOTE: A jewelers screwdriver or an eyeglass repair screwdriver (supplied)
is a suitable instrument. Do not make changes to the Span adjustment (the “S”
pot to the right of the push button) as part of the zero trimming. The Span should
only be changed as part of the re-calibration of a gauge with a known pressure
source.
2. Use of Auto-Tare Feature
When the DPG5000 is first turned on you will notice that the display flashes
for the first 4 seconds. If the On/Off button is pushed and held during this
period, any existing reading will be re-set to zero. This allows the user to “Tare-
Out” a starting weight in hydraulic weighing applications. To remove the Tare
feature turn the unit off and back on again and do not push the On/Off button
during the flashing period.
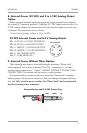
3. Battery Replacement (9 Volt Type)
The battery can be replaced simply by removing the single screw at the top of
the battery door. Remove the old battery, unplug the cable connector and replace
with Eveready type 216 or equivalent. Replace the battery door and secure with
the self-tapping screw. (Do not overtighten)
NOTE: For best accuracy, re-calibration per step 4 should be performed at the
time batteries are replaced.
DPG5000 M3366/0606
4