


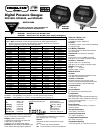
DPG3500, DPG5500, and DPG5600 Series
2
Installation and Precautions
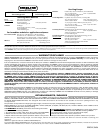
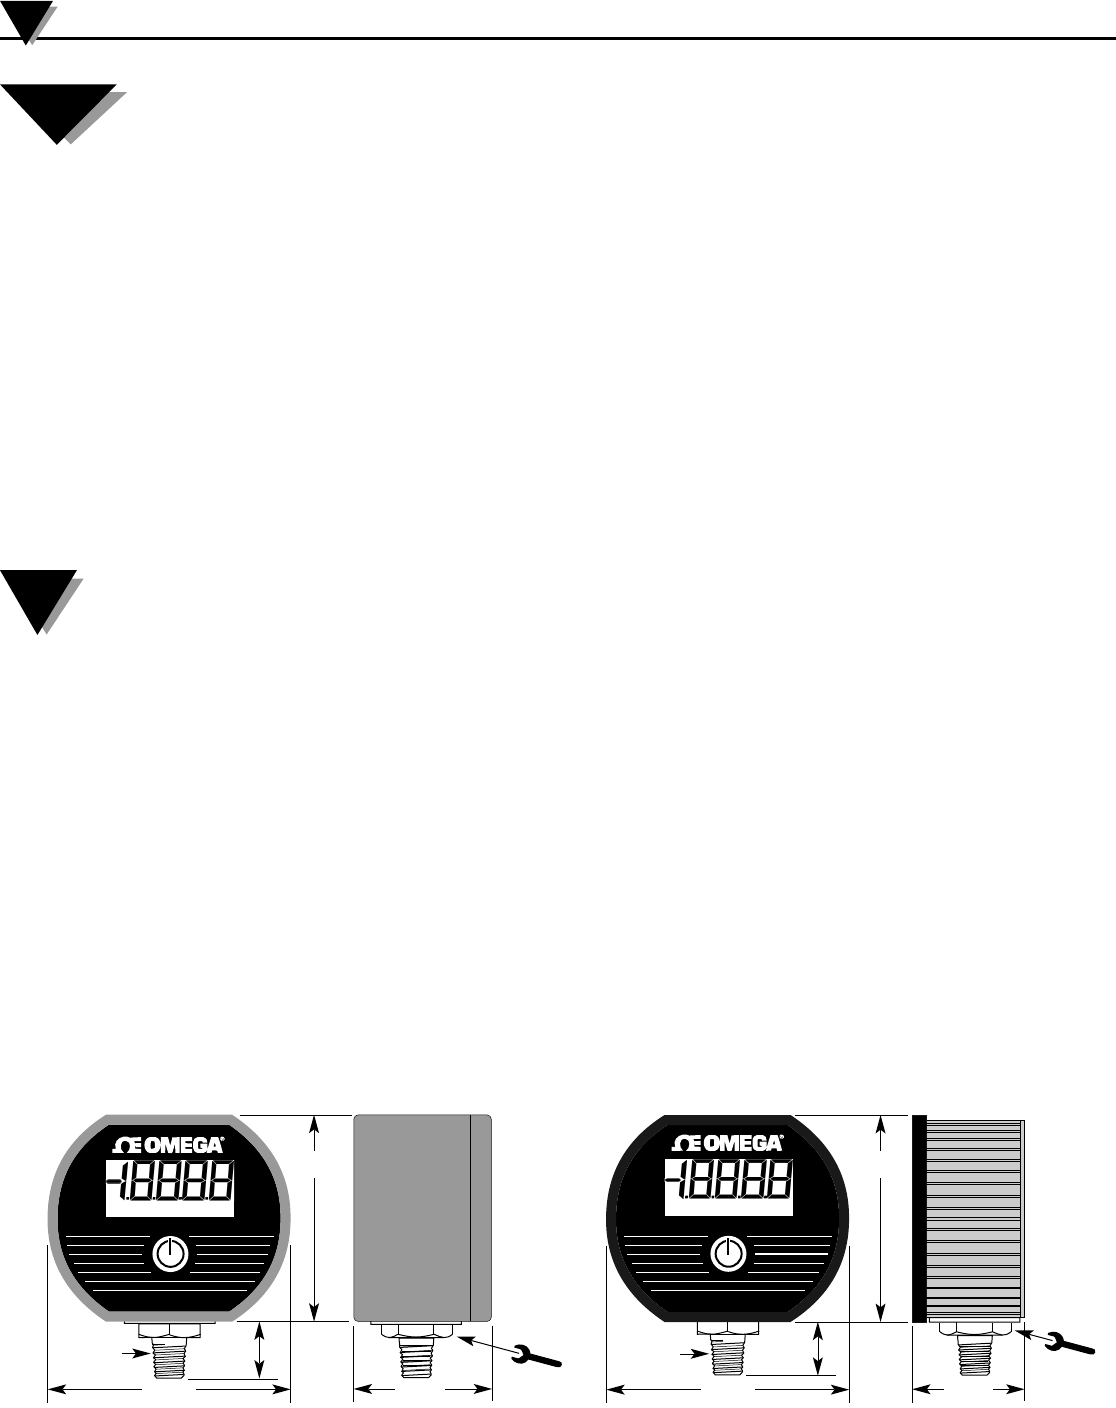
Install or remove gauge using
wrench on hex fitting only. Do
not attempt to tighten by
turning housing or any other
part of the gauge.
See gauge rear label for pressure range!
Use fittings appropriate for the pressure range of
the gauge.
Do not apply vacuum to gauges not specified for
vacuum operation.
Due to the hardness of 316 stainless steel, it is
recommended that a thread sealant be used to
ensure leak-free operation.
NEVER insert objects into the gauge port or blow
out with compressed air. Permanent damage not
covered by warranty will result to the sensor.
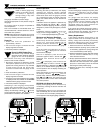
Power-Up
1. Press and hold the pushbutton for
approximately 1 second.
2. The full-scale range is indicated and the
display segments are tested.
3. The actual pressure is displayed.
Power-Up With Display Zero
This feature is only used with Gauge
reference models. Absolute reference
gauges do not use the pushbutton
zero feature since they read atmospheric
pressure under normal conditions.
1. Be sure the gauge port is exposed to normal
atmospheric pressure and no pressure is
applied. The zeroing function is only activated
at each power-up and the stored zero
correction is erased when the gauge is shut
off.
2. Press and hold the pushbutton.
3. The full-scale range is indicated and the
display segments are tested.
4. Continue to press the pushbutton until
oo oo oo oo
is displayed and then release the button. This
indicates that the gauge has been zeroed.
5. The actual pressure is displayed.
Attempting to zero the gauge with pressure
greater than approximately 3% of full-scale
applied will result in an error condition, and the
display will alternately indicate
E
r r
0
and the
actual measured pressure. The gauge must be
powered down to reset the error condition.
Normal Operation
Following the start-up initialization, the display
indicates the pressure reading updated
approximately 3 times per second. The auto
shutoff timer starts when the gauge is powered
up or whenever the button is pushed, unless the
gauge was ordered without an auto shutoff time
(-NS option).
If excessive vacuum is applied to a pressure-only
gauge, the display will indicate
–
E
r r
until the
vacuum is released. Applying vacuum to a gauge
designed for pressure may damage the pressure
sensor.
If excessive pressure is applied (112.5% over
range), an out-of-range indication of
i
– – – or
i
–.–.–.– will be displayed depending on model.
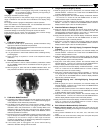
Minimum and Maximum Readings
Minimum and maximum readings are
continuously stored and updated whenever
gauge is on. The stored readings can be
manually cleared if desired. The
HI
and
LO
memory is also cleared whenever the gauge is
off.
Press and hold the pushbutton for about 1
second until
HI
is displayed. The maximum
stored value is displayed.
After HI is displayed, press and hold the
pushbutton again for about 1 second until
LO
is
displayed. The minimum stored value is
displayed.
After
LO
is displayed, press and hold the
pushbutton again for about 1 second until
AP
(Applied Pressure) is displayed. The
HI
and
LO
memory is not erased and the gauge returns to
normal operation with the display indicating the
current pressure.
Press and continue to hold the pushbutton until
the display indicates
C
i
r
Hi/Lo
(about 3
seconds total) and then release the pushbutton.
Both
HI
and
LO
values are cleared and the
gauge returns to the normal mode and displays
the current pressure.
DPG5600 with Display Backlighting
Display backlighting can be turned on by
momentarily pressing the button whenever the
gauge is on.
The backlighting will turn on for one minute and
then automatically shut off. This also restarts the
auto shutoff timer. The display backlighting will
not be apparent under bright lighting conditions.
Shut-Down
To shut off the gauge manually at any time, press
and hold the pushbutton until the display
indicates
OFF
(about 5 seconds) and then
release.
For gauges with auto shutoff, the display
indicates
OFF
five seconds prior to auto shutoff.
The pushbutton can be pressed to keep the
gauge on. The auto shutoff and backlight (if
equipped) timers are reset whenever the
pushbutton is pressed and released.
If the gauge was ordered without auto shutoff (-
NS option) it will stay on until manually shut off or
until the batteries are depleted. Turn gauge off
when not in use to conserve battery life.
Battery Replacement
A low battery indication will be shown in the
upper left-hand corner of the display when the
battery voltage falls sufficiently. The battery
should be replaced soon after the indicator
comes on or unreliable readings may result.
1. Remove the screws on the back of the unit.
2. Remove batteries by lifting up the positive end
of the battery (opposite the spring) taking care
not to bend the battery holder spring.
3. Discard old batteries properly, DO NOT discard
into fire, sources of extreme heat, or in any
other hazardous manner.
4. Always replace both batteries at the same time
with high quality alkaline batteries. Install
batteries with correct orientation. The negative
(flat) end of each battery should be inserted
first facing the battery holder spring.
6. Replace the back cover, including the rubber
sealing gasket.
1
/4"NPT
Omega Engineering / Made in USA
2.88"
3.38
"
0.75"
1.65
"
Turn at
hex
fitting
only
1
/4"NPT
3.0"
3.5
"
0.75"
2.0
"
Turn at
hex
fitting
only!
Omega Engineering / Made in USA
DPG5500, DPG5600
DPG3500
CAUTION:
NOTE:
XXXXX
8
8
8
8
8
2
XXXXX
8
8
8
8
8
2