


- 4 -
Chapter 3 Installation
The RCI-2950DX/2970DX-150 is easy to install. All necessary parts (less
the antenna and coax cable) have been included to facilitate installation.
Transceiver Mounting
Choose a suitable location for the transceiver that will allow easy access
to the front panel as well as proper air circulation to the back of the unit.
If you are installing the unit in a vehicle, attach the mounting bracket first,
then attach the transceiver to the mounting bracket using the hardware
provided. Before making any electrical connection, ensure that the
transceiver is turned off and the vehicle's battery is disconnected.
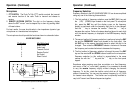
Power Connection
The transceiver operates off of any 12 to 13.8 VDC source. Beware of
voltage drops caused by operating from Cigarette Lighter Plugs or long
DC wire runs. Sometimes it is best to connect direct to the battery for
best RF output and Tx audio quality
If an AC power supply is used with your radio, it must be regulated and
rated for at least 7 Amps continuous for the RCI-2950DX and 20 Amps
continuous for the RCI-2970DX-150. Low voltage while under load will
cause reduced receiver gain and low transmitter output with possible
distortion and splatter.
NOTE
The condition of a vehicle's electrical system can affect the operation of
your RCI-2950DX/2970DX-150. A low battery, worn generator/
alternator, or poor voltage regulator will impair performance of the unit
as well as the vehicle.
CAUTION
Voltage above 15 VDC will damage the unit. Be sure to check the
source voltage before connecting the power cord.
- 5 -
Chapter 4 Operation
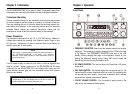
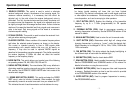
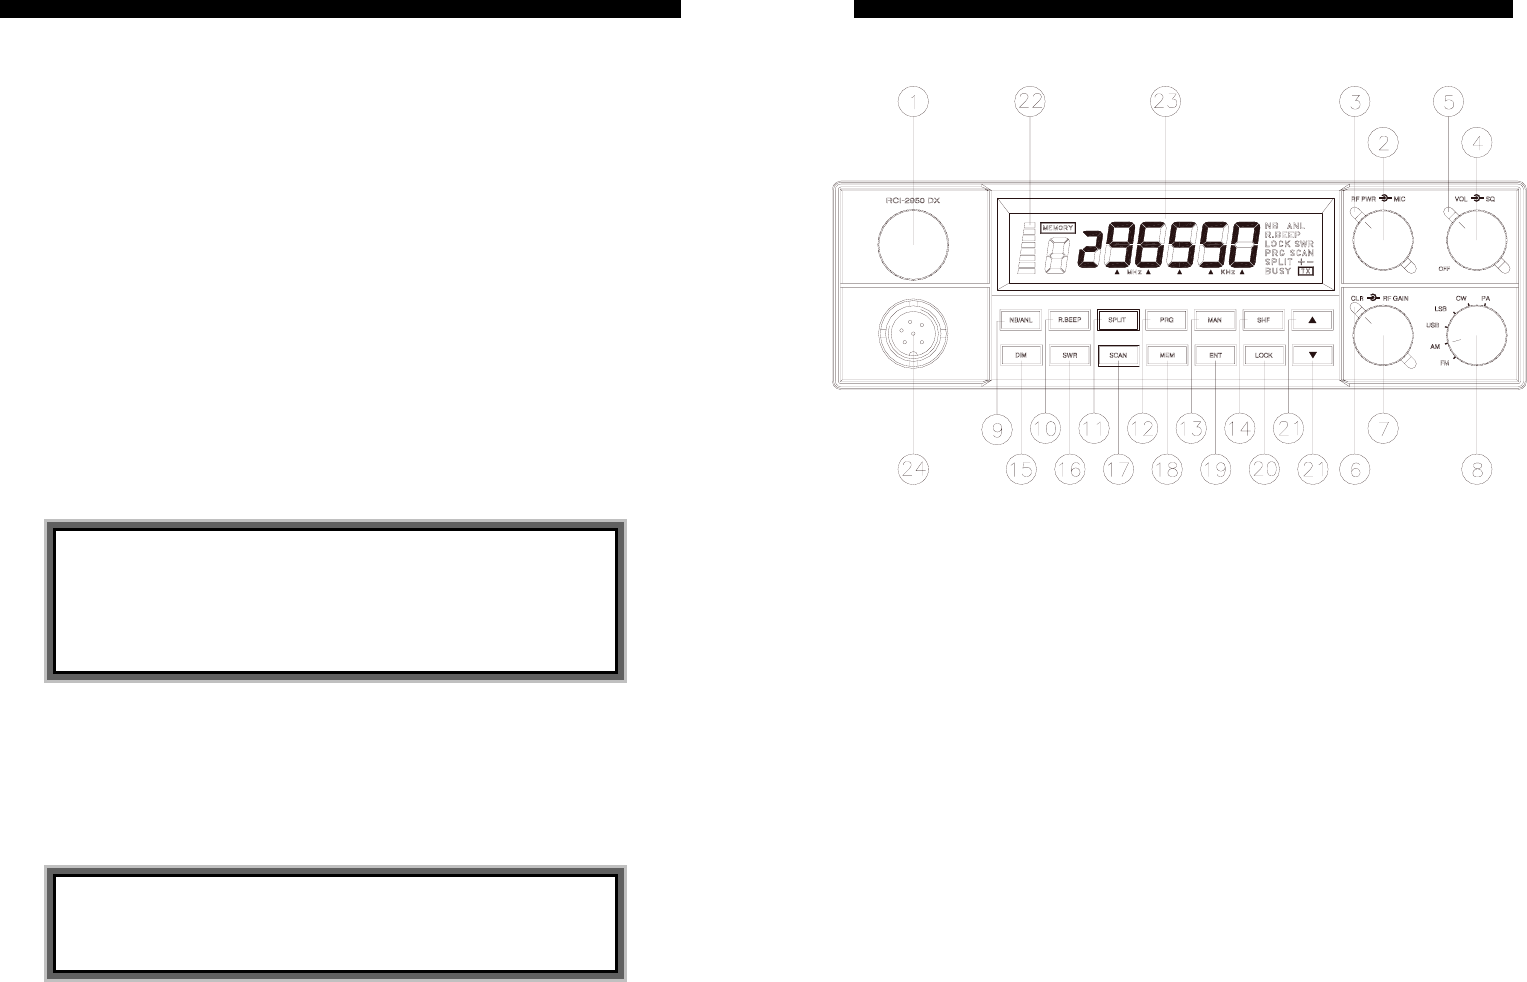
Front Panel
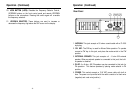
1. FREQUENCY SELECTOR: Used to set the desired transmit and receive
frequency. The frequency is digitally displayed in the LCD window next
to the selector. The FREQUENCY SELECTOR knob next to the LCD
display, allows changing each digit on the frequency display by first
placing the frequency display cursor (using SHF button) below the
desired digit and then turning the selector knob.
2. RF POWER CONTROL: This control adjust the Transmitter’s RF power
output level.
3. MIC GAIN CONTROL: This feature adjust the microphone gain for the
transmit and PA modes. Experiment with this control for the setting that
will provide best audio quality. Avoid over-modulation, which causes
interference to adjacent stations and “splatter”.
4. ON/OFF VOLUME CONTROL: Turn clockwise to apply power to the
radio and to set the desired listening level.