


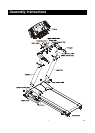
XT9
14
Belt and Bed - Your treadmill uses a very high-efficient low-friction bed. Performance is
maximized when the bed is kept as clean as possible. Use a soft, damp cloth or paper towel to
wipe the edge of the belt and the area between the belt edge and frame. Also reach as far as
practical directly under the belt edge. This should be done once a month to extend belt and
bed life. Use water only - no cleaners or abrasives. A mild soap and water solution along with
a nylon scrub brush will clean the top of the textured belt. Allow to dry before using.
Belt Dust - This occurs during normal break-in or until the belt stabilizes. Wiping excess off
with a damp cloth will minimize buildup.
General Cleaning - Dirt, dust, and pet hair can block air inlets and accumulate on the running
belt. On a monthly basis, vacuum underneath your treadmill to prevent buildup. Once a year,
you should remove the black motor hood and vacuum out dirt that may accumulate. UNPLUG
POWER CORD BEFORE THIS TASK.
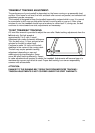
BELT ADJUSTMENTS:
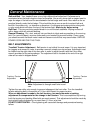
Treadbelt Tension Adjustment - Belt tension is not critical for most users. It is very important
for joggers and runners in order to provide a smooth, steady running surface. Adjustment must
be made from the right side of the rear roller in order to adjust tension with the 6 mm Allen
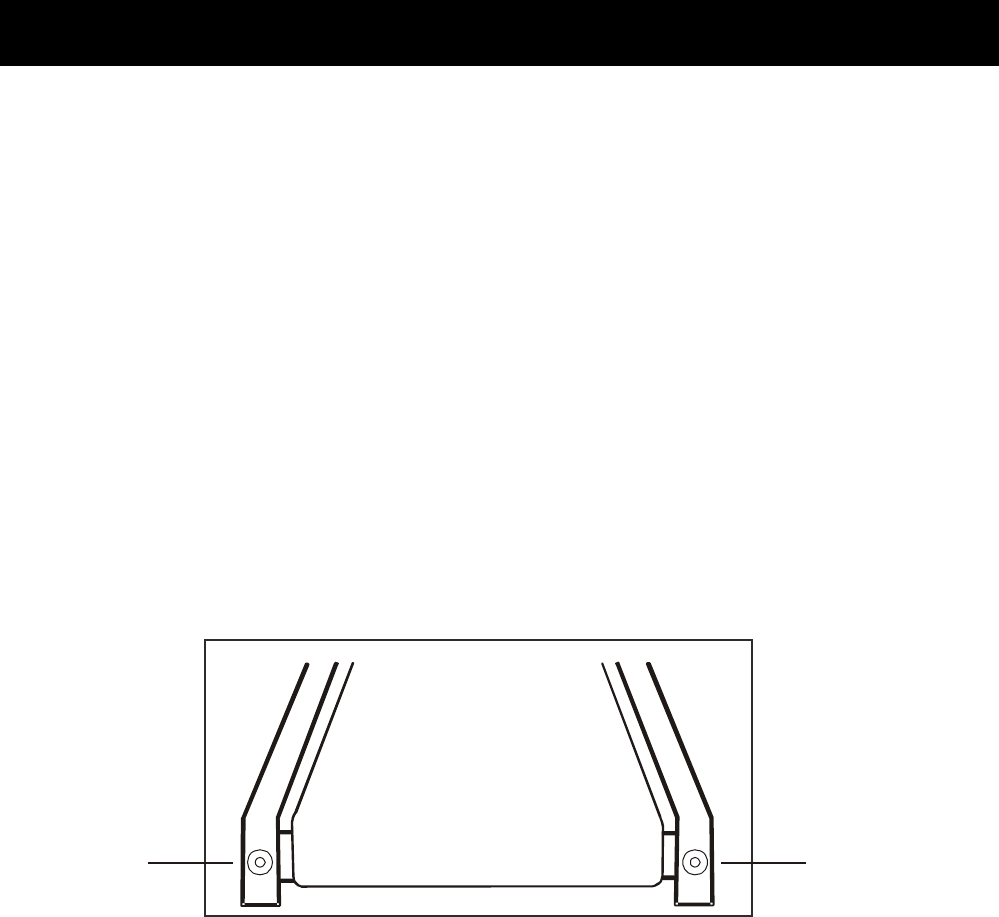
wrench provided in the parts package. The adjustment bolt is located at the end of the right
side rail as noted in diagram below.
Tighten the rear roller only enough to prevent slippage at the front roller. Turn the treadbelt
tension adjusting bolt in increments of 1/4 turn and inspect for proper tension.
When an adjustment is made to the belt tension, you must also make a tracking
adjustment to compensate for the change in belt tension. This is accomplished by turning
both the tension and tracking Allen bolts an equal amount. This adjustment should be made by
turning both bolts clockwise by no more than a 1/4 turn at a time.
DO NOT OVERTIGHTEN Over tightening will cause belt damage and premature bearing
failure.
General Maintenance
Note:
Adjustment is through small hole in end
cap.
Tracking / Tension
Adjustment
Tracking / Tension
Adjustment