DS41 Owner’s Manual9
Installation
Face Plate Installation
1. To install a face plate:
a) Attach the face plate to the front panel
of the instrument.
b) Twist the face plate clockwise until tight.
2. To remove face plate, twist it anticlockwise
until loose and detach.
Instrument Installation
The instrument can be easily installed in different
types of instrument panels. Refer to Figures 3,
4, and 5 for the following steps.
1. Select a suitable location for the instrument.
When selecting the location for mounting,
the following are recommended:
• Controls of the instrument must be
accessible to the user.
• Electrical connections must be routed to
the boat system as directly as possible,
minimising the length of cable where
practical.
• Location should provide as much
protection from the elements as
possible.
• The panel for mounting the instrument
should be 1/8 to 3/4 inch thick.
• The space behind the instrument panel
must have a depth of at least 3.75
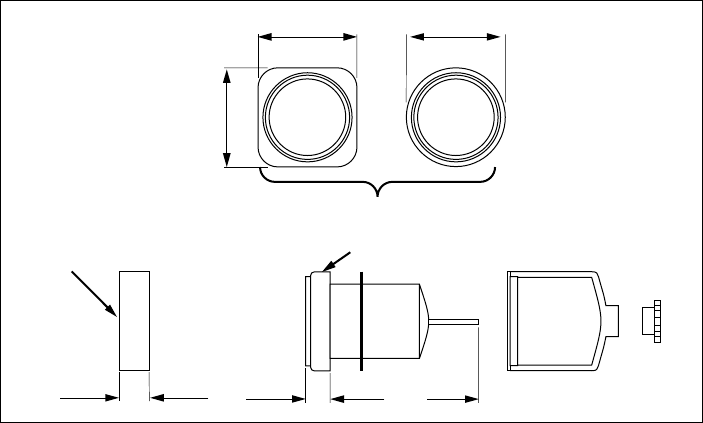
inches. See Figure 1 for dimensions of
the instrument.
2. Drill a 2-inch hole on the instrument panel
in the selected location.
3. With the mounting bracket removed, insert
the instrument into the hole until the back of
the face plate is flush with the outside
mounting wall.
4. Slide the bracket over the body of the
instrument.
Note:
Orient the bracket in such a manner
that it does not cover the buzzer.
5. Tighten the mounting nut until the bracket
is secure.
2.5"
2.5"
2.5"
INTERCHANGEABLE FACE PLATES
3.75".5"
.75"
SQUARE FACE PLATEROUND FACE PLATE
Figure 1. Depth Sounder Dimensions


