


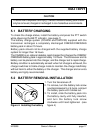
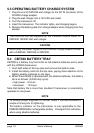
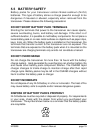

HX350S Owner’s Manual page 13
4.13 OPERATING ON CHANNEL 67
When channel 67 is used for navigational bridge-to-bridge traffic between
ships, high power may be used temporarily in the USA mode by pressing the
H/L key. When the H/L key is released, the transceiver will revert low power.
4.14 CHANNEL A/B INSTANT ACCESS
Two user-assigned channels can be programmed for instant access. USA
channels 9 and 16, and WX channels should not be assigned as A or B
channels because they are readily available with the 16/9 and WX keys. If
the A/B key is pressed and no channel A or B has been assigned, the LCD
will display “– –” and no channel number will be present.
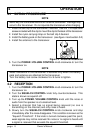
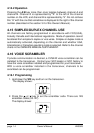
4.14.1 Programming
1. Hold down the A/B key and then turn on the transceiver.
2. The blinking letter A will appear on the display, and dashes “– –”
indicate that no channel has been designated Channel A.
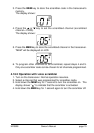
3. Press the
or key until the desired channel number is displayed.
4. With the desired channel number displayed, press the MEM key once.
The “A” will stop blinking, indicating that the displayed channel is now
designated Channel A.
5. Press the A/B key again. The blinking letter “b” will appear on the
display, and dashes “– –” indicate that no channel has been
designated Channel B.
6. Press the
or key until the desired channel number is displayed.
7. With the desired channel number displayed, press the MEM key once.
The “b” will stop blinking, indicating that the displayed channel is now
designated Channel B.
8. Turn the radio off and then on again to return to normal radio mode.
To change A and B channel assignments, perform the following steps:
1. Hold down the A/B key and then turn on the transceiver. The desired
channel A’s number is displayed.
2. Press the MEM key. The “A” will blink and dashes “– –” will appear on
the display.
3. Set the new channel to be designated Channel A (or leave the channel
unassigned). Press the MEM key again to save.
4. Next press the A/B key and press the MEM key. The “b” will blink and
dashes “– –” will appear on the display.
5. Set the new channel to be designated Channel B (or leave the channel
unassigned). Press the MEM key again to save.
6. Turn the radio off and then on again to return to normal radio mode.