Installing In-Sight™ 4000 Series Vision Sensors Section 2 – Installing the In-Sight 4000
17
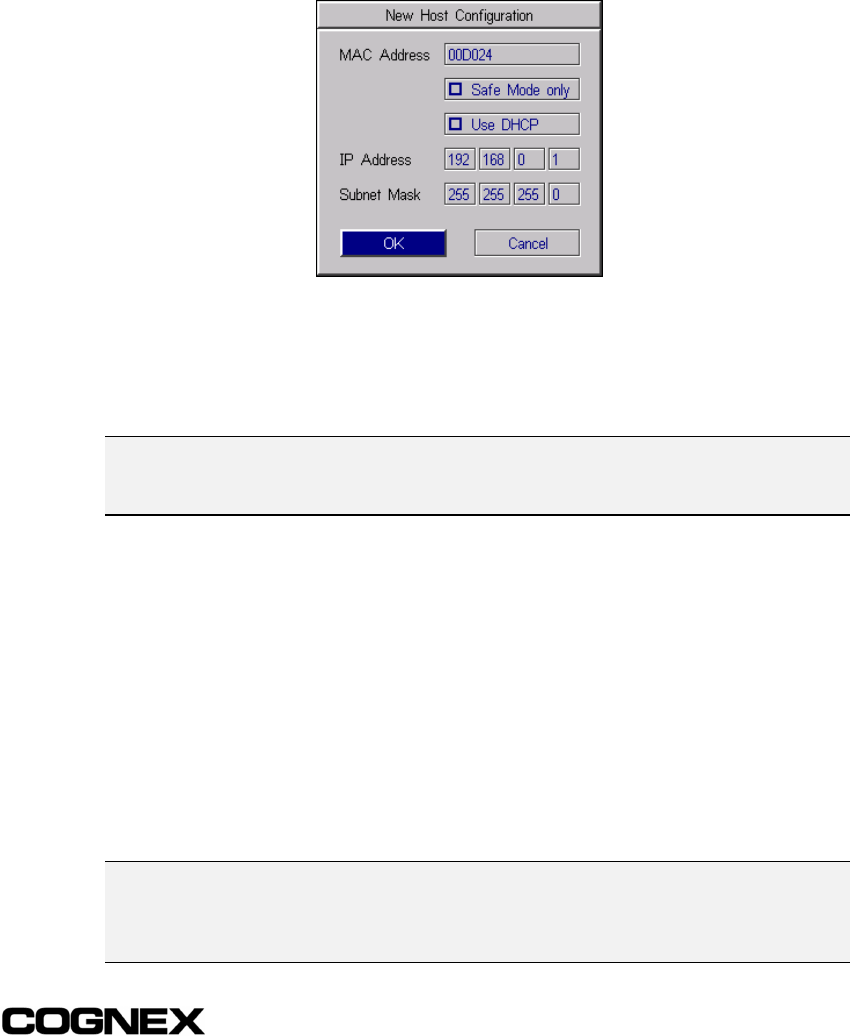
5 Select <New> from the list to open the New Host Configuration dialog (Figure 2-6).
Figure 2-6: New Host Configuration Dialog
6 Enter the last six characters of the In-Sight 4000's 12-character Media Access
Control (MAC) address, without spaces or dashes. Do not delete or change the
first six characters that are already entered.
NOTE The MAC address is located on the serial number label affixed to one side of the In-Sight
4000. This identifier is factory-assigned, unique for every In-Sight system, and cannot be
changed or deleted.
7 Verify that the Use DHCP Server check box is disabled. Refer to section 2.5.1:
Use DHCP Server (page 21) for more information about using DHCP.
8 Enter a valid IP Address for the In-Sight 4000. Every In-Sight sensor must be
assigned a unique IP Address consistent with the addressing scheme in use on the
network. Refer to the table in section 2.5.2: IP Address (page 22) for a description
of common IP Address schemes.
9 Enter a Subnet Mask for the local network. The Subnet Mask specifies which parts
of the In-Sight 4000's IP Address are the same for all hosts on the local network,
and which are unique to each host. The default Subnet Mask 255.255.255.0 is
appropriate for most users, as described in section 2.5.3: Subnet Mask (page 22).
Consult your network administrator for more information.
NOTE When the Safe Mode only checkbox is disabled (the default setting), the IP Address and
Subnet Mask entered overwrite the target In-Sight 4000 sensor’s Network settings. If the
checkbox is enabled, the Use DHCP, IP Address, and Subnet Mask fields will be grayed
out, and the target sensors network settings will be preserved.


