


MMX-6 DL Ultrasonic Thickness Gauge
15
6)
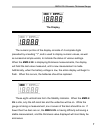
While the transducer is firmly coupled to the probe-disc, press the
PRB-0 key on the keypad. The MMX-6 DL will display "Prb0"
while it is calculating its zero point.
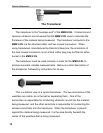
7) Remove the transducer from the probe-disc.
At this point, the MMX-6 DL has successfully calculated it's internal
error factor, and will compensate for this value in any subsequent
measurements. When performing a "probe-zero", the MMX-6 DL will
always use the sound-velocity value of the built-in probe-disc, even if some
other velocity value has been entered for making actual measurements.
Though the MMX-6 DL will remember the last "probe-zero" performed, it is
generally a good idea to perform a "probe-zero" whenever the tool is turned
on, as well as any time a different transducer is used. This will ensure that
the instrument is always correctly zeroed.
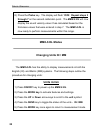
Calibration
In order for the MMX-6 DL to make accurate measurements, it must be
set to the correct sound-velocity for the material being measured. Different
types of material have different inherent sound-velocities. For example, the
velocity of sound through steel is about 0.233 inches-per-microsecond,
versus that of aluminum, which is about 0.248 inches-per-microsecond. If
the tool is not set to the correct sound-velocity, all of the measurements the
tool makes will be erroneous by some fixed percentage. The one point