


MMX-6 DL Ultrasonic Thickness Gauge
21
Two Point Calibration
Note: This procedure requires that the operator has two known
thickness points on the test piece that are representative of the
range to be measured.
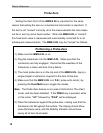
1) Make sure the MMX-6 DL is on and switched to P-E (pulse-echo)
mode. Press the Dual-Multi key to toggle modes.
Note: The calibration function has been disabled in E-E (echo-echo)
mode. If the CAL key is pressed while in E-E mode, “nO” followed
by “CAL” will be displayed.
2) Perform a Probe-Zero (refer to page 14)
3) Apply couplant to the sample piece.
4) Press the transducer against the sample piece, at the first/second
calibration point, making sure that the transducer sits flat against
the surface of the sample. The display should show some
(probably incorrect) thickness value, and the Stability Indicator
should have nearly all its bars on.
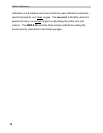
5) Having achieved a stable reading, remove the transducer. If the
displayed thickness changes from the value shown while the
transducer was coupled, repeat step 4.
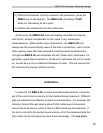
6) Press the CAL key. The IN (or MM) symbol should begin flashing.
7) Use the UP and DOWN arrow keys to adjust the displayed
thickness up or down, until it matches the thickness of the sample
piece.