


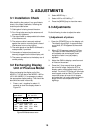
5
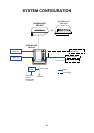
1.2 Display Unit
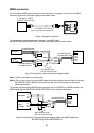
Installation
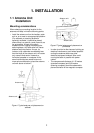
Mounting considerations
When selecting a mounting location for the
display unit keep in mind the following points.
• Locate the display unit in a position where
you can view and operate it conveniently.
• The orientation of the display unit should be
so the radar screen is viewed while the
operator is facing in the direction of the bow.
This makes determination of your position
much easier.
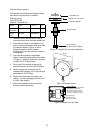
• The display unit is designed and constructed
to be splashproof, thus it can be installed
outdoors. If it is to be installed outdoors, we
recommend installing it an enclosed cabinet,
for maximum protection against the marine
environment.
• Even though the picture is quite legible even
in bright sunlight, keep the display unit out of
direct sunlight or at least shaded because of
heat that can build up inside the cabinet.
• The temperature and humidity of the
mounting location should be stable and
moderate. No LCD can provide adequate
contrast if the ambient temperature is too
low or too high.
• Make sure you allow enough clearance both
to get to the connectors behind the unit and
to allow you to get your hands in on both
sides to loosen or tighten the mounting
knobs. Make sure you leave at least a foot or
so of "service loop" in cables behind the unit
for servicing or easy removal of the
connectors.
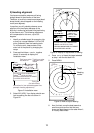
• The compass safe distance of 0.90 meters
(standard compass) and 0.60 meters
(steering compass) should be observed to
prevent deviation of the magnetic compass.
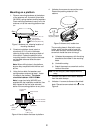
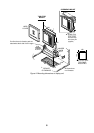
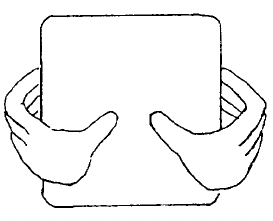
Removing cover
While pressing the center of the cover with your
thumbs as illustrated, pull the cover towards
you to remove it.
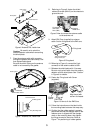
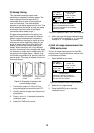
Mounting
The display unit can be mounted on a tabletop,
the overhead, or flush mounted in a panel.
1. Fix the hanger to the mounting location
with four tapping screws (supplied).
2. Attach the anti-vibration pads to the
hanger.
3. Fit the knob bolts and anti-vibration rubbers
to the display unit.
4. Cover the unused bolt holes with the
dummy films supplied.
5. Install the display unit in the hanger.
Tighten the knob bolts securely.