


1. MOUNTING
1-4
1
2
3
4
1
2
3
4
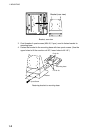
Bracket (rear view)
Bracket, rear view
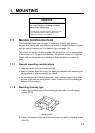
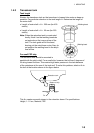
4. Coat threads of upset screws (M6x16, 2 pcs.) used to fasten bracket to
mounting base.
5. Fasten the bracket to the mounting base with two upset screws. (Use the
upper holes to tilt the monitor unit 20°; lower holes to tilt it 9°.)
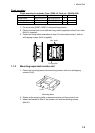
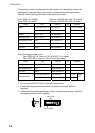
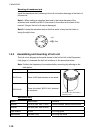
Flush mounting for monitor unit (Type: OP06-17, Code no. 006-556-310)
Name Type Code No. Qty Remarks
Fixing metal 06-021-1321-2 100-279-622-10 1
Self-tapping screw 5x20 000-162-609-10 4
Hex. bolt M4x12 000-162-939-10 4
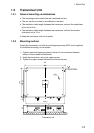
1. Cut out a hole (W287 x H207) in the mounting location.
2. Fasten the fixing metal (supplied) to the monitor unit with four hex. bolts
(M4x12, supplied).
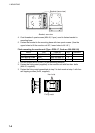
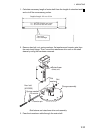
3. Fasten the fixing metal assembled at step 2 to hole made at step 1 with four
self-tapping screws (5x20, supplied).
Hex. bolts
Fixing metal